Android Absolute Layout
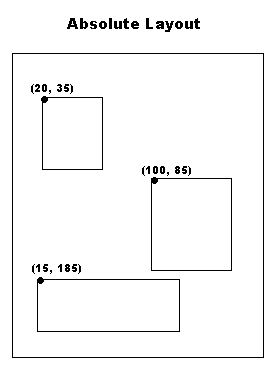
An Absolute Layout lets you specify exact locations (x/y coordinates) of its children. Absolute layouts are less flexible and harder to maintain than other types of layouts without absolute positioning.
Absolute Layout
AbsoluteLayout Attributes
Following are the important attributes specific to AbsoluteLayout −
| Sr.No | Attribute & Description |
|---|---|
| 1 | android:id This is the ID which uniquely identifies the layout. |
| 2 | android:layout_x This specifies the x-coordinate of the view. |
| 3 | android:layout_y This specifies the y-coordinate of the view. |
Public Constructors
| AbsoluteLayout(Context context) |
| AbsoluteLayout(Context context, AttributeSet attrs) |
| AbsoluteLayout(Context context, AttributeSet attrs, int defStyleAttr) |
| AbsoluteLayout(Context context, AttributeSet attrs, int defStyleAttr, int defStyleRes) |
Example
This example will take you through simple steps to show how to create your own Android application using absolute layout. Follow the following steps to modify the Android application we created in Hello World Example chapter −
| Step | Description |
|---|---|
| 1 | You will use Android studio IDE to create an Android application and name it as demo under a package com.example.demo as explained in the Hello World Example chapter. |
| 2 | Modify the default content of res/layout/activity_main.xml file to include few widgets in absolute layout. |
| 3 | No need to modify string.xml, Android studio takes care of default constants |
| 4 | Run the application to launch Android emulator and verify the result of the changes done in the application. |
Following is the content of the modified main activity file src/com.example.demo/MainActivity.java. This file can include each of the fundamental lifecycle methods.
package com.example.demo;

import android.os.Bundle;
import android.app.Activity;

public class MainActivity extends Activity {
   @Override
   protected void onCreate(Bundle savedInstanceState) {
      super.onCreate(savedInstanceState);
      setContentView(R.layout.activity_main);
   }

}
Following will be the content of res/layout/activity_main.xml file −
<AbsoluteLayout xmlns:android="https://schemas.android.com/apk/res/android"
   android:layout_width="fill_parent"
   android:layout_height="fill_parent">

   <Button
      android:layout_width="100dp"
      android:layout_height="wrap_content"
      android:text="OK"
      android:layout_x="50px"
      android:layout_y="361px" />
   <Button
      android:layout_width="100dp"
      android:layout_height="wrap_content"
      android:text="Cancel"
      android:layout_x="225px"
      android:layout_y="361px" />

</AbsoluteLayout>
Following will be the content of res/values/strings.xml to define two new constants −
<?xml version="1.0" encoding="utf-8"?>
<resources>
   <string name="app_name">demo</string>
   <string name="action_settings">Settings</string>
</resources>
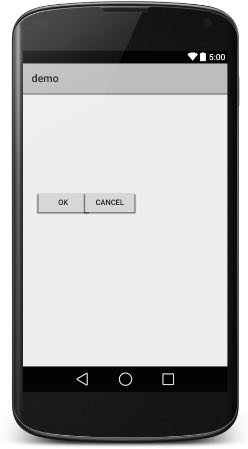
Let's try to run our modified Hello World! application we just modified. I assume you had created your AVD while doing environment setup. To run the app from Android Studio, open one of your project's activity files and click Run  icon from the toolbar. Android Studio installs the app on your AVD and starts it and if everything is fine with your setup and application, it will display following Emulator window −