MFC - Controls Management
In MFC applications, after visually adding a control to your application, if you want to refer to it in your code, you can declare a variable based on, or associated with that control. The MFC library allows you to declare two types of variables for some of the controls used in an application a value or a control variable.
One variable is used for the information stored in the control, which is also known as Control Variable/Instance.
The other variable is known as Control Value Variable. A user can perform some sort of actions on that control with this variable.
Control Variable/Instance
A control variable is a variable based on the class that manages the control. For example, a button control is based on the CButton class.
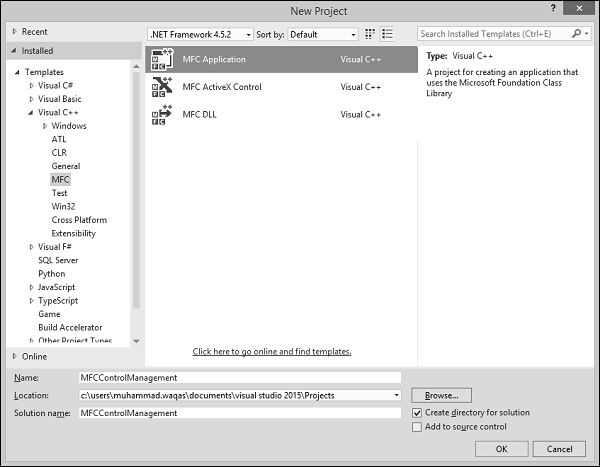
To see these concepts in real programming, let us create an MFC dialog based project MFCControlManagement.
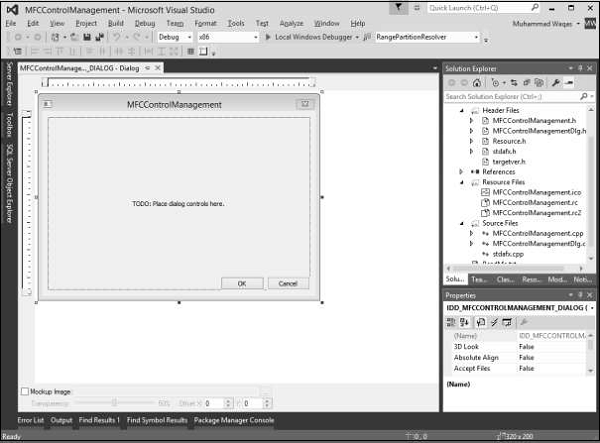
Once the project is created, you will see the following dialog box in designer window.
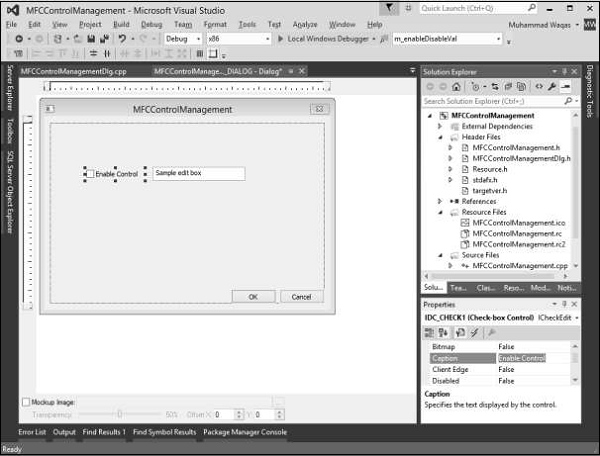
Step 1 − Delete the TODO line and drag one checkbox and one Edit control as shown in the following snapshot. Change the caption of checkbox to Enable Control.
Step 2 − Right-click on the checkbox.
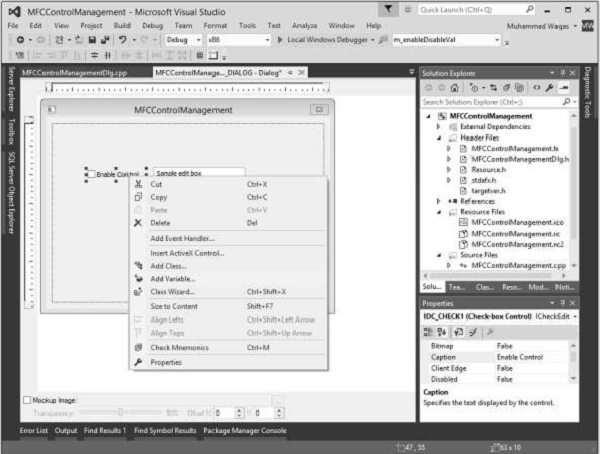
Step 3 − Select Add Variable.
Step 4 − You can now see the Add Member Variable Wizard.
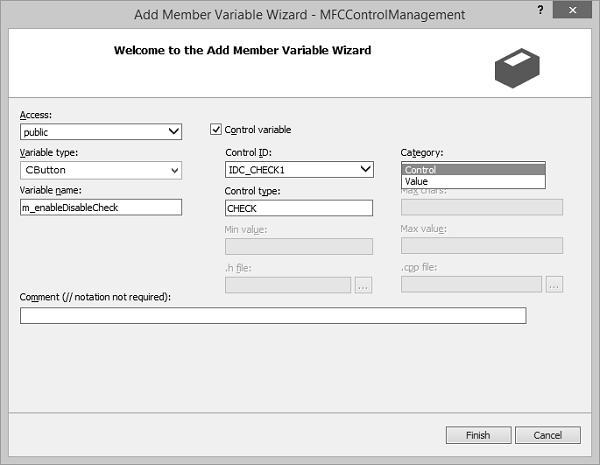
You can select different options on this dialog box. For checkbox, the variable type is CButton. It is selected by default in this dialog box.
Similarly, the control ID is also selected by default now we need to select Control in the Category combo box, and type m_enableDisableCheck in the Variable Name edit box and click finish.
Step 5 − Similarly, add Control Variable of Edit control with the settings as shown in the following snapshot.

Observe the header file of the dialog class. You can see that the new variables have been added now.
CButton m_enableDisableCheck;
CEdit m_myEditControl;
Control Value Variable
Another type of variable you can declare for a control is the value variable. Not all controls provide a value variable.
The value variable must be able to handle the type of value stored in the control it is intended to refer to.
For example, because a text based control is used to handle text, you can declare a text-based data type for it. This would usually be a CString variable.
Let us look into this type of variable for checkbox and edit control.
Step 1 − Right-click on the checkbox and select Add Variable.
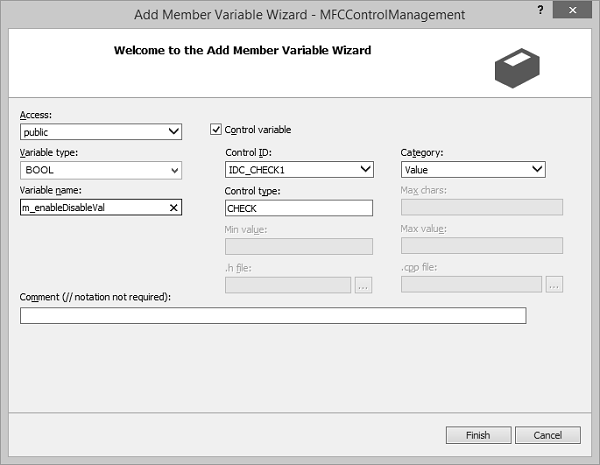
Step 2 − The Variable type is BOOL. Select Value from the Category dropdown list.
Step 3 − Click Finish to continue.
Step 4 − Similarly, add value Variable for Edit control with the settings as shown in the following snapshot.

Step 5 − Type CString in variable type and m_editControlVal in the variable name field.
Step 6 − You can now see these variables added in the Header file.
bool m_enableDisableVal;
CString m_editControlVal;
Controls Event Handlers
After adding a control to your application, whether you visually added it or created it dynamically, you will also decide how to handle the possible actions that the user can perform on the control.
For project dialog boxes that are already associated with a class, you can take advantage of some shortcuts when you create event handlers.
You can quickly create a handler either for the default control notification event or for any applicable Windows message.
Let us look into the same example in which we added event handler for checkbox.
Step 1 − Right-click the control for which you want to handle the notification event.
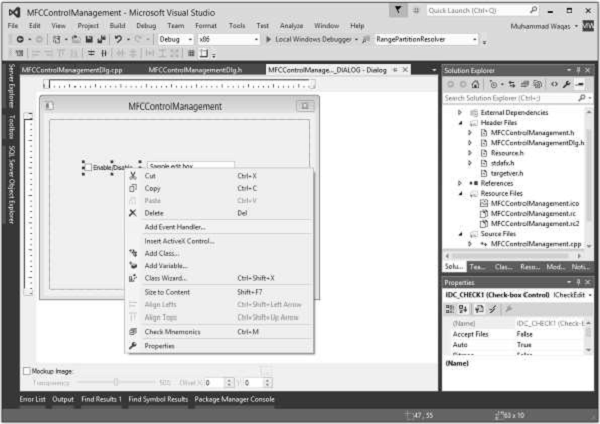
Step 2 − On the shortcut menu, click Add Event Handler to display the Event Handler Wizard.
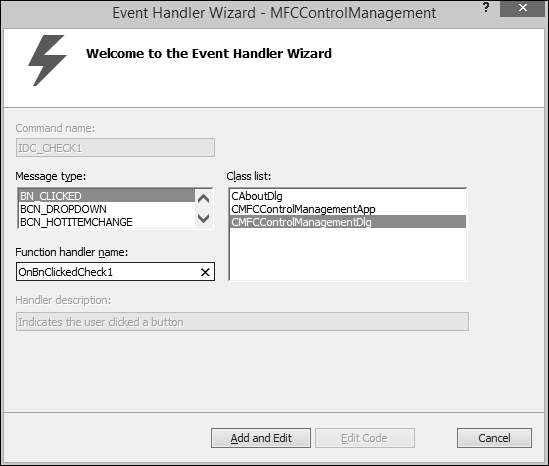
Step 3 − Select the event in the Message type box to add to the class selected in the Class list box.
Step 4 − Accept the default name in the Function handler name box, or provide the name of your choice.
Step 5 − Click Add and edit to add the event handler.
Step 6 − You can now see the following event added at the end of CMFCControlManagementDlg.cpp file.
void CMFCControlManagementDlg::OnBnClickedCheck1() {
   // TODO: Add your control notification handler code here
}
Controls Management
So far, we have seen how to add controls to an application. We will now see how to manage these controls as per user requirement. We can use the control variable/instance in a particular event handler.
Step 1 − Let us look into the following example. Here, we will enable/disable the edit control when the checkbox is checked/unchecked.
Step 2 − We have now added the checkbox click event handler. Here is the implementation −
void CMFCControlManagementDlg::OnBnClickedCheck1() {
   // TODO: Add your control notification handler code here
   UpdateData(TRUE);
   if (m_enableDisableVal)
      m_myEditControl.EnableWindow(TRUE);
   else
      m_myEditControl.EnableWindow(FALSE);
}
Step 3 − When the dialog is created, we need to add the following code to CMFCControlManagementDlg::OnInitDialog(). This will manage these controls.
UpdateData(TRUE);
if (m_enableDisableVal)
   m_myEditControl.EnableWindow(TRUE);
else
   m_myEditControl.EnableWindow(FALSE);
Step 4 − Here is the complete implementation of CMFCControlManagementDlg.cpp file.
// MFCControlManagementDlg.cpp : implementation file
//

#include "stdafx.h"
#include "MFCControlManagement.h"
#include "MFCControlManagementDlg.h"
#include "afxdialogex.h"

#ifdef _DEBUG
#define new DEBUG_NEW
#endif


// CAboutDlg dialog used for App About

class CAboutDlg : public CDialogEx {
   public:
      CAboutDlg();

   // Dialog Data
   #ifdef AFX_DESIGN_TIME
      enum { IDD = IDD_ABOUTBOX };
   #endif

   protected:
      virtual void DoDataExchange(CDataExchange* pDX); // DDX/DDV support

   // Implementation
   protected:
      DECLARE_MESSAGE_MAP()
};

CAboutDlg::CAboutDlg() : CDialogEx(IDD_ABOUTBOX) {

}
void CAboutDlg::DoDataExchange(CDataExchange* pDX) {
   CDialogEx::DoDataExchange(pDX);
}

BEGIN_MESSAGE_MAP(CAboutDlg, CDialogEx)
END_MESSAGE_MAP()

// CMFCControlManagementDlg dialog


CMFCControlManagementDlg::CMFCControlManagementDlg(CWnd* pParent /* = NULL*/)
   :CDialogEx(IDD_MFCCONTROLMANAGEMENT_DIALOG, pParent) ,
   m_enableDisableVal(FALSE) , m_editControlVal(_T("")) {
   m_hIcon = AfxGetApp()&rarr LoadIcon(IDR_MAINFRAME);
}

void CMFCControlManagementDlg::DoDataExchange(CDataExchange* pDX) {
   CDialogEx::DoDataExchange(pDX);
   DDX_Control(pDX, IDC_CHECK1, m_enableDisableCheck);
   DDX_Control(pDX, IDC_EDIT1, m_myEditControl);
   DDX_Check(pDX, IDC_CHECK1, m_enableDisableVal);
   DDX_Text(pDX, IDC_EDIT1, m_editControlVal);
}
BEGIN_MESSAGE_MAP(CMFCControlManagementDlg, CDialogEx)
   ON_WM_SYSCOMMAND()
   ON_WM_PAINT()
   ON_WM_QUERYDRAGICON()
   ON_BN_CLICKED(IDC_CHECK1, &CMFCControlManagementDlg::OnBnClickedCheck1)
END_MESSAGE_MAP()

// CMFCControlManagementDlg message handlers

BOOL CMFCControlManagementDlg::OnInitDialog() {
   CDialogEx::OnInitDialog();

   // Add "About..." menu item to system menu.
   // IDM_ABOUTBOX must be in the system command range.
   ASSERT((IDM_ABOUTBOX & 0xFFF0) == IDM_ABOUTBOX);
   ASSERT(IDM_ABOUTBOX < 0xF000);

   CMenu* pSysMenu = GetSystemMenu(FALSE);
   if (pSysMenu != NULL) {
      BOOL bNameValid;
      CString strAboutMenu;
      bNameValid = strAboutMenu.LoadString(IDS_ABOUTBOX);
      ASSERT(bNameValid);
      if (!strAboutMenu.IsEmpty()) {
         pSysMenu → AppendMenu(MF_SEPARATOR);
         pSysMenu → AppendMenu(MF_STRING, IDM_ABOUTBOX, strAboutMenu);
      }
   }

   // Set the icon for this dialog. The framework does this automatically
   // when the application's main window is not a dialog
   SetIcon(m_hIcon, TRUE);        // Set big icon
   SetIcon(m_hIcon, FALSE);       // Set small icon

   // TODO: Add extra initialization here
   UpdateData(TRUE);
   if (m_enableDisableVal)
      m_myEditControl.EnableWindow(TRUE);
   else
      m_myEditControl.EnableWindow(FALSE);
   return TRUE; // return TRUE unless you set the focus to a control
}
void CMFCControlManagementDlg::OnSysCommand(UINT nID, LPARAM lParam) {
   if ((nID & 0xFFF0) == IDM_ABOUTBOX) {
      CAboutDlg dlgAbout;
      dlgAbout.DoModal();
   }else {
      CDialogEx::OnSysCommand(nID, lParam);
   }
}

// If you add a minimize button to your dialog, you will need the code below
// to draw the icon. For MFC applications using the document/view model,
// this is automatically done for you by the framework.

void CMFCControlManagementDlg::OnPaint() {
   if (IsIconic()) {
      CPaintDC dc(this); // device context for painting

      SendMessage(WM_ICONERASEBKGND,
         reinterpret_cast<WPARAM>(dc.GetSafeHdc()), 0);

      // Center icon in client rectangle
      int cxIcon = GetSystemMetrics(SM_CXICON);
      int cyIcon = GetSystemMetrics(SM_CYICON);
      CRect rect;
      GetClientRect(&rect);
      int x = (rect.Width() - cxIcon + 1) / 2;
      int y = (rect.Height() - cyIcon + 1) / 2;

      // Draw the icon
      dc.DrawIcon(x, y, m_hIcon);
   }else {
      CDialogEx::OnPaint();
   }
}

// The system calls this function to obtain the cursor to display while the user drags
// the minimized window.
HCURSOR CMFCControlManagementDlg::OnQueryDragIcon() {
   return static_cast<HCURSOR>(m_hIcon);
}

void CMFCControlManagementDlg::OnBnClickedCheck1() {
   // TODO: Add your control notification handler code here
   UpdateData(TRUE);
   if (m_enableDisableVal)
      m_myEditControl.EnableWindow(TRUE);
   else
      m_myEditControl.EnableWindow(FALSE);
}
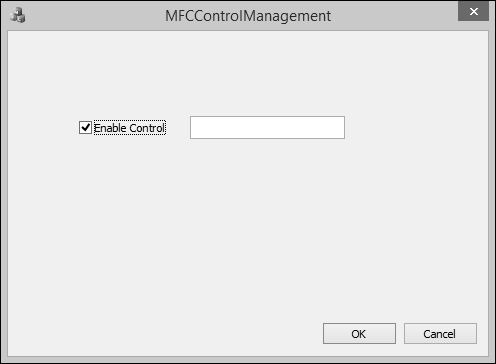
Step 5 − When the above code is compiled and executed, you will see the following output. The checkbox is unchecked by default. This disables the edit control too.
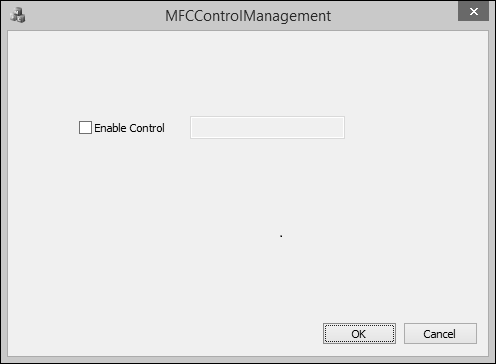
Step 6 − Check the Enable Control checkbox. This will automatically enable the edit control.