MS Project - Track Progress
Once your project plan is ready in MS Project, it becomes essential for a project manager to measure the actuals (in terms of work completed, resources used and costs incurred) and to revise and change information about tasks and resources due to any changes to the plans. A Project Manager should not assume that everything is progressing according to plan and should always keep track of each task. Resistance to formal tracking of project management data is normal. You can overcome resistance to tracking by explaining your expectations, explaining the benefits of tracking, and training people to track the task themselves.
Save a Baseline
To evaluate project performance you need to create a baseline against which you will compare the progress. One needs to save the baseline, once a plan is fully developed. Of course, due to rolling wave planning or progressive elaboration needed to manage projects one can always add new tasks, resources, constraints and costs to the plan.
Also note, it makes sense to save the baseline before entering any actual values such as percentage of task completion.
Note − With MS Project 2013, you can save up to 11 Baselines in a Single plan. These multiple baselines seem contrary to the definition of baseline. You can use this flexibility when −
You have a baseline plan for the external customer and another for the internal team.
You are preparing for a risk event. You want to develop separate baseline plans for risk response and recovery.
You are accommodating a big change request, you might still want to keep the original plan for future reference when communicating with a stakeholder.
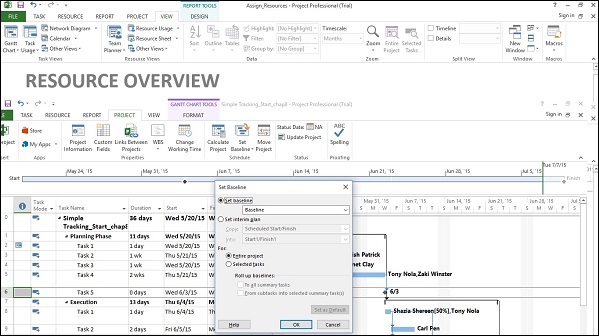
Create a Baseline
Click Project Tab → Schedule group → Set Baseline → OK.
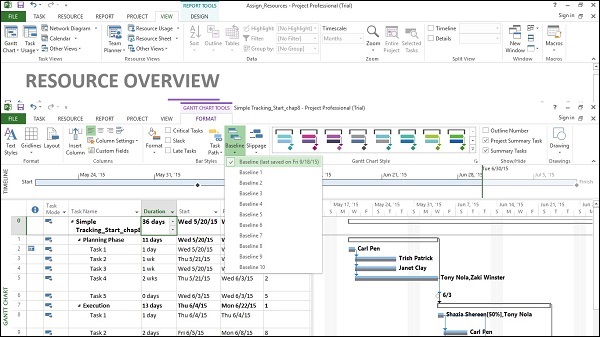
View Baseline on Gantt Chart
Click View Tab → Task Views group → Gantt Chart.

Click Format Tab → Bars and Styles group → Baseline (that you want to display).
You will see Baseline Gantt bars displayed together with the current Gantt bars.
Update a Baseline
As time and work progresses on a project, you might need to change the baseline as well. You have several options for the same −
- Update the baseline.
- Update the baseline for selected tasks.
- Save multiple baselines.
Update the Baseline for the Entire Project
This simply replaces the original baseline values with the currently scheduled values.
Click Project Tab → Schedule group → Set Baseline → OK.
Update the Baseline for Selected Tasks
This does not affect the baseline values for other tasks or resource baseline values in the plan.
Click Project Tab → Schedule group → Set Baseline → For select Selected tasks → OK.
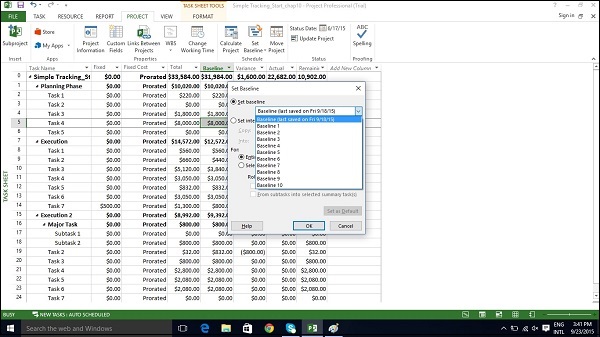
Save Multiple Baselines
You can save up to 11 baselines in a single plan. The first one is called Baseline, and the rest are Baseline 1 through Baseline 10.
Click Project Tab → Schedule group → Set Baseline → click
   the dropdown box to save any baseline you like.

Click OK.
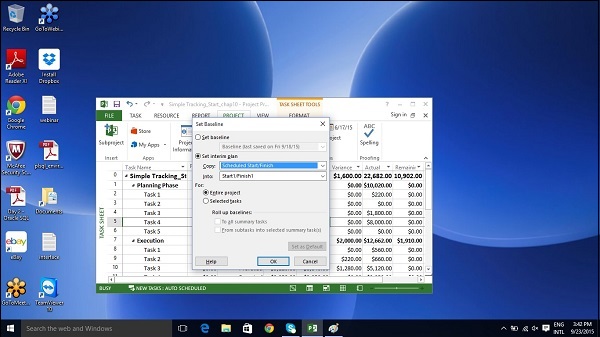
Interim Plans
An interim plan saves only two kinds of information for each task − Current start dates and Current finish dates.
It can be used as a project marker. It is visually easy to see how off-track or on-track the project progress is. Because it only specifies dates, it is simple, clear and easy information.
Click Project Tab → Schedule group → Set Baseline → Set interim plan → OK.
Track Plan by Specific Date
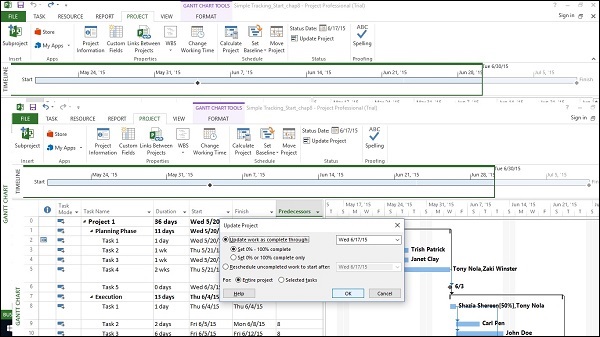
If all tasks have started and are finished as scheduled, you can record this in the Update Project dialog box. Most of the times, a seasoned project manager understands that this isn’t true. But sometimes this approach might be fine when the actual work and cost values generated are close enough to your baseline schedule.
Click Project tab → Status group → Update Project.

Switch on the radio button for “Update work as complete through”
   option, and then Set 0% -100% complete. Select the current date.

Click OK.
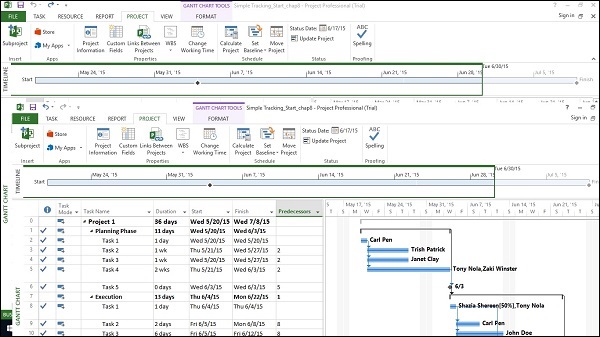
Check marks will appear in the indicators column for tasks that have been completed. On the right in the Chart portion, progress bars are generated in the Gantt bars of each task.
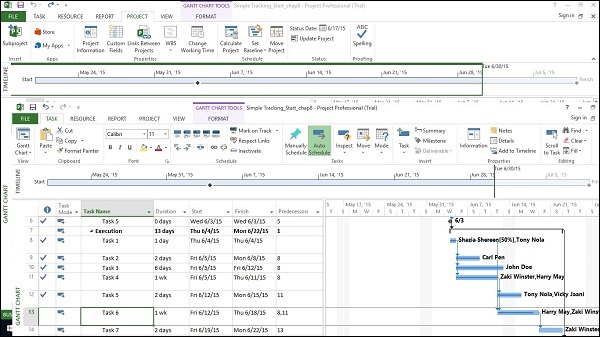
Track Plan as % Complete
Method 1
Click any Task → Task Tab → Schedule group → either 0%, 25%, 50%, 75% or 100%.
Method 2
Click View tab → Data group → Tables → Tracking.
Now for the required Task, click the corresponding % Comp column and enter the required % complete.
Track Plan by Actual Values
You can enter the following actual values for your project −
Actual Start and finish dates − Project moves the schedule accordingly.
Task’s Actual duration − If equal or greater than schedule duration: task = 100% complete.
Task’s Actual Duration
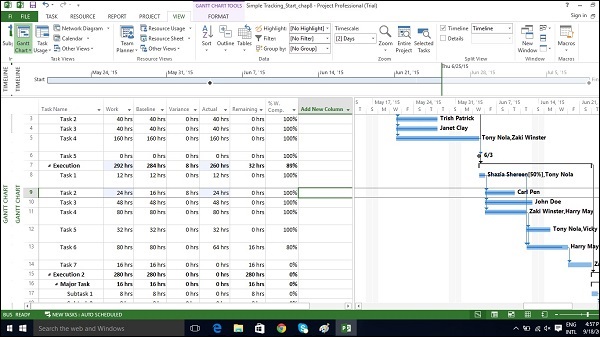
Click View Tab → Data group → Tables → Work.
You will see the % W. Comp. (% work complete) column.
This table includes Work (Scheduled work), Actual, and Remaining columns.
Click on Task you want to update. In the following example, Task 9’s Actual field is clicked and 24 hours is entered. For this task, initial scheduled Work was 16 hours, because 24 hours is greater. The project marks the task as 100% complete and updates the Work column to 24 hours (from initial 16 hours). In the example, a Baseline is saved, because the Baseline does not change and is used as a comparison. The Baseline is still at 16 hours and a Variance of 8 hours is now calculated by MS Project.
Note − Actual work is rolled up and also reflects on the summary task.
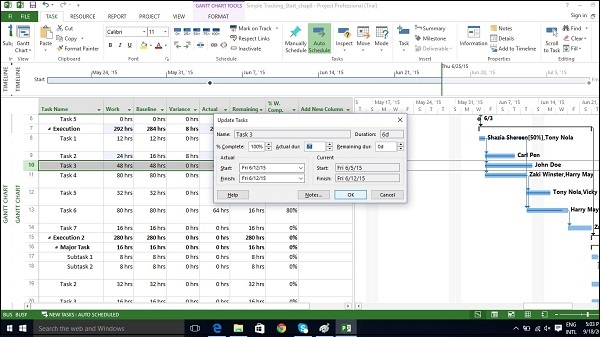
Actual Start and Finish Dates
Click Task whose dates you would like to change.
Click Task tab → Schedule group → dropdown menu for Mark on Track → Update Tasks.

Change Start or Finish field in Actual group.
You can fill Actual duration field as well.