
Excel Macros - Absolute References
Excel macros can be recorded either with absolute references or relative references. A macro recorded with absolute references places the recorded steps exactly in the cells where it was recorded, irrespective of the active cell. On the other hand, a macro recorded with relative references can perform the recorded tasks at different parts on the worksheet.
You will learn about absolute references for macro in this chapter. You will learn about relative references in the next chapter.
Suppose you have to submit a report about your team’s work at the end of every day in the following format −
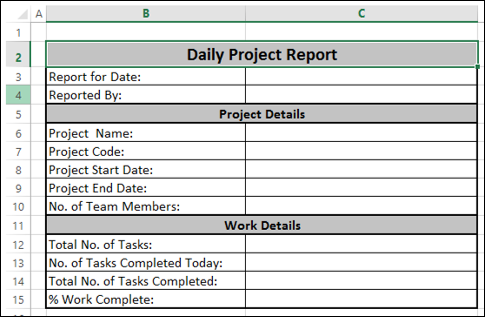
Now, the report should be placed in the cell B2 and should be in the given format.
A sample filled in report will be as shown below −
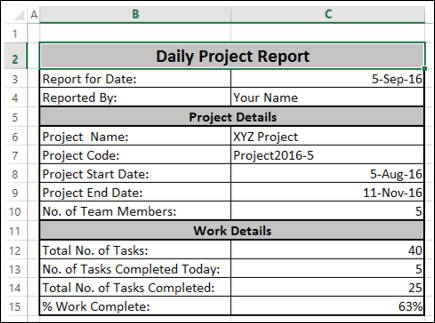
Except for the data in the following cells, the information is constant for every report that you generate for the project.
- C3 – Report for Date.
- C13 – No. of Tasks Completed Today.
- C14 – Total No. of Tasks Completed.
- C15 – % Work Complete.
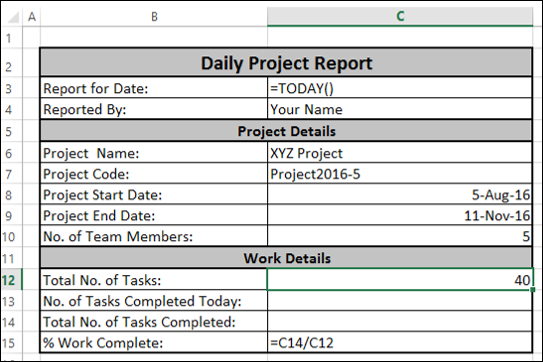
Of these also, in C3 (Report for Date) you can place the Excel function = TODAY () that places the date of your report without your intervention. Further, in cell C15, you can have the formula C14/C12 and format the cell C15 as percentage to have the % Work Complete calculated by Excel for you.
This leaves you with only two cells – C13 and C14 that need to be filled in by you every day. Hence, it would be ideal to have information for the rest of the cells, every time you have to create the report. This saves time for you and you can do the mundane activity of reporting in just few minutes.
Now, suppose you have to send such reports for three projects. You can imagine the time you can save and take up more challenging work for the day and of course get the accolades from your management.
You can achieve this by recording a macro per project and running them on a day-to-day basis to generate the required reports in a matter of just few minutes. However, every time you run the macro, the report should appear on the worksheet as given above, irrespective of the active cell. For this, you have to use absolute references.
Ensuring Absolute References
To record a macro with absolute references, you have to ensure that the macro is being recorded starting from the cell where the steps have to start. This means, in the case of the example given in the previous section, you need to do the following −
- Start recording the macro.
- Create a new worksheet.
- Click in any cell other than B2 in the new worksheet.
- Click in the cell B2.
- Continue recording the macro.
This will create a new worksheet for every new report and get the report format placed in the cell B2 every time you run the macro.
Note − The first three steps given above are essential.
If you do not create a new worksheet, when you run the macro, it places whatever you recorded on the same worksheet at the same place. This is not what you want. You need to have every report on a different worksheet.
If you do not click in a different cell at the beginning of the recording, even if the active cell is B2, Excel places the recorded steps in the active cell. When you run the macro, it will place the recorded report format at any part of the worksheet based on the active cell. By explicitly clicking in a cell other than B2 and then the the cell B2, you are telling the recorder to always place your macro steps in the cell B2.
Recording a Macro
You can start recording the macro with the Record Macro command on the Ribbon under the VIEW tab → Macros. You can also click the Start Recording Macro button present on left side of the Excel task bar.

Start recording the macro. The Record Macro dialog box appears.
Give a meaningful name to identify the macro as a report of a particular project.
Select This Workbook under Store macro in, as you will produce reports from this specific workbook only.
Give a description to your macro and click OK.

Your macro starts recording.
Create a new worksheet. This ensures your new report will be on a new worksheet.
Click in any cell other than B2 in the new worksheet.
Click in the cell B2. This ensures that the macro places your recorded steps in B2 always.
Create the format for the report.
Fill in the static information for the project report.
Place = TODAY () in C3 and = C14/C12 in the cell C15.
Format the cells with dates.
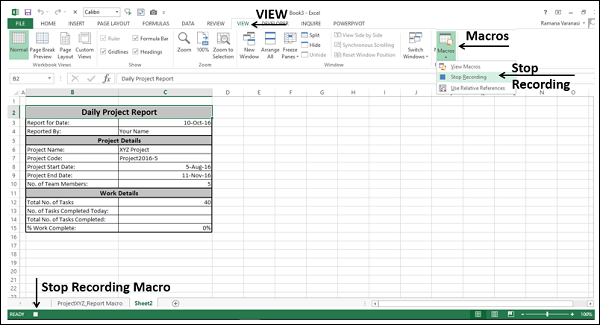
Stop recording the macro.
You can stop recording the macro either with the Stop Recording command on the Ribbon under VIEW tab → Macros or by clicking the Stop Recording Macro button present on left side of the Excel task bar.
Your Project Report macro is ready. Save the workbook as a macro-enabled workbook (with .xlsm extension).
Running a Macro
You can generate any number of reports in a few seconds just by running the macro.
- Click the VIEW button on the Ribbon.
- Click Macros.
- Select View Macros from the dropdown list. The Macro dialog box appears.
- Click the macro Report_ProjectXYZ.
- Click the Run button.
A new worksheet will be created in your workbook, with the report stencil created in it in the cell B2.


