Powerpoint 2010 - Quick Guide
Getting Started with Powerpoint 2010
In this chapter, we will understand how to get started with PowerPoint 2010. We will understand how to start PowerPoint 2010 application in simple steps. To access PowerPoint 2010, you must have Microsoft Office 2010 installed in your PC. Only Office 2010 Home and Student, Home and Business, Standard, Professional and Professional Plus packages have PowerPoint included in them. Other packages may have a viewer, but you cannot create presentations with them.
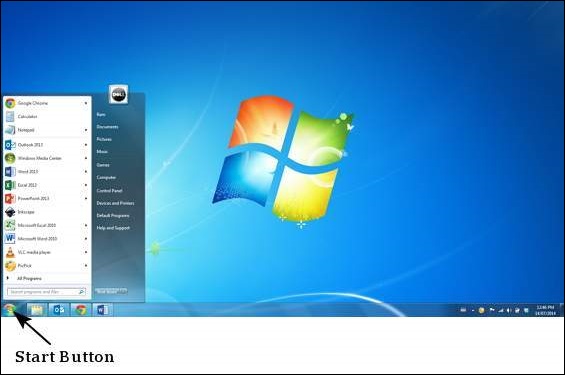
Step 1 − Click the Start button.
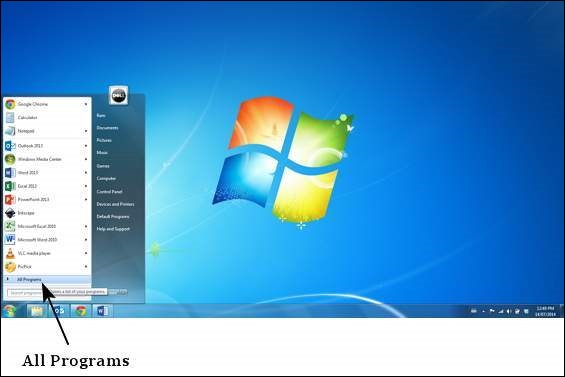
Step 2 − Click All Programs option from the menu.
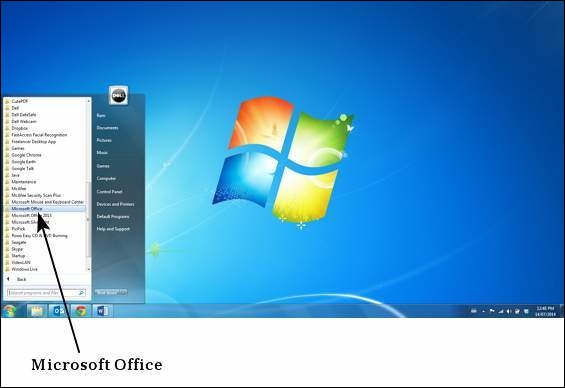
Step 3 − Search for Microsoft Office from the sub menu and click it.
Step 4 − Search for Microsoft PowerPoint 2010 from the submenu and click it.
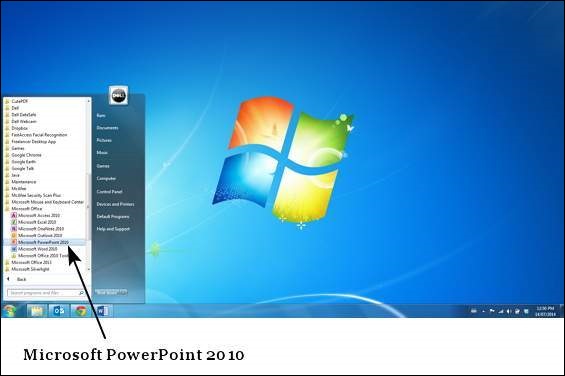
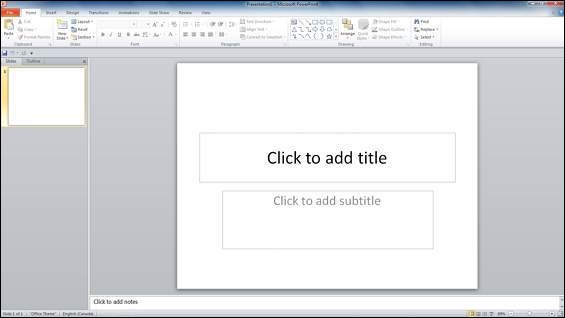
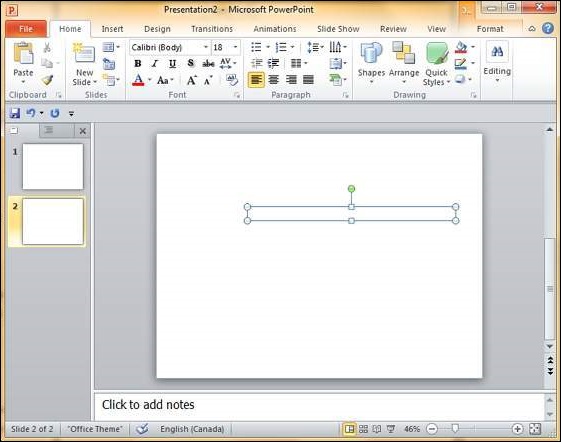
This will launch the Microsoft PowerPoint 2010 application and you will see the following presentation window.
Explore Windows in Powerpoint 2010
The following screenshot shows the various areas in a standard PowerPoint file. It is important to familiarize yourself with these areas as it makes learning and using PowerPoint easier.
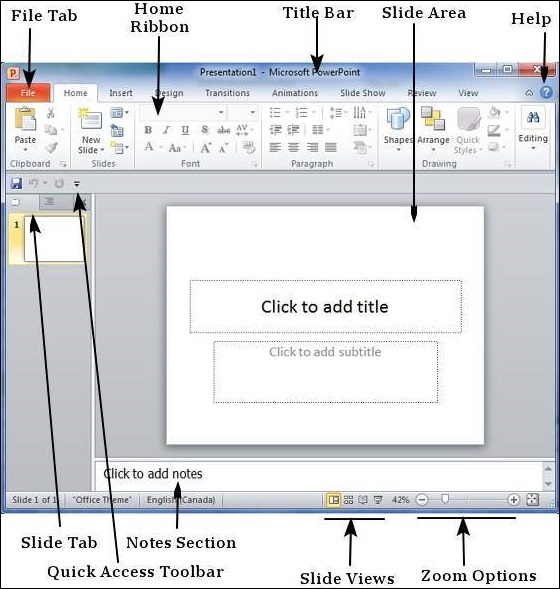
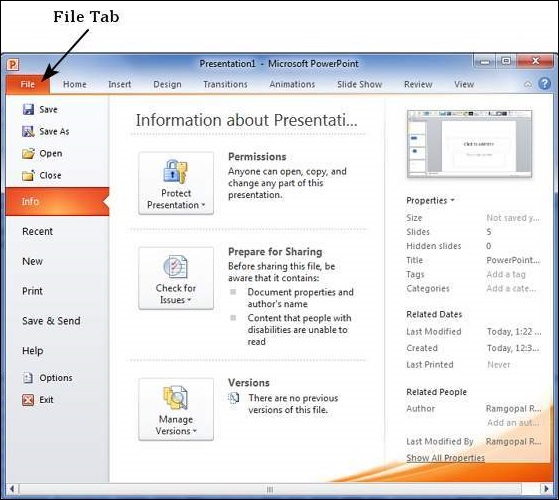
File Tab
This tab opens the Backstage view which basically allows you to manage the file and settings in PowerPoint. You can save presentations, open existing ones and create new presentations based on blank or predefined templates. The other file related operations can also be executed from this view.
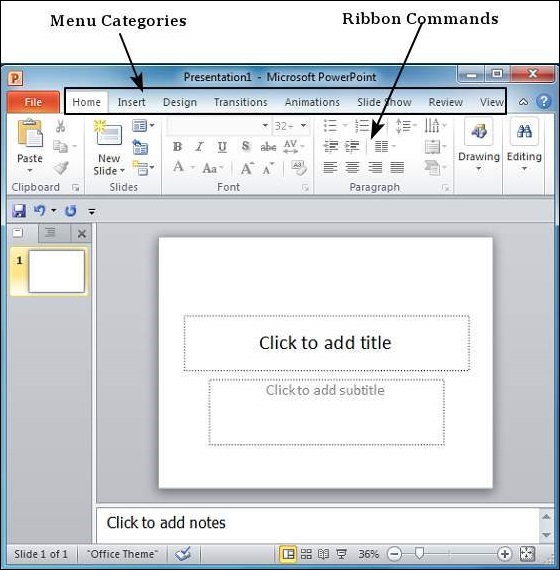
Ribbon

The ribbon contains three components −
Tabs − They appear across the top of the Ribbon and contain groups of related commands. Home, Insert, Page Layout are examples of ribbon tabs.
Groups − They organize related commands; each group name appears below the group on the Ribbon. For example, a group of commands related to fonts or a group of commands related to alignment, etc.
Commands − Commands appear within each group as mentioned above.
Title Bar
This is the top section of the window. It shows the name of the file followed by the name of the program which in this case is Microsoft PowerPoint.
Slide Area
This is the area where the actual slide is created and edited. You can add, edit and delete text, images, shapes and multimedia in this section.
Help
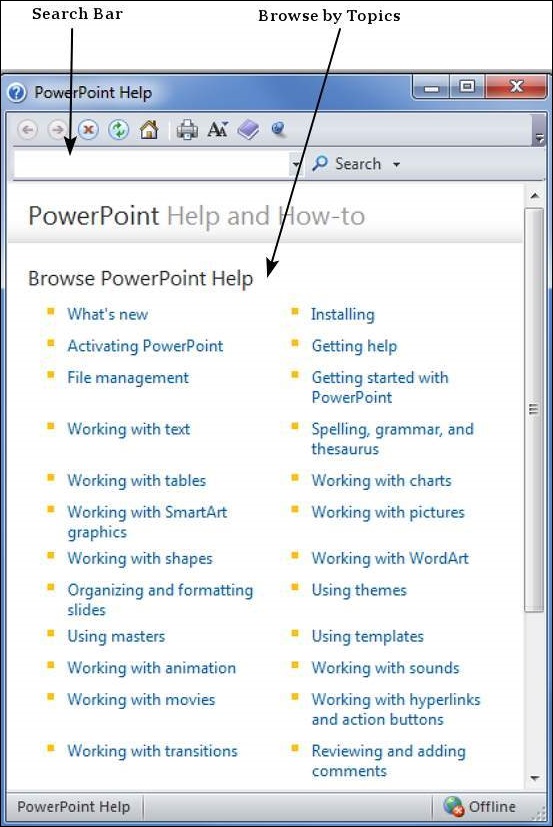
The Help Icon can be used to get PowerPoint related help anytime you need. Clicking on the "?" opens the PowerPoint Help window where you have a list of common topics to browse from. You can also search for specific topics from the search bar at the top.
Zoom Options
The zoom control lets you zoom in for a closer look at your text. The zoom control consists of a slider that you can slide left or right to zoom in or out, you can click on the - and + buttons to increase or decrease the zoom factor. The maximum zoom supported by PowerPoint is 400% and the 100% is indicated by the mark in the middle.
Slide Views
The group of four buttons located to the left of the Zoom control, near the bottom of the screen, lets you switch between PowerPoint views.
Normal Layout view − This displays page in normal view with the slide on the right and a list of thumbnails to the left. This view allows you to edit individual slides and also rearrange them.
Slide Sorter view − This displays all the slides as a matrix. This view only allows you to rearrange the slides but not edit the contents of each slide.
Reading View − This view is like a slideshow with access to the Windows task bar in case you need to switch windows. However, like the slideshow you cannot edit anything in this view.
Notes Section
This sections allows you to add notes for the presentation. These notes will not be displayed on the screen during the presentation; these are just quick reference for the presenter.
Quick Access Toolbar
The Quick Access Toolbar is located just under the ribbon. This toolbar offers a convenient place to group the most commonly used commands in PowerPoint. You can customize this toolbar to suit your needs.
Slide Tab
This section is available only in the Normal view. It displays all the slides in sequence. You can add, delete and reorder slides from this section.
Backstage View in Powerpoint 2010
In Office 2010, Microsoft replaced the traditional file menu with the new Backstage view. This view not only offers all the menu items under the file menu, but additional details which makes management of your files a lot easier.
Accessing Backstage View
You can access the Backstage view simply by clicking on the File tab. You can exit this view by clicking on any tab (including the File tab again). You can also press the 'Esc' button on the keyboard.
Organization of Backstage View
The backstage view has three sections or panes.
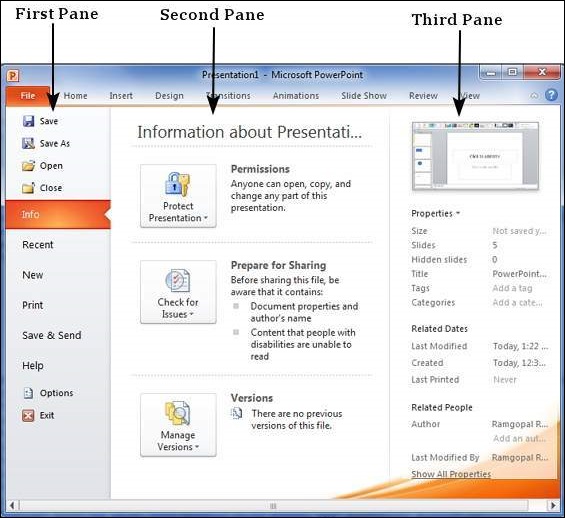
First Pane − This is the commands pane which consists of all the commands you would typically find in the file menu of older versions. You also have the Options menu which lets you edit the options on the program like customizing the ribbon.
Various commands under the first pane are described in the table below −
| S.No | Command & Description |
|---|---|
| 1 | Save This allows you to save a new file or an existing file in standard format. If you are working on a previously saved file this will save the new changes in the same file format. If you are working on a new file, this command would be similar to the Save As command. |
| 2 | Save As Allows you to specify the file name and the file type before saving the file. |
| 3 | Open Allows you to open new PowerPoint files. |
| 4 | Close Allows you to close an existing file. |
| 5 | Info Displays the information about the current file. |
| 6 | Recent Lists series of recently viewed or edited PowerPoint files. |
| 7 | New Allows you to create a new file using blank or pre-defined templates. |
| 8 | Allows you to select the printer settings and print the presentation. |
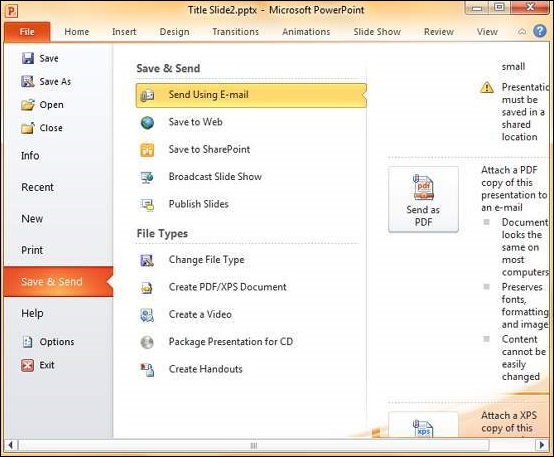
| 9 | Save & Send Allows you to share your presentation with larger audience via emails, web, cloud services, etc. |
| 10 | Help Provides access to PowerPoint Help. |
| 11 | Options Allows you to set various options related to PowerPoint program. |
| 12 | Exit Closes the presentation and exits the program. |
Second Pane − This is the subcommands pane. This will list all the commands related to the main command you choose in the first pane. For example, if you select Print in the first pane, you get to choose the printer and adjust the print settings in the second pane.
Third Pane − This is the preview or file information page. Depending on the command and the subcommand you select, this pane will either display the properties of the file or give you a preview of the file.
Create Presentation using Powerpoint 2010
PowerPoint offers a host of tools that will aid you in creating a presentation. These tools are organized logically into various ribbons in PowerPoint. The table below describes the various commands you can access from the different menus.
| Menu Category | Ribbon Commands |
|---|---|
| Home | Clipboard functions, manipulating slides, fonts, paragraph settings, drawing objects and editing functions. |
| Insert | Insert tables, pictures, images, shapes, charts, special texts, multimedia and symbols. |
| Design | Slide setup, slide orientation, presentation themes and background. |
| Transitions | Commands related to slide transitions. |
| Animations | Commands related to animation within the individual slides. |
| Slide Show | Commands related to slideshow set up and previews. |
| Review | Proofing content, language selection, comments and comparing presentations. |
| View | Commands related to presentation views, Master slides, color settings and window arrangements. |
Besides these depending on the objects selected in the slide, there are other menu tabs that get enabled.
Add New Slides in Powerpoint 2010
In this chapter, we will understand how to add new slides in an existing presentation. Here are the steps that allow you to insert a new slide in the deck −
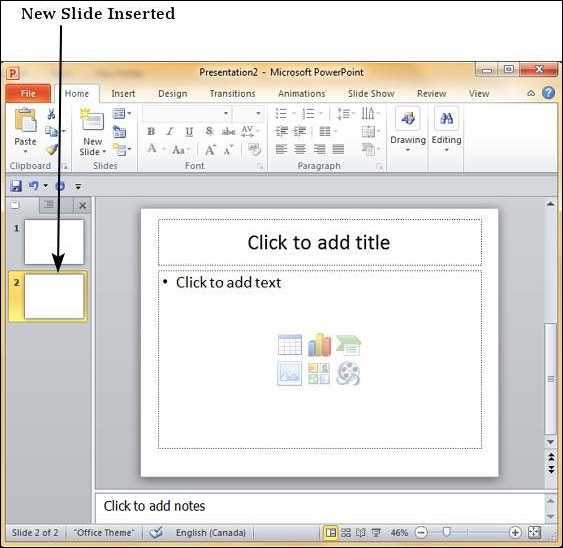
Step 1 − Right-click in the Navigation Pane under any existing slide and click on the New Slide option.
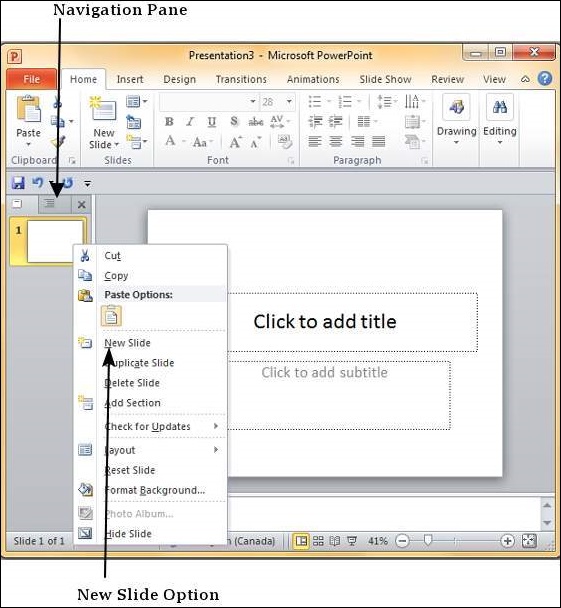
Step 2 − The new slide is inserted. You can now change the layout of this slide to suit your design requirements.
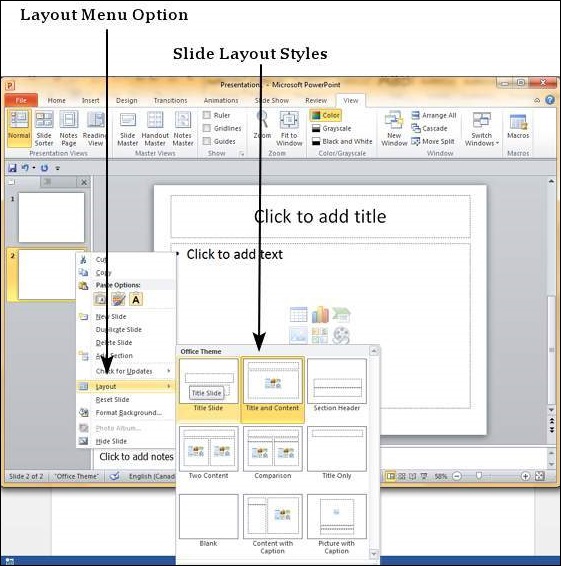
Step 3 − To change the slide layout, right-click on the newly inserted slide and go to the Layout option where you can choose from the existing layout styles available to you.
You can follow the same steps to insert a new slide in between existing slides or at the end on the slide list.
When we insert a new slide, it inherits the layout of its previous slide with one exception. If you are inserting a new slide after the first slide (Title slide), the subsequent slide will have the Title and Content layout.
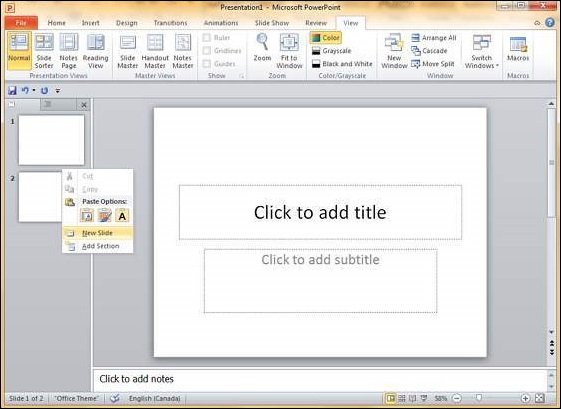
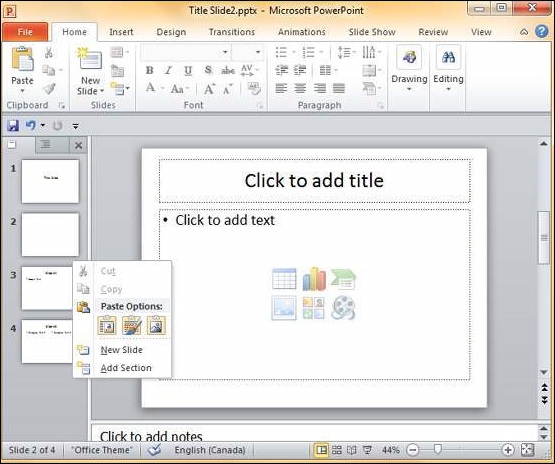
You will also notice that if you right-click in the first step without selecting any slide the menu options you get are different, although you can insert a new slide from this menu too.
Adding Text in Boxes in Powerpoint 2010
PowerPoint allows users to add text to the slide in a well-defined manner to ensure the content is well distributed and easy to read. The procedure to add the text in a PowerPoint slide is always the same - just click in the text box and start typing. The text will follow the default formatting set for the text box, although this formatting can be changed later as required. What changes is the different kinds of content boxes that support text in a PowerPoint slide.
Given below are some of the most common content blocks you will see in PowerPoint.
Title Box
This is typically found on slides with the title layout and in all the slides that have a title box in them. This box is indicated by "Click to add title".
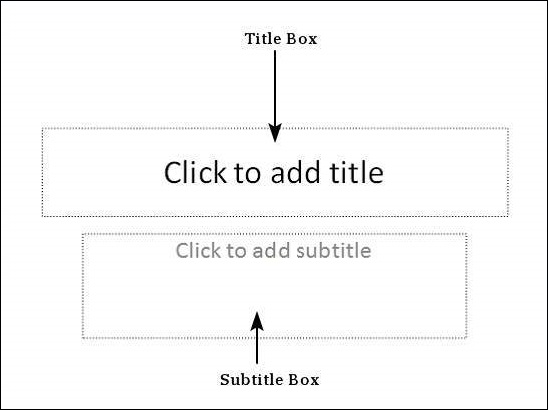
Subtitle Box
This is found only in slides with the Title layout. This is indicated by "Click to add subtitle"
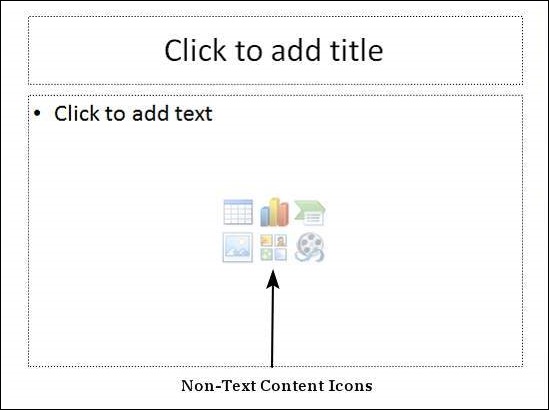
Content Box
This is found in most of the slides that have a placeholder for adding content. This is indicated by "Click to add text". As you can see, this box allows you to add text as well as non-text content. To add text to such a box, click anywhere on the box, except on one of the content icons in the center and start typing.
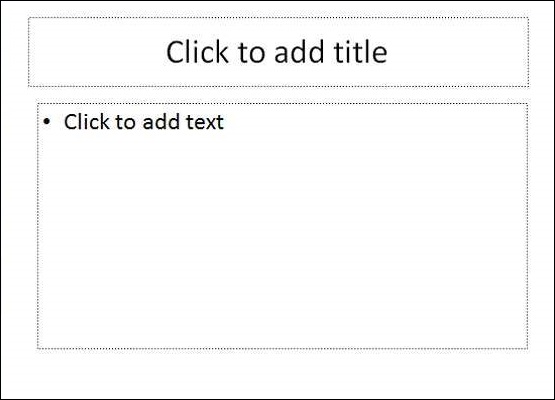
Text Only Box
This is not a default content box available in PowerPoint, but you can create it using Slide Master, if required. This is also indicated by "Click to add text". The only difference between the Text Only Box and the Content Box is that the former only supports text in the content area.
Adding New Text Boxes in Powerpoint 2010
This chapter will teach you how to add new text boxes in a slide. Most of the standard layouts come with the text box option. As mentioned in the previous chapter, text boxes will have "Click to add text" as the default text. Here are the steps to add new text boxes in slide.
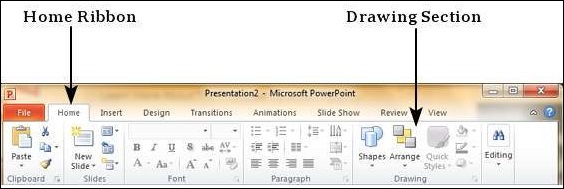
Step 1 − Click on the Text Box icon in the Home ribbon under the Drawing section.

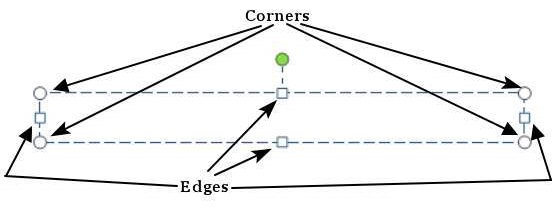
Step 2 − You will get the insert text box cursor that looks like an inverted cross.
Step 3 − Click to insert a text box. You can now start typing directly into the text box.

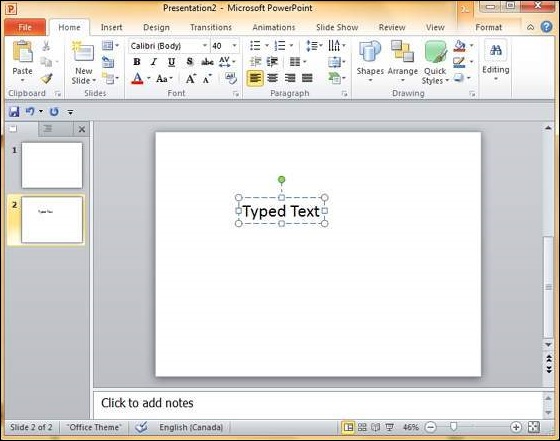
Step 4 − Alternately, you can click and drag the cursor without releasing the click to create a text box.
The size of the text box can be adjusted by selecting one of the edges marked by squares or corners marked by circles.
Deleting Existing Slide in Powerpoint 2010
There are times while building a slide deck, you may need to delete some slides. This can be done easily from PowerPoint. You can delete the slides from the Normal view as well as the Slide Sorter view. In each view, you can delete the slides in two ways.
Deleting from Normal View
Step 1 − Go to the Normal view.
Step 2 − Right-click on the slide to be deleted and select the Delete Slide option.
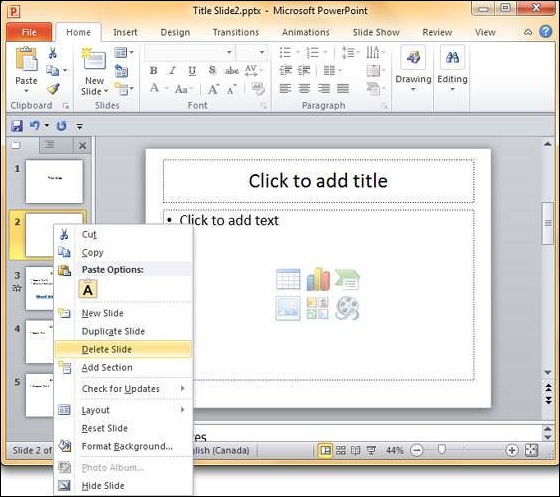
Alternately, you can select the slide and press the Delete button on your key board.
Deleting from Slide Sorter View
Let us now understand how to deleted slides from the Slide Sorter View.
Step 1 − Go to the Slide Sorter view.
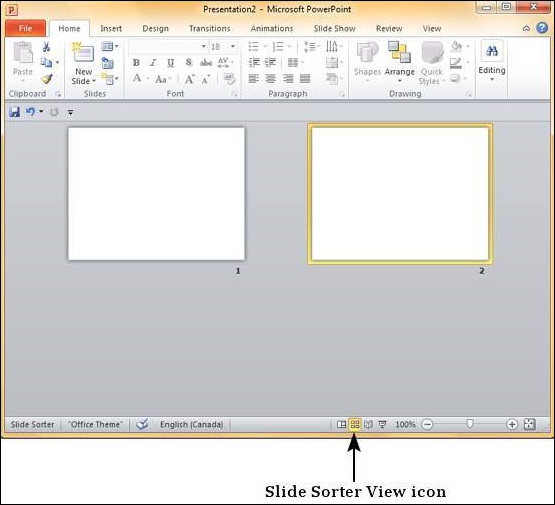
Step 2 − Right-click on the slide to be deleted and select the Delete Slide option.
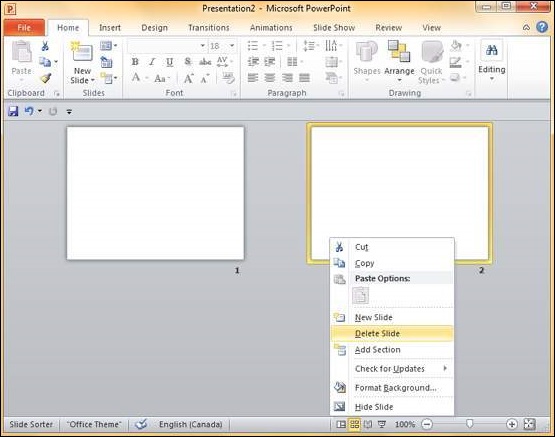
Alternately, you can select the slide and press the Delete button on your key board.
Rearranging Slides in Powerpoint 2010
Rearranging slides is important when it comes to organizing the overall presentation flow. While it is vital that you get the right content in every slide, it is equally important that you are able to present them in a format that makes it easier for the audience to understand the content too; most times this will require rearranging the slides.
You can rearrange slides from two views in PowerPoint - Normal View and Slide Sorter View. Given below are the steps to rearrange slides from different views.
Normal View
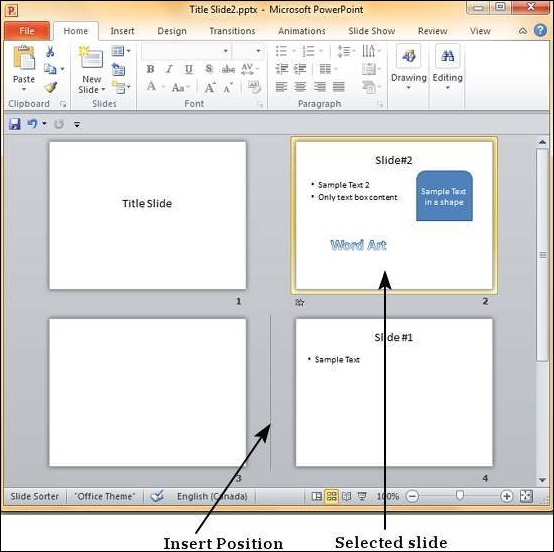
Step 1 − Select the slide to be moved.
Step 2 − Left click on the slide and drag it to the position in the sequence where you want to place it. PowerPoint will indicate the insert position with a line in-between existing slides.
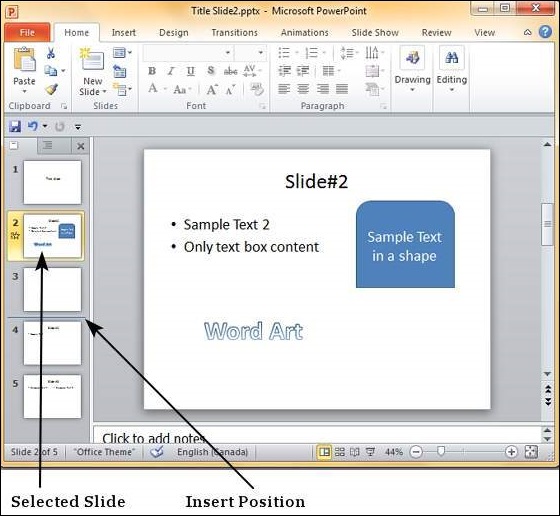
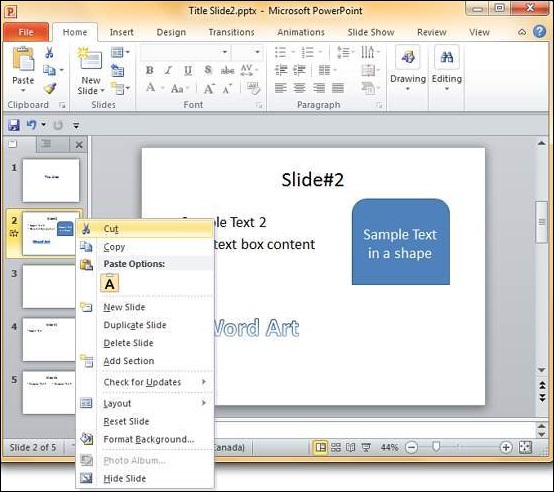
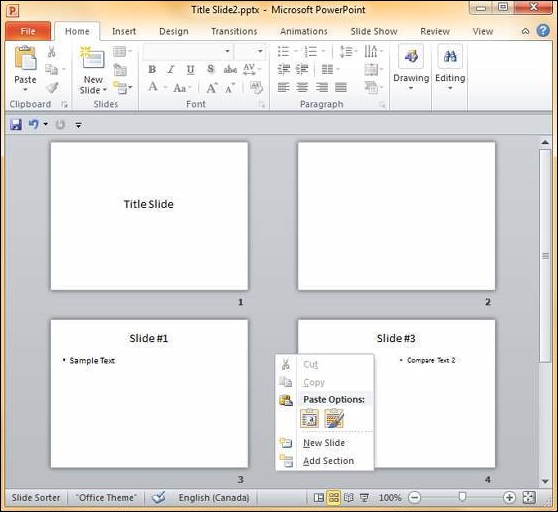
Step 3 − When you get to the right position release the left click button to insert the slide. Alternately you can also cut the selected slide and paste it back in the sequence as shown below.
Slide Sorter View
Let us now understand how the Slide Sorter View works.
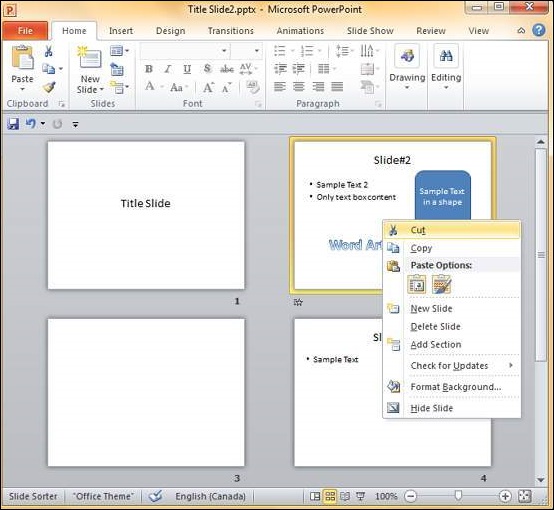
Step 1 − Select the slide to be moved.
Step 2 − Left click on the slide and drag it to the position in the sequence where you want to place it. PowerPoint will indicate the insert position with a line in-between existing slides.
Step 3 − When you get to the right position release the left click button to insert the slide. Alternately you can also cut the selected slide and paste it back in the sequence as shown below.
Adding Slide Notes Powerpoint 2010
Slide notes can be very useful tools for presentation. These notes are not displayed on the screen in the Slideshow mode, but the presenter can see them so they can prepare well to present the slides. Depending on your Print settings, you can also print the slide notes along with the slides.
This chapter will show you how to add slide notes to an existing presentation.
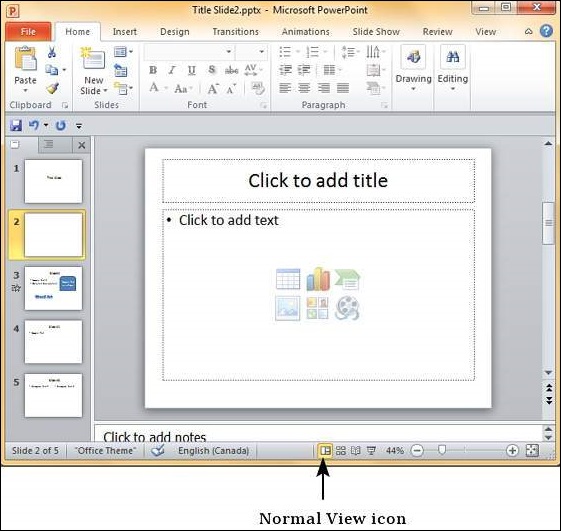
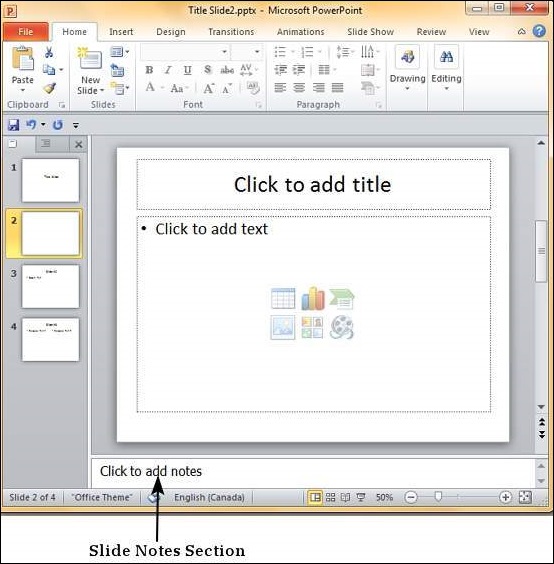
Step 1 − To locate the slide notes, set the view in Normal mode.
Step 2 − The Slide Notes section is indicated by "Click to add notes".
Step 3 − You can click on the top border and drag the section to increase its size to make it easier to type.
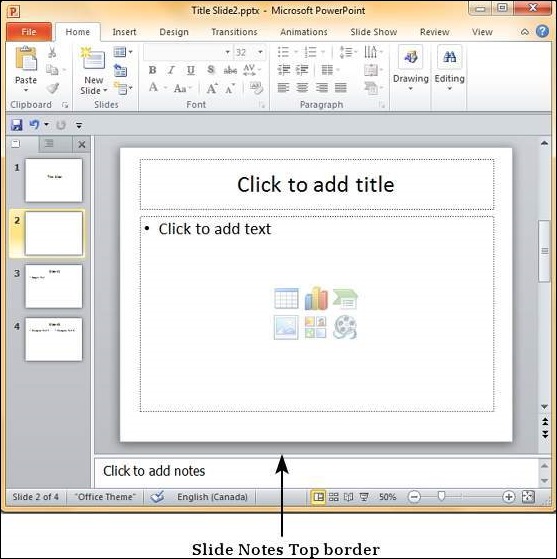
Step 4 − Type your text in this section as slide notes.
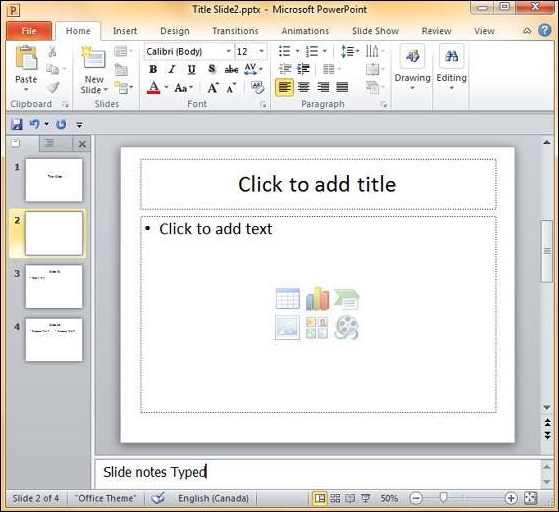
You can only use bullets, numbering and alignment functions in the Slide Notes section. All other functions can be selected, but can be applied only to the selected slide, not the notes.
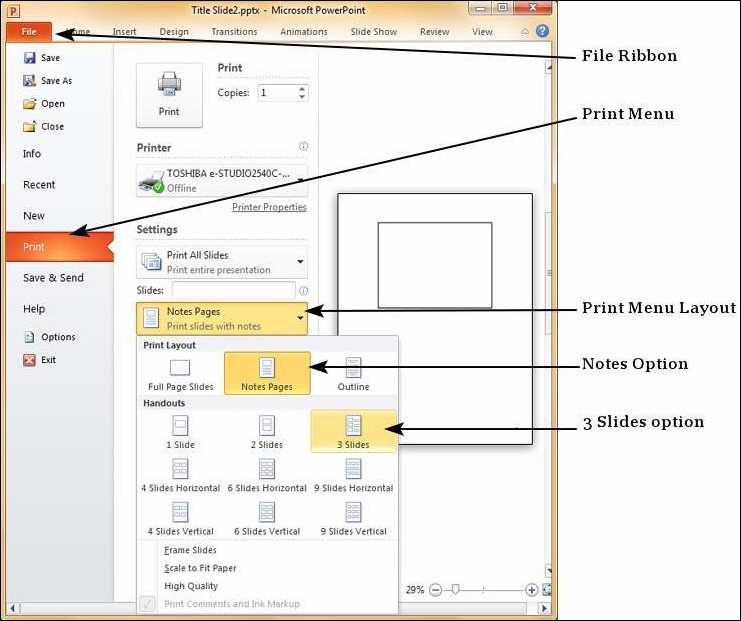
Slide notes can be printed from the print menu under the Backstage view. From the Print Layout option, select Notes Pages or 3 Slides. Notes Pages will print a single slide with the slide notes below it. The 3 Slides will print all three slides with notes on the right side.
Managing Sections in Powerpoint 2010
Given the popularity of PowerPoint and its versatility, there are situations when you are dealing with very large slide decks or just collaborating with different people to build the slides. In such cases, it is always helpful to be able to segregate the slides into smaller groups and work with these groups. PowerPoint 2010 introduces the concept of sections to achieve this. Here are the main functions you can execute with sections.
Creating Sections
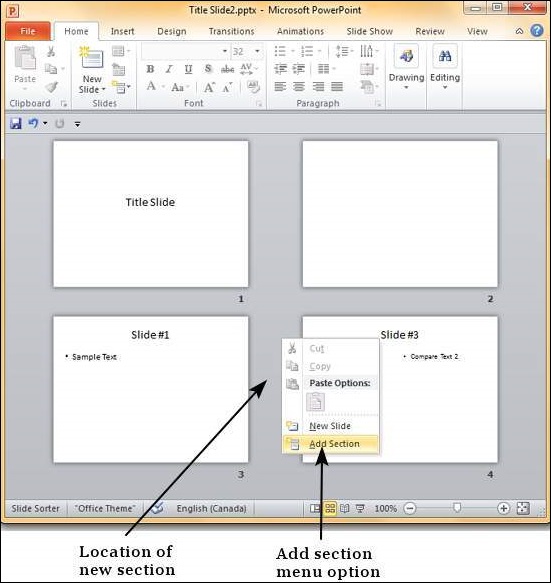
The steps to create a new section are as follows. You can execute these steps from the Normal view or the Slide Sorter view.
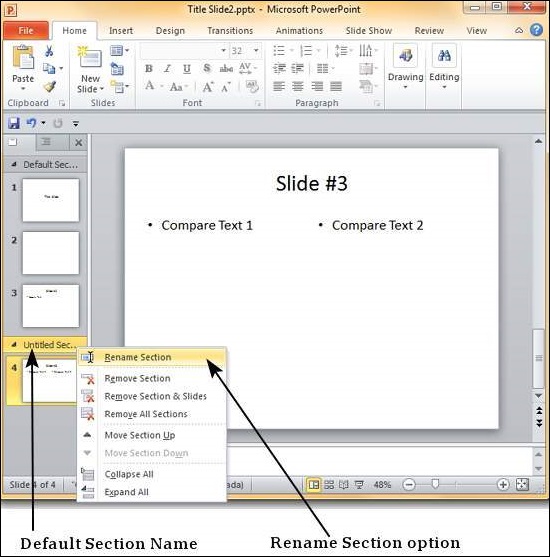
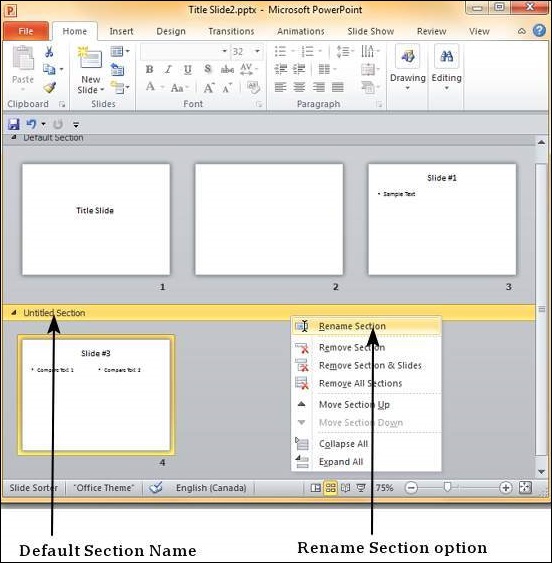
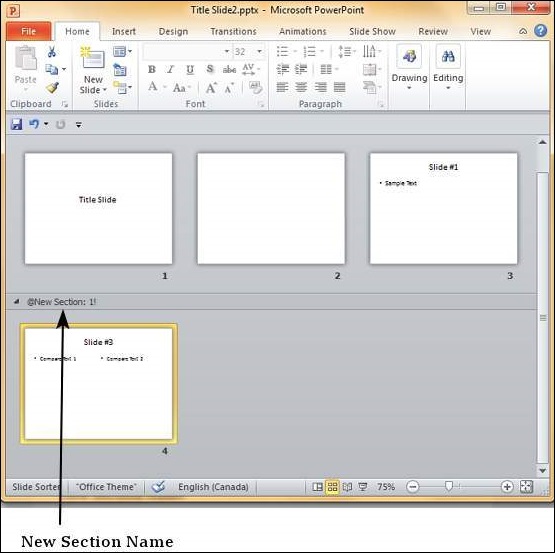
Step 1 − In the Normal view or the Slide Sorter view, right-click at the position where you want to add the section and select add section.
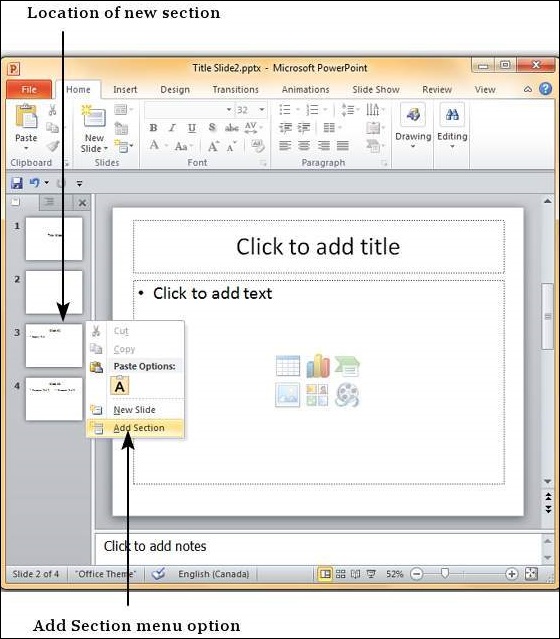
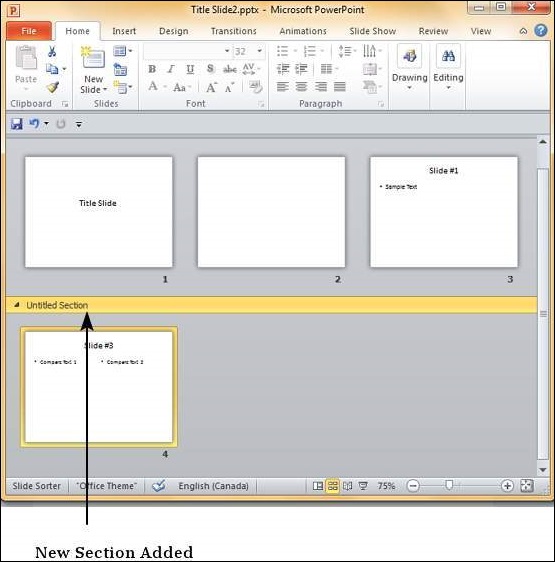
Step 2 − The new section gets added to the presentation with all the subsequent slides being included in this section.
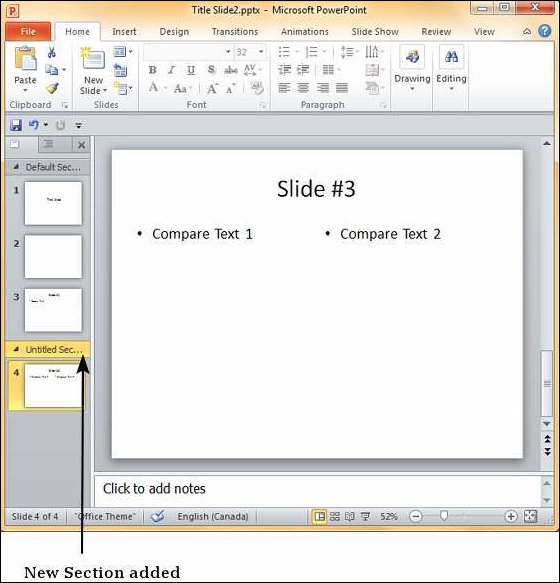
Step 3 − By default, the new section is named "Untitled Section" but you can change the section name. Right-click on the section and select "Rename Section".
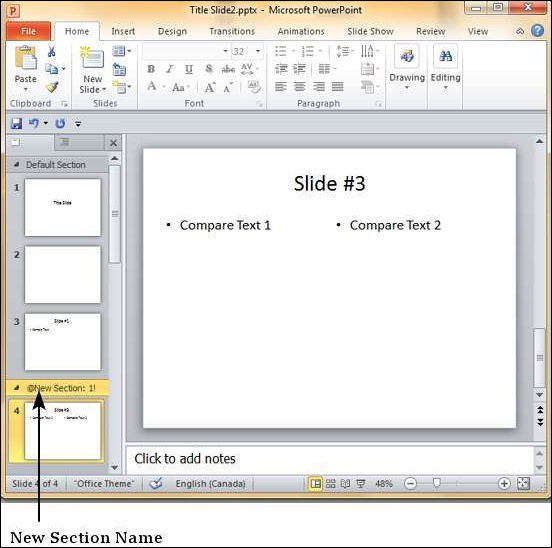
Step 4 − In the Rename Section dialog box, enter the new section name. This accepts all the characters including alphabets, numbers, special characters, punctuations, etc.
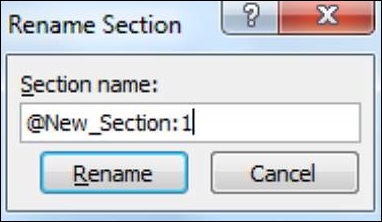
Step 5 − Click on the "Rename" button on the dialog to rename the section.
Rearranging Sections
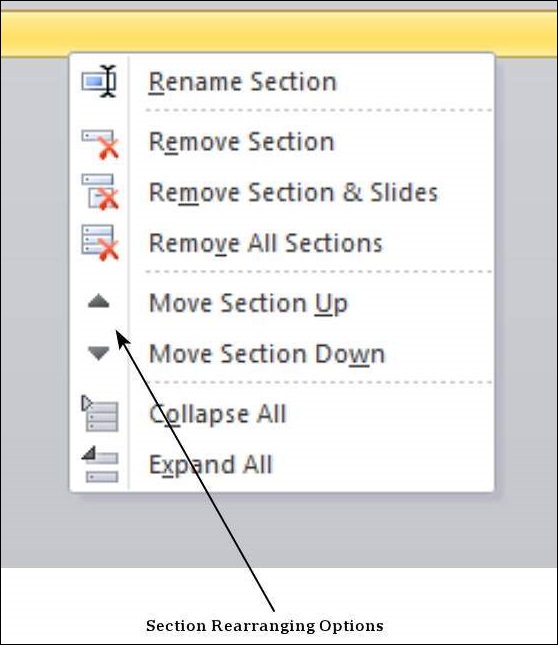
One of the advantages of sections is that you can not only group slides together, but also rearrange them as one set. Instead of having to move each slide individually, you can move the entire section. Just like rearranging slides you can drag and move the sections. Alternately, you can right-click on the section and move it up or down as shown below.
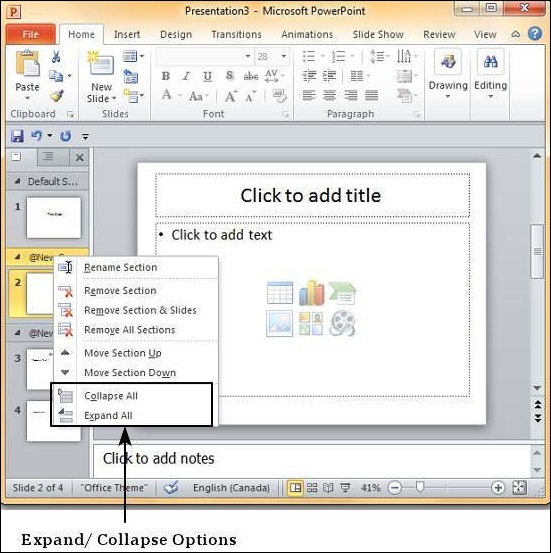
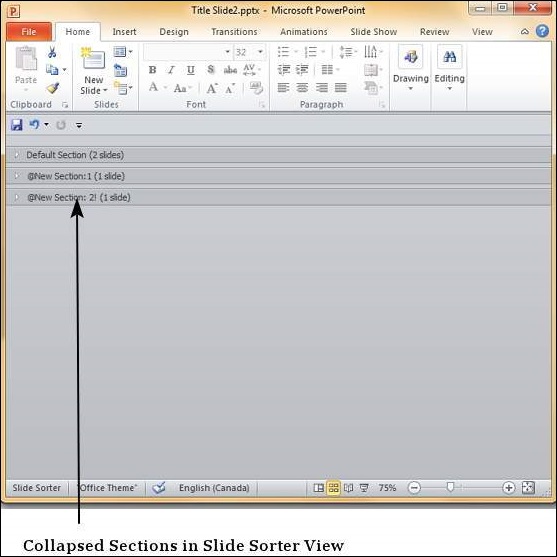
If there are many slides to work with, you can collapse them so you view just the sections. This makes rearranging them less confusing too.

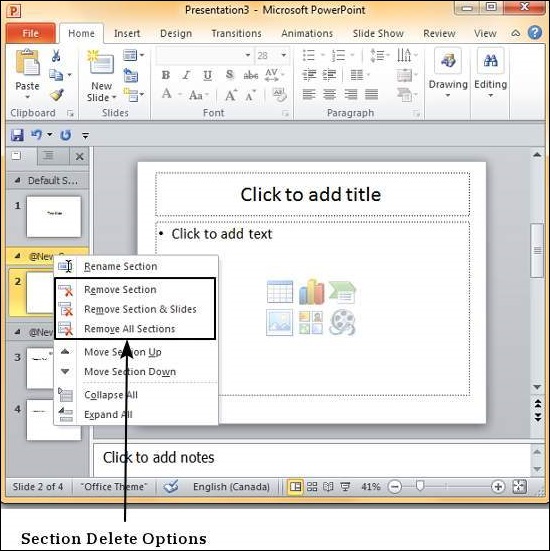
Deleting Sections
PowerPoint 2010 provides three options to delete sections. The table below explains the function of each option.
| S.No | Delete Option & Description |
|---|---|
| 1 | Remove Section Deletes the selected section and merges slides with the previous section. |
| 2 | Remove Section & Slide Deletes the selected section and all the slides in the section. |
| 3 | Remove All Sections Deletes all the sections and merges all the slides into a presentation without sections. |
Working With Outlines in Powerpoint 2010
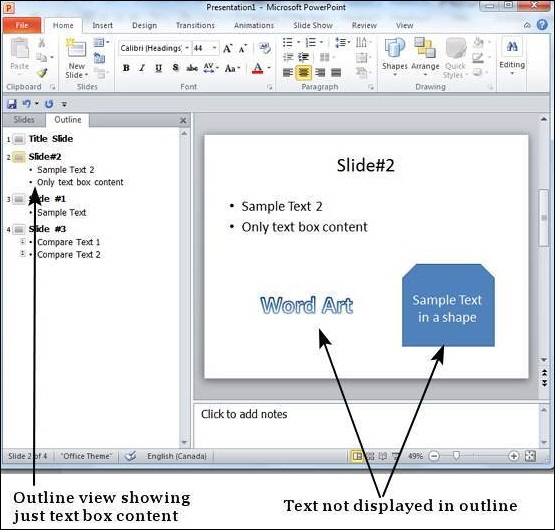
PowerPoint is a great program that allows you to bring together text, images, shapes and multimedia. However, sometimes you may just want to review the text without focusing on the non-text aspects of the slide deck. This is where the Outline view in PowerPoint is quite useful. The Outline view can be accessed from the tab adjacent to the Slide tab in the Normal view.
The outline view shows just the text content from various slides. This view does not show the text entered in the non-text box like SmartArt, WordArt or any other shapes.
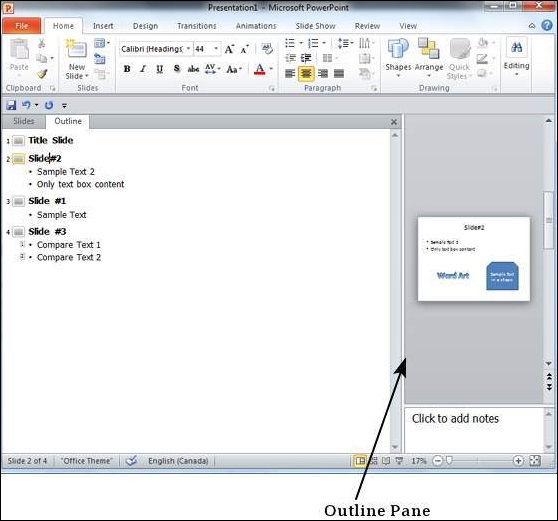
By default, the outline pane size is the same as the slide tab pane; hence it is small. However, you can drag the pane out to increase the size to improve readability.
Sidebars in Powerpoint 2010
PowerPoint slides have a left-hand side bar which offers two invaluable views. These views are great to review the slides and edit them. The side bar is available in the Normal view and by default, it is set to the Slides tab.
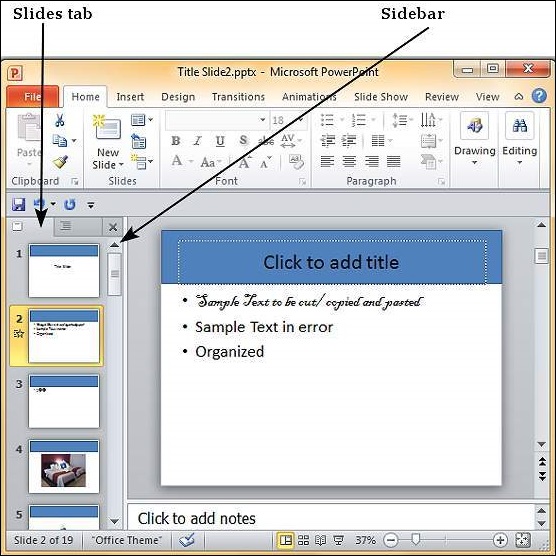
Slides Tab
This tab shows all the slides stacked vertically in a sequential manner. You can select individual slides from this tab and also perform some tasks like changing slide layouts, reordering slides, inserting new slides, deleting slides, etc. Although you cannot edit the slide contents from this tab, you can select the slide and make edits from the slide displayed to the right.
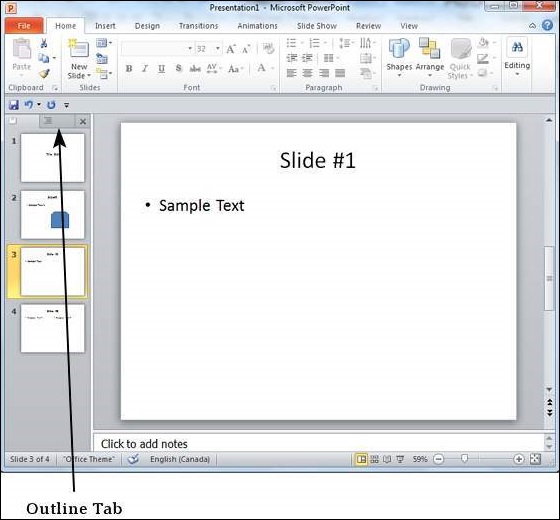
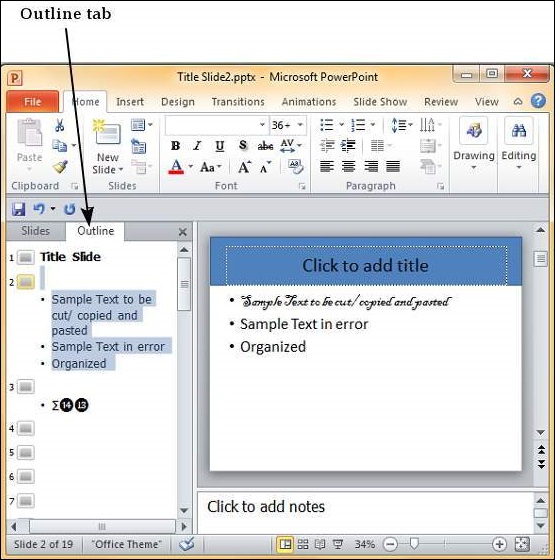
Outline Tab
This is the tab right next to the Slides tab and as the name suggests, this provides the outline for the slide. This section just displays all the textual content from every slide - this can be very useful if there is a lot of non-text content in the slide and reviewing just the written part gets difficult. Unlike in the slides tab, you can edit the text from this section.
If you need greater viewing space, you can close the sidebar by click on the X on the top right of this bar.
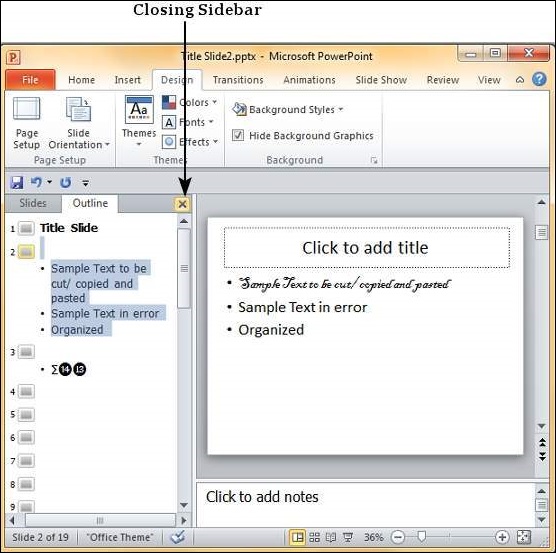
To recover the sidebar, just click on the Normal view icon again.
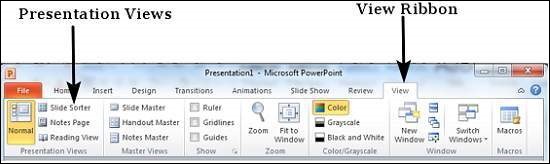
Presentation Views in Powerpoint 2010
PowerPoint supports multiple views to allow users to gain the maximum from the features available in the program. Each view supports a different set of functions and is designed accordingly.
PowerPoint views can be accessed from two locations.
Views can be accessed quickly from the bottom bar just to the left of the zoom settings.
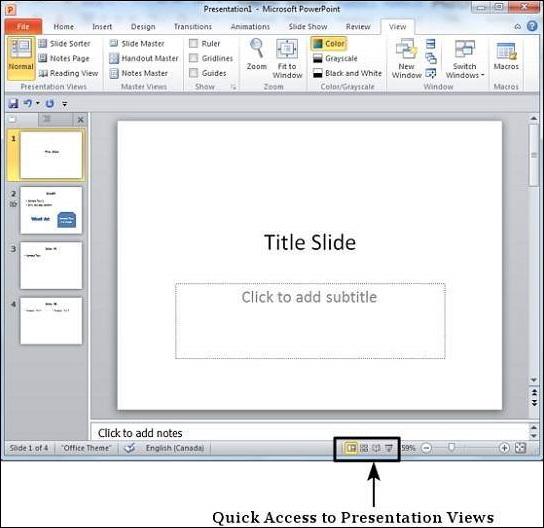
Views can also be accessed from the Presentation Views section in the View ribbon
Here is a short description of the various views and their features.
Normal View
This is the default view in PowerPoint and this is primarily used to create and edit slides. You can create/ delete/ edit/ rearrange slides, add/ remove/ modify content and manipulate sections from this view.
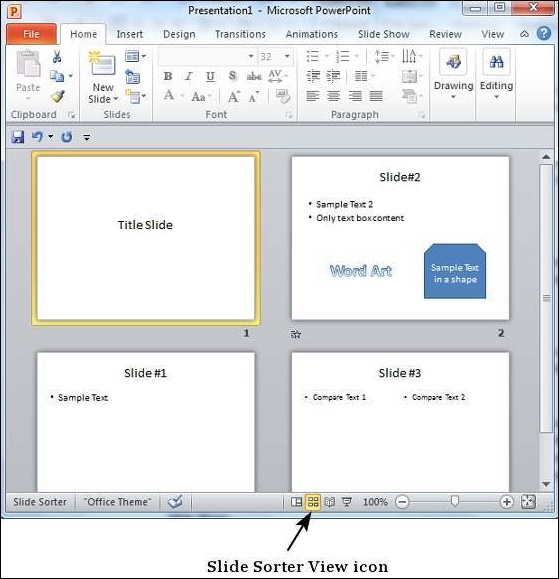
Slide Sorter View
This view is primarily used to sort slides and rearrange them. This view is also ideal to add or remove sections as it presents the slides in a more compact manner making it easier to rearrange them.
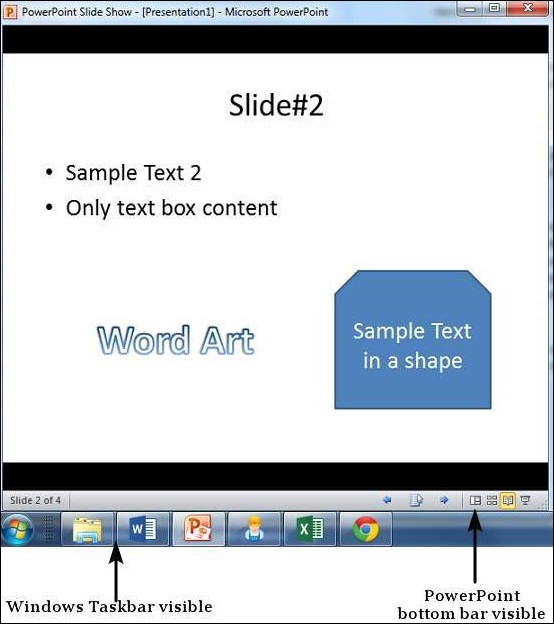
Reading View
This view is new to PowerPoint 2010 and it was created mainly to review the slideshow without losing access to rest of the Windows applications. Typically, when you run the slideshow, the presentation takes up the entire screen so other applications cannot be accessed from the taskbar. In the reading view the taskbar is still available while viewing the slideshow which is convenient. You cannot make any modifications when on this view.
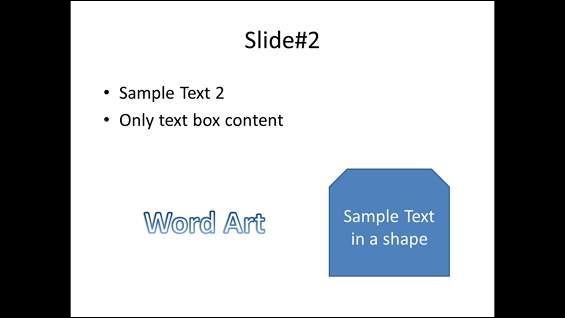
SlidesShow
This is the traditional slideshow view available in all the earlier versions of PowerPoint. This view is used to run the slideshow during presentation.
Setting Backgrounds in Powerpoint 2010
As PowerPoint is a design-based program, backgrounds are effective ways of improving the aesthetics and readability of the slides. The Themes in PowerPoint help select the backgrounds by default, so every time you change the theme, the default background is set automatically. Theme includes more than just backgrounds, so you can retain other aspects of the theme while changing the default background.
Given below are the steps to apply backgrounds in PowerPoint.
Step 1 − In the Design ribbon, under the Background group, click the Background Styles command.
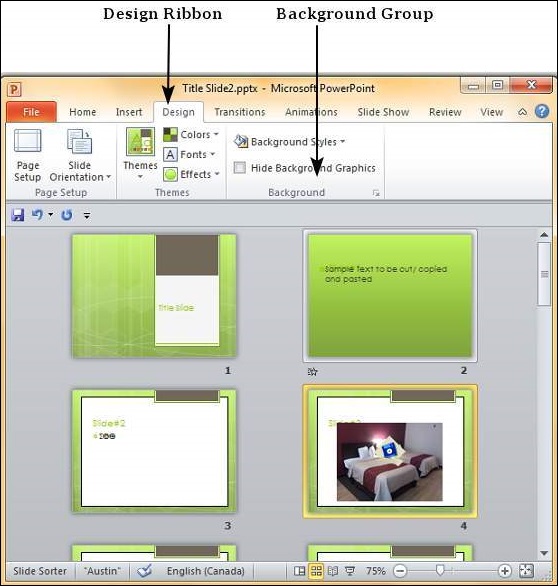
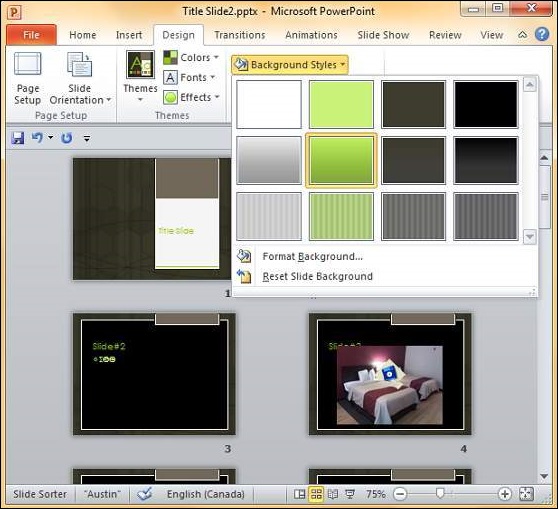
Step 2 − Select one of the background styles that suits your requirements.
Step 3 − To edit the background for a specific slide, right-click on the desired background slide and select "Apply to Selected Slides".
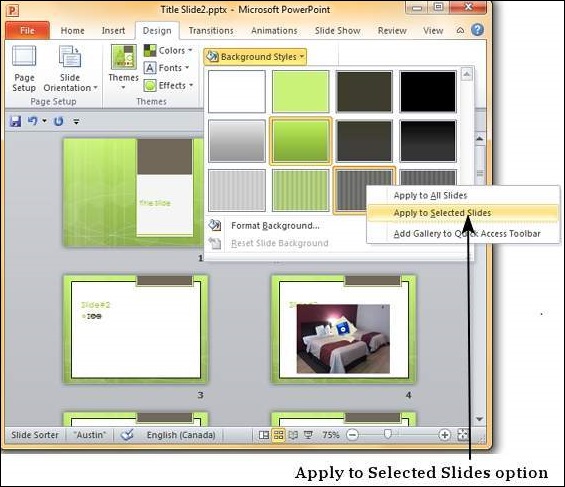
Step 4 − Selected slide(s) now have the new background.
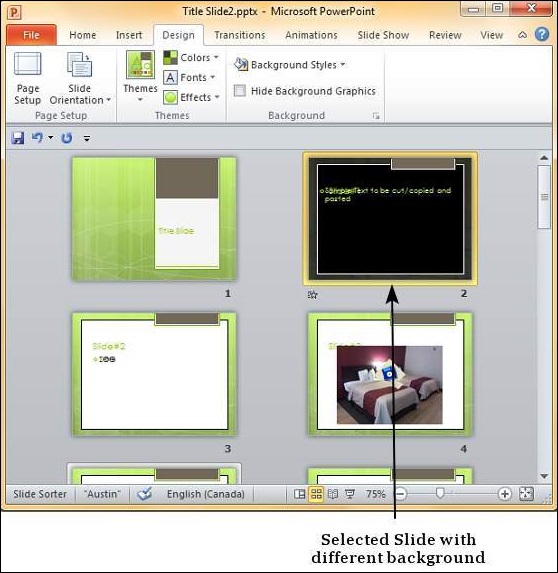
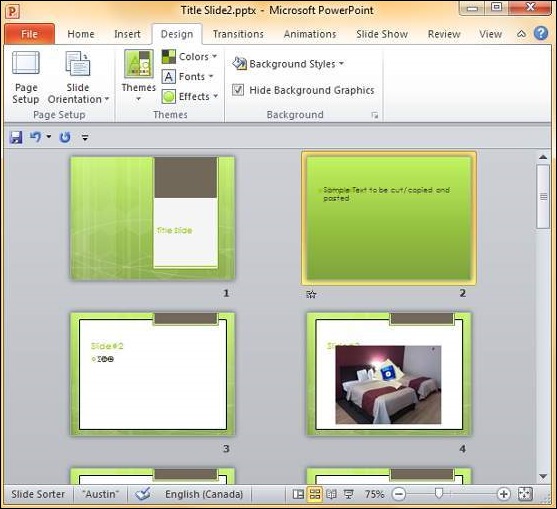
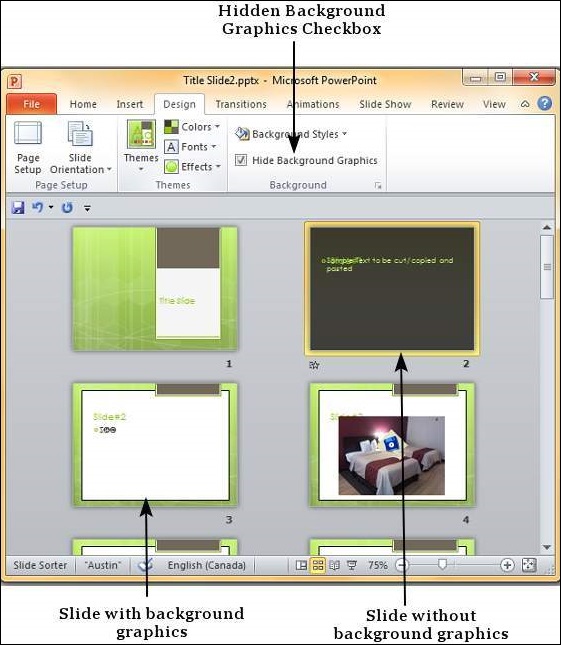
The graphics in the slide background can distract you from the actual content, in such cases you can hide the graphics and retain a plain background till you finish working on the content. To do this, select the slide and check the "Hide Background Graphics" checkbox.
Slide Orientations in Powerpoint 2010
In the recent years, presentations are being used for more than just as a high end replacement for transparencies and projectors. With its unique features, PowerPoint is becoming quite versatile in the kind of information it can depict and very flexible in its usage. The slide orientations are invaluable part of this improved list of PowerPoint features. Like most other applications PowerPoint supports two orientations: landscape and portrait.
The Landscape layout is the default PowerPoint layout and it is probably the more commonly used one. In the landscape layout, the longer edge is horizontal so the slides align better with the screens and projectors.
The Portrait layout is where the shorter edge is horizontal. This is sometimes better for print depending on the kind of content you want to present.
Slide orientations in PowerPoint can be changed from the Design ribbon using the Slide Orientation command.

Saving Presentation in Powerpoint 2010
One of the most basic tasks in PowerPoint is being able to save your work; this is probably the most important task as well. There are many users who have burnt their fingers for not saving their work in time and losing hours of hard work. The following are the basic steps to save a presentation.
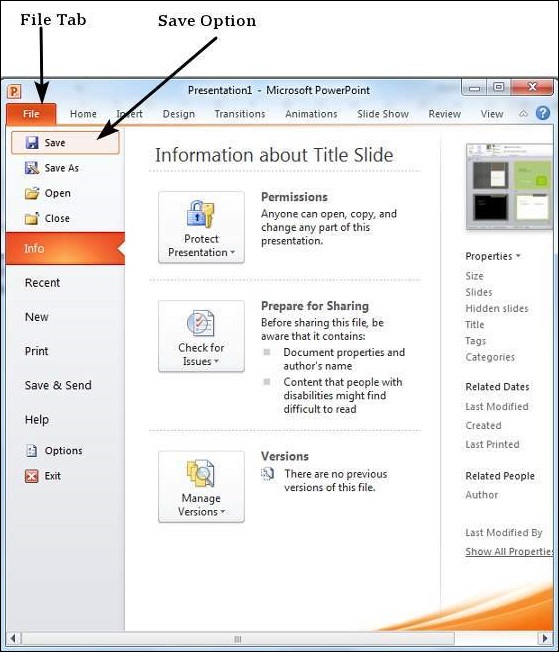
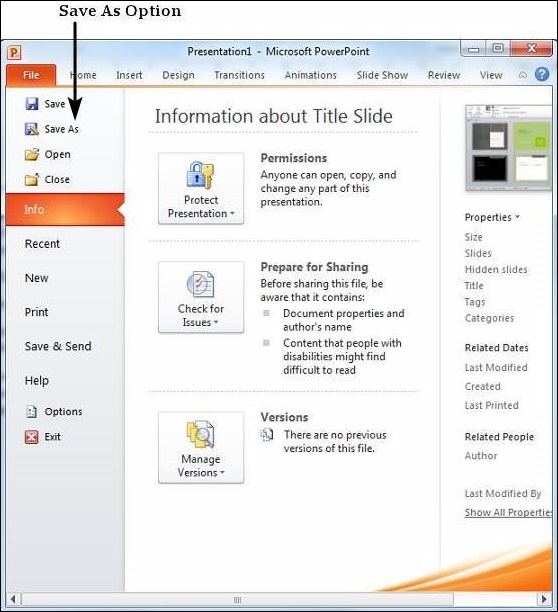
Step 1 − Click on the File tab to launch the Backstage view and select Save.
Step 2 − In the Save As dialog, type in the file name and click "Save".
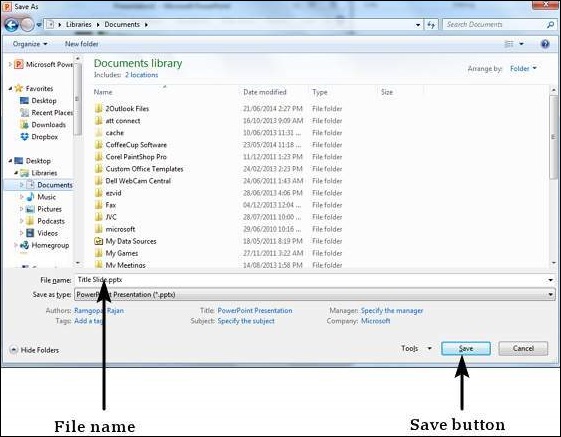
Step 3 − The default file format is .pptx. If you want to save the file with a different name, choose one of the file types from the "Save as type" dropdown list.
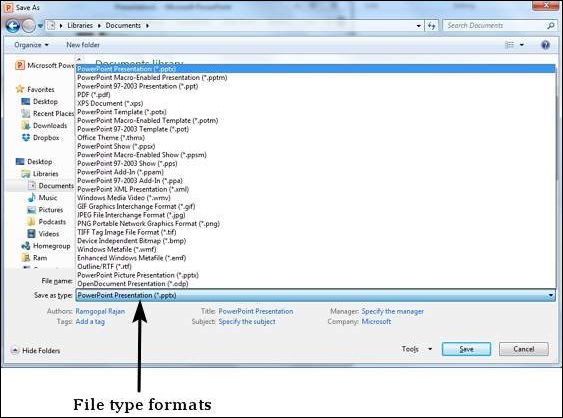
If you are working on an already saved file, the "Save" option in the Backstage view will directly save the file in the existing format with the existing name. If you want to change the format or filename of an existing file, use the Save As option instead.
Review Presentation in Powerpoint 2010
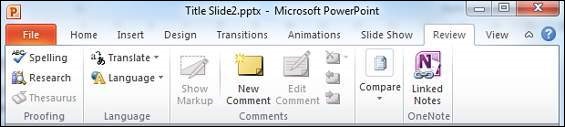
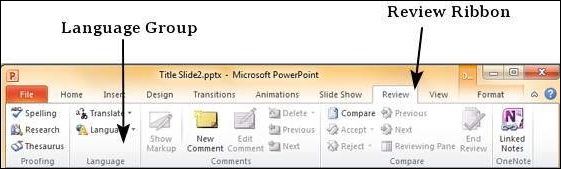
Reviewing the presentation can be a very powerful way of eliminating the errors and perfecting the slides. PowerPoint offers a wide range of reviewing options for you to use. Some of them are automatic or system driven, while others aid other users to collaborate and review the slides. All the reviewing tools are grouped under the Review ribbon.
| Review Section | Functions |
|---|---|
| Proofing |
|
| Language |
|
| Comments |
|
| Compare |
|
Adding Slide Numbers in Powerpoint 2010
Just like you have page numbers for books, it is usually a good idea to add slide numbers to presentations. There are two ways you can add slide numbers to your presentation and this chapter will show you both those techniques.
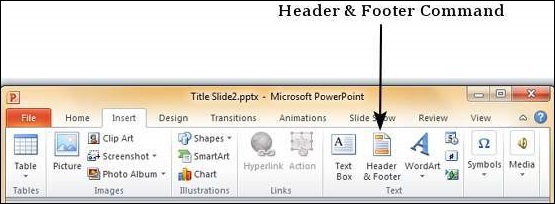
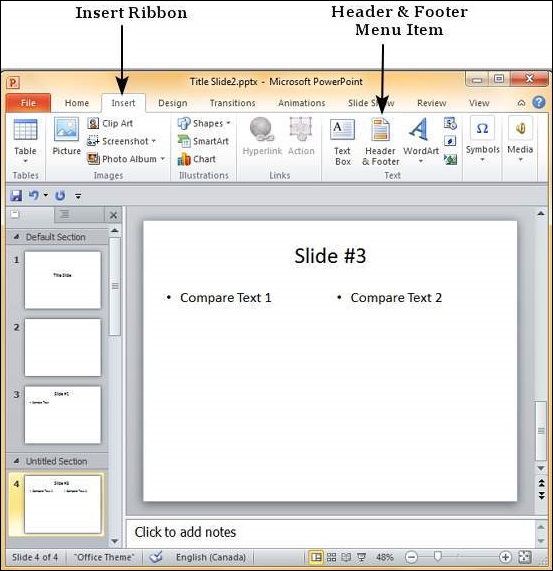
Step 1 − Under the Insert ribbon, Text group click on Slide Number command.
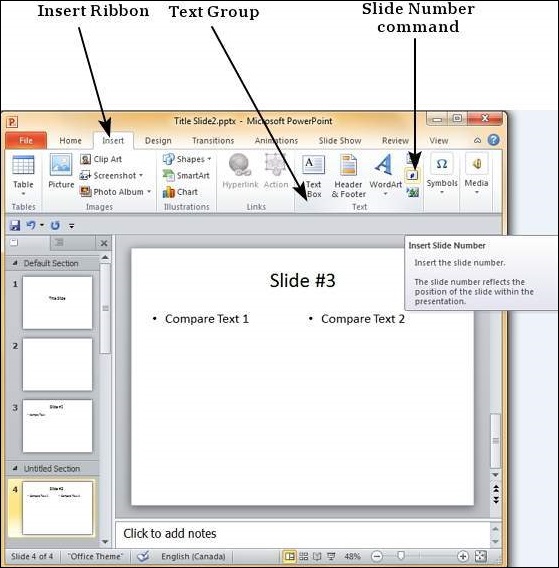
Step 2 − The Header and Footer dialog opens up.
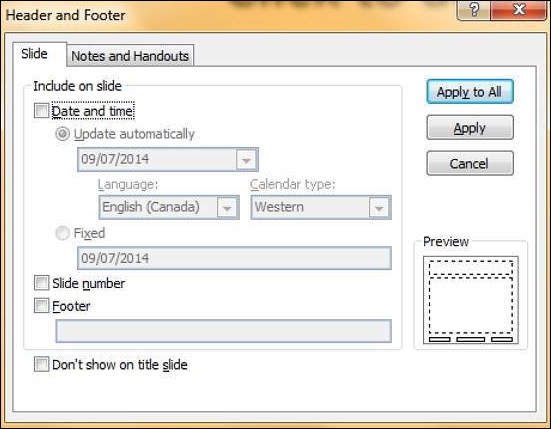
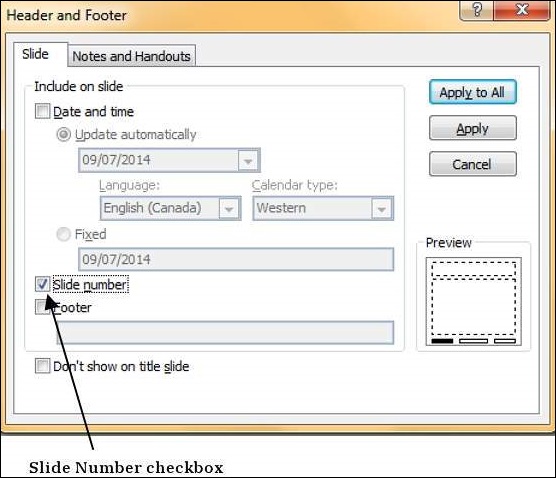
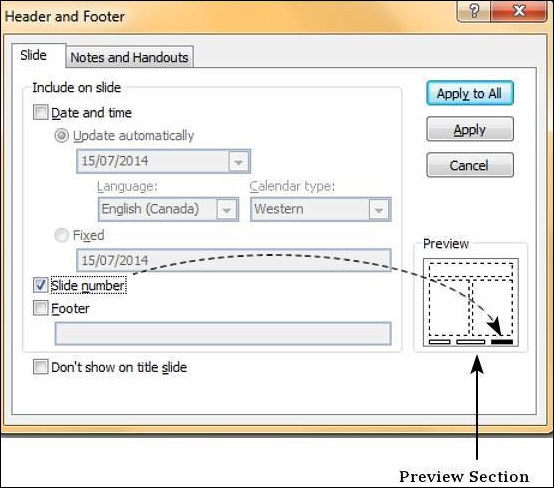
Step 3 − Check the Slide number check box.
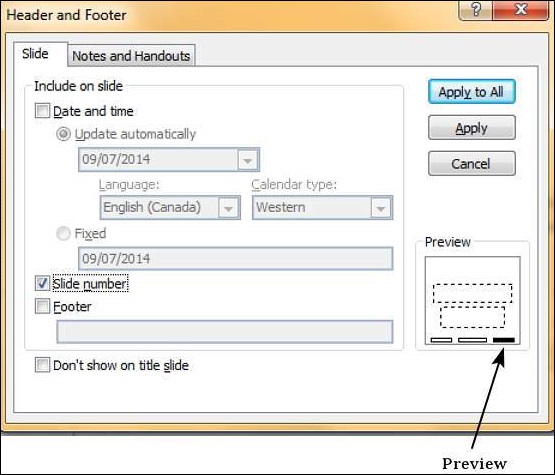
Step 4 − The Preview shows the section where the slide number will be placed.
Instead of clicking on the Slide Number command, you can also click on the Header & Footer menu item to launch the same dialog as in Step 2.
Adding Header & Footer in Powerpoint 2010
PowerPoint offers the ability to add header and footers to the slides. While having footers in presentations is logical, header may not be quite evident at first. Typically, the slide title would be the header in the main slide, however when it comes to printing out handouts a separate header would be quite useful.
Here are the steps to add header and footer information to slides
Step 1 − In the Insert ribbon, click on the Header & Footer menu item.
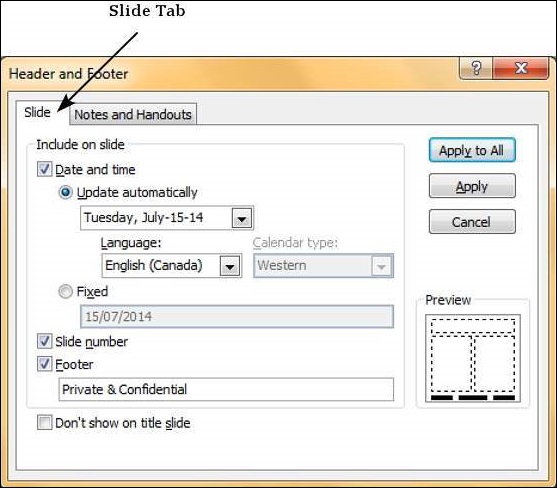
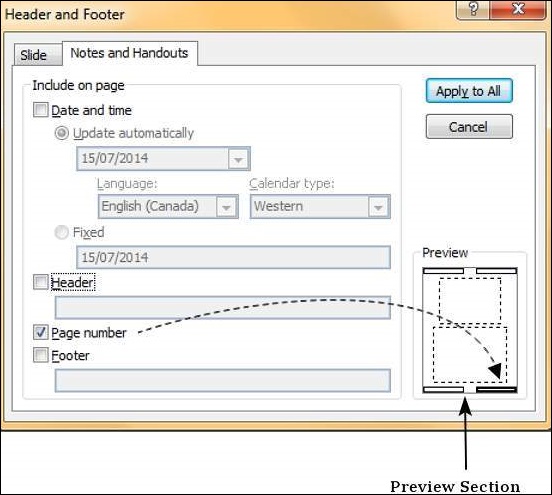
Step 2 − The Header and Footer dialog has two tabs — the Slide tab and the Notes and Handouts tab.
Step 3 − You can add details to the slide footer from the Slide tab.
| S.No | Slide Footer Options & Description |
|---|---|
| 1 | Date and time
|
| 2 | Slide Number Insert Slide number in the footer |
| 3 | Footer Add designated text to the footer - a good example of this is the confidentiality clause or copyright clause |
| 4 | Don't show on title slide Decide on whether the footer information should be displayed on the title slide or not |
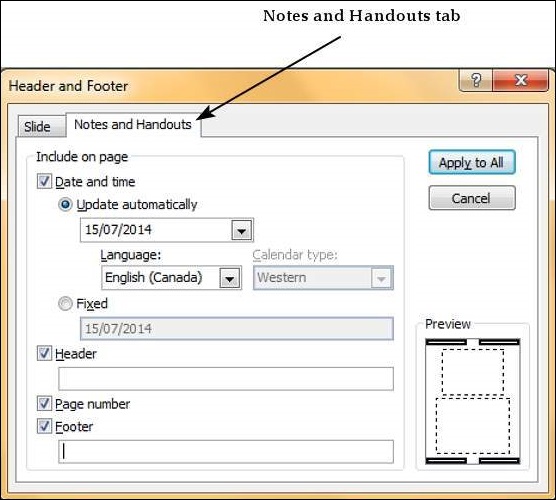
Step 4 − You can add the details to the handouts from the Notes and Handouts tab.
| S.No | Notes and Handouts Options & Description |
|---|---|
| 1 | Date and time
|
| 2 | Header Add the header information for every page on the handout |
| 3 | Page Number Insert page number in the footer |
| 4 | Footer Add designated text to the footer - a good example of this is the confidentiality clause or copyright clause |
When you check any of the header and footer checkboxes in either tabs, you can see the location where the detail is inserted in the preview section.
Running Slide Show in Powerpoint 2010
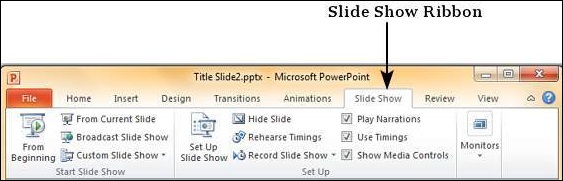
Most PowerPoint presentations are created to be run as a slideshow. Given all the advanced features available in PowerPoint 2010, it is no surprise that there are many features related to running the slideshow that have been included in this program too. Most of these features are really to help you create a good slideshow without having to go through the entire presentation over and over again after every minor change. Features related to running the slideshow are grouped under the Slideshow ribbon.
| Section | Menu Item | Description |
|---|---|---|
| Start Slideshow | From Beginning | Starts slideshow from beginning |
| From Current Slide | Starts slideshow from the current slide | |
| Broadcast Slideshow | Allows users to broadcast the slideshows using Microsoft's PowerPoint Broadcast Service | |
| Custom Slideshow | Builds a custom slideshow by picking the slides you want to run | |
| Set Up | Set Up Slideshow | Helps set up the slideshow including browser/ full screen display, show options with or without narration/ animation, pen and laser color during the slideshow and the slides to be presented during the show |
| Hide Slide | Helps mark/ unmark the slide as hidden, so it is skipped or shown during the slideshow respectively | |
| Rehearse Timing | Allows users to rehearse the timing on each slide and the entire slideshow | |
| Record Slideshow | Records the slideshow including narration and animation | |
| Slideshow Checkboxes | Helps set or avoid the use of narrative audio and rehearsed timings during the show. Display media controls in the slideshow view | |
| Monitors | Resolution | Defines resolution in slideshow view |
| Show Presentation on | Picks the monitor to display the presentation one - in case of multiple monitors | |
| Use Presenter View | Run presentation in Presenter view rather than just slideshow view |
Keyboard Shortcuts in Powerpoint 2010
Like the other windows based programs, PowerPoint 2010 also offers a wide range of keyboard shortcuts. For the current PowerPoint users, there is a major change in the way these shortcuts are being mapped in the 2010 release compared to some of the older ones. With a whole new range of features being added to PowerPoint, it is evident why there are so many changes to the keyboard shortcuts. We will understand how to read and figure out the shortcuts with ease.
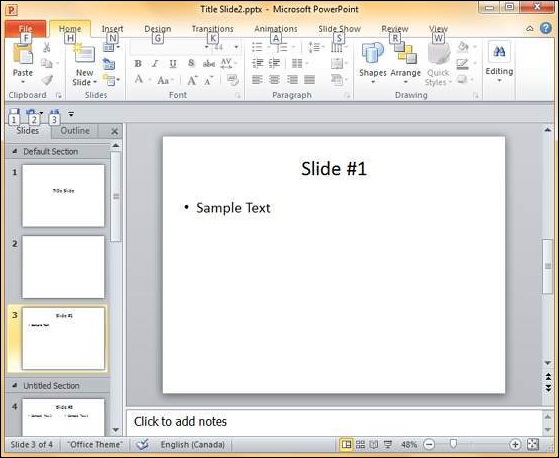
Step 1 − The first step to access the keyboard shortcuts is to press the Alt key on your keyboard. This will display the first level of shortcuts indicated by alphabets or numbers as shown. For example, the shortcut to access the Home ribbon is 'H' and for saving the presentation, the shortcut is '1'.
Step 2 − Once you select the first level of shortcut, the second level of shortcuts for respective commands are shown. Notice that some of these shortcuts are disabled or displayed in a lighter shade than others. This is because the disabled shortcuts cannot be used in the current state.
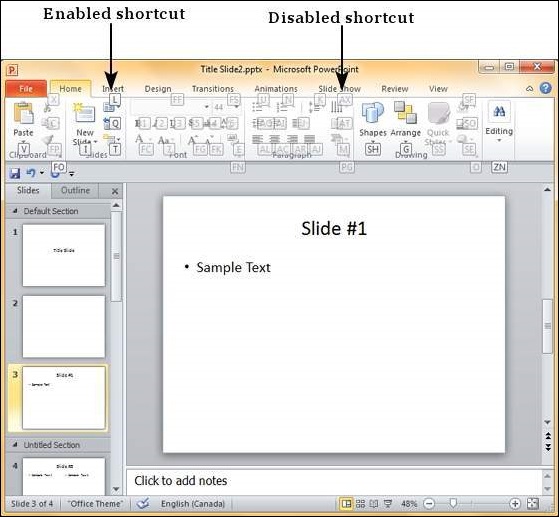
For example, all the font related commands are disabled as no text has been selected. If you execute the same steps after selecting a portion of text, these shortcuts will be enabled too.
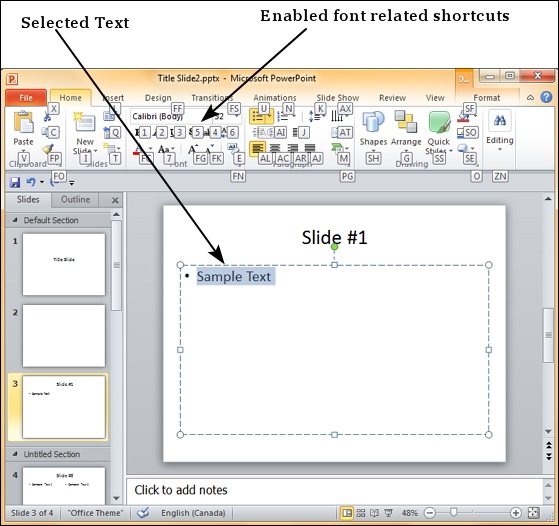
In some cases, there are two alphabets associated with a single shortcut; in such cases, you need to key in both of them immediately after another to get the desired effect.
Get Context Help in Powerpoint 2010
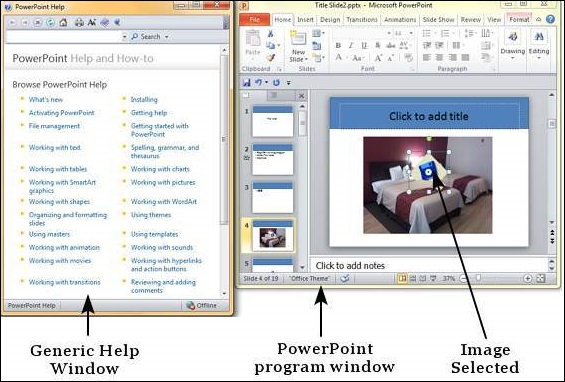
Despite getting a good grasp of the program, we may need help on the different aspects from time to time. To aid in such scenarios, PowerPoint has created the Context Help feature. With this feature, if you get stuck in any dialog, you can press F1 and PowerPoint will open the help topic related to that dialog. This is extremely beneficial as you need not spend time trying to browse through all the help topics just to get to the one you need.
The context help is based on the active window and not on the object you have selected. So if you select an image and press F1, you will get the generic help windows as your active window is still the main PowerPoint program.
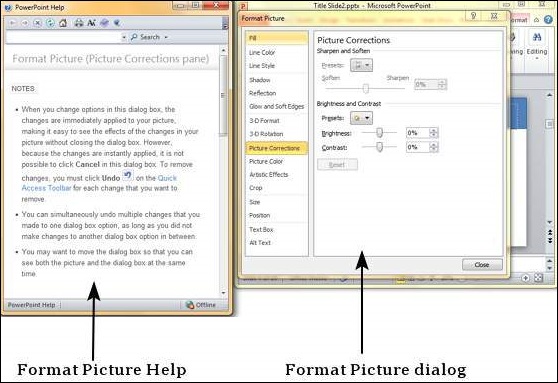
If you select any other dialog or window, PowerPoint context help will show the related help topic when you press F1. If you continue to work only with the ribbon options on the screen, the context help would not work. But if you right-click on the shapes or objects and open the related editing dialogs, you can press F1 and can learn more about the related functionalities of those shapes and objects.
Copy and Paste Content in Powerpoint 2010
In this chapter, we will understand how to copy and paste content in PowerPoint 2010. PowerPoint offers to the users a wide range of options when it comes to duplicating content. PowerPoint has the standard cut and copy functions but allows variations of paste options.
Cut Option
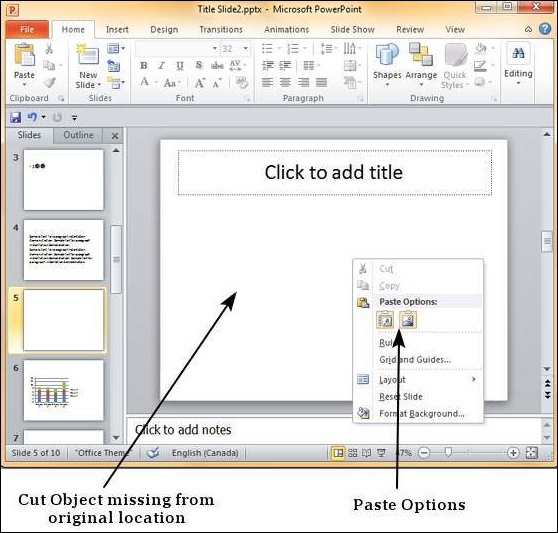
This option allows you to cut content from the slide - this means the original content is being moved to a different location hence the content will be deleted from its original location when you use this option. To cut a content, you need to select it and press "Ctrl + X" or right-click on the selected content and select Cut.
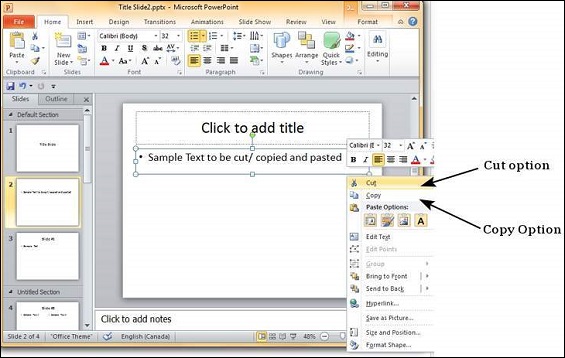
Copy Option
This option allows you to copy content from one location to another; hence the original content is retained it its place while the duplicate content can be pasted. To copy a portion of content, you need to select it and press "Ctrl + C" or right-click on the selected content and select Copy.
Paste Option
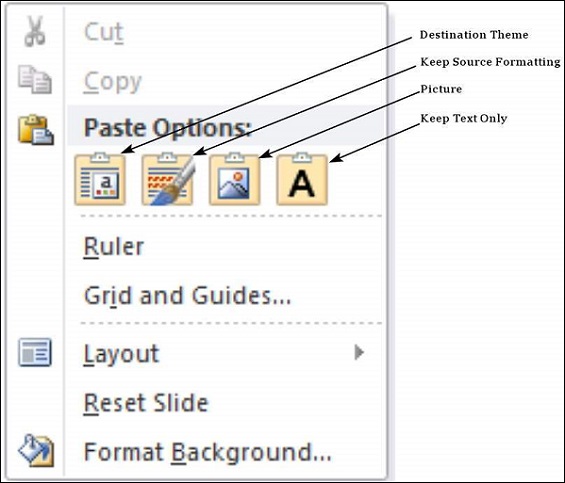
This option allows you to paste the cut or copied content at the desired location. There are multiple paste options for you to choose from. These options are indicated by different icons when you right-click at the desired location. Even if you do not remember the icons, you can hover your cursor on top of them for tooltip explanations. The table below describes the paste options in PowerPoint.
| S.No | Paste Option & Description |
|---|---|
| 1 | Destination Theme Pasted content adopts the destination theme. |
| 2 | Keep Source Formatting Pasted content retains the source formatting - available for table or Excel content. |
| 3 | Picture Content is pasted as an image - once pasted as an image, the content cannot be modified. |
| 4 | Keep Text Only Pastes just the text - available for table or Excel content. |
You can also paste content using "Ctrl + V". In this case, you can make changes to the pasted object by pressing the Ctrl key to get access to the paste options. Note that these options are available only immediately after pasting. If you perform some other action, you will not be able to make changes based on the paste options.
Find & Replace Content in Powerpoint 2010
PowerPoint offers its users the ability to search for specific text and if required replace it automatically. This is a very useful tool when you need to review a very large presentation or correct the same error in multiple places in the slide. Given below are the steps to find and replace text in PowerPoint. Although, you can only use this function for text, the text itself can be present in a text box, in another shape, as a WordArt, in SmartArt or tables.
Finding Content
The following steps will show you how to find content in PowerPoint.
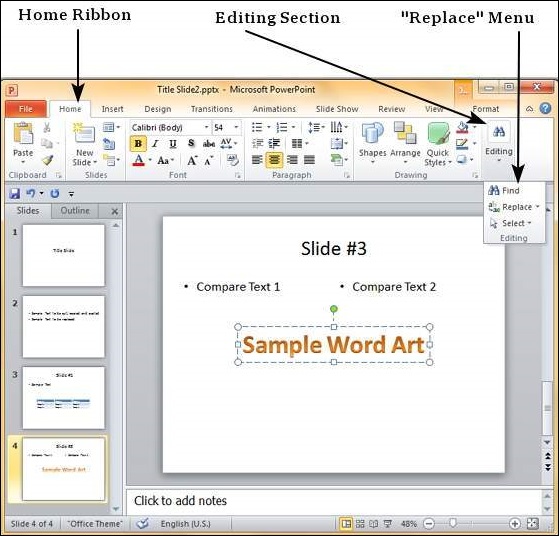
Step 1 − In the Home tab, under the Editing section click on Find.

Step 2 − Type the text you want to search in the "Find what:" field.
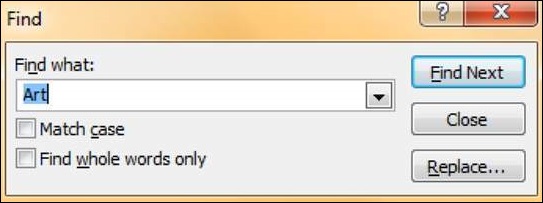
Step 3 − You can narrow your search by selecting "Match Case" - to find exact case match - and "Find whole words only" - to find whole words and not words where typed word is just a part of the word.
Step 4 − Press on "Find Next" to find the next occurrence of the search word.
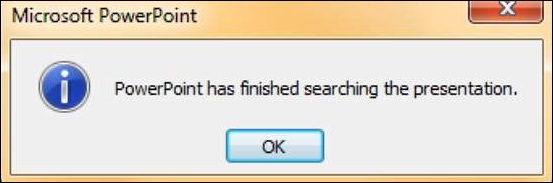
Step 5 − The Find dialog does not disappear after finding the first instance, so you can keep pressing "Find Next" multiple times till you reach the end of the search. At this point, you will receive a message from PowerPoint indicating the end of the search.
Replacing Content
Here are the steps to replace content in PowerPoint.
Step 1 − In the Home tab, under the Editing section click on the Replace button.
Step 2 − Type the text you want to replace in the "Find what:" field and the replaced text in "Replace with:" field
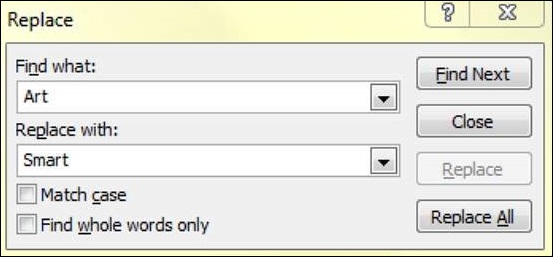
Step 3 − You can narrow your search by selecting "Match Case" - to find the exact case match - and "Find whole words only" - to find the whole words and not words where typed word is just a part of the word.
Step 4 − Press on "Find Next" to find the next occurrence of the search word. PowerPoint will show you the next occurrence and you can then click on "Replace" to replace the word. If you want to skip the occurrence, you can press "Find Next" again without pressing "Replace"
Step 5 − The Replace dialog does not disappear after finding the first instance, so you can keep pressing "Find Next" multiple times till you reach the end of the search. At this point, you will receive a message from PowerPoint indicating the end of the search.
Undo Edited Changes in Powerpoint 2010
Like any other program, there are times when you may want to undo some of the changes you made to the slides. PowerPoint offers the "Undo/ Redo" option to facilitate this. While working with the "Undo/ Redo" options, you must remember that these will always be sequential which means you can only undo actions in the order they were executed. You cannot undo the last action, retain the remaining 10 actions and undo the eleventh one. If you want to undo the eleventh action, all the subsequent 10 actions will also be undone.
To undo the last action, click on the Undo button in the PowerPoint Quick Access bar.

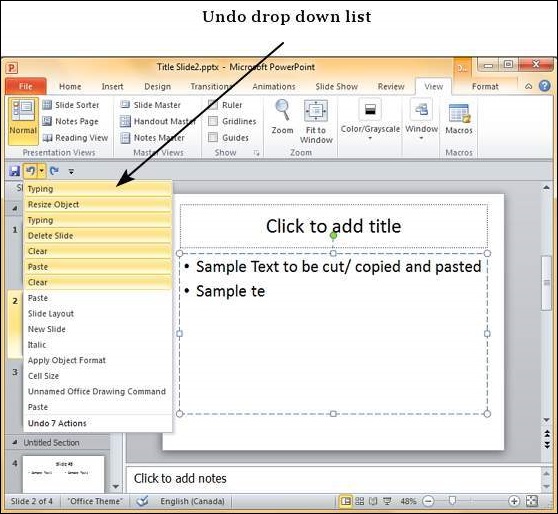
You can keep clicking on this button repeatedly to undo the series of actions; however a more graceful way of undoing multiple actions is to use the dropdown next to the undo button. Here you can select the list of actions you want to undo by sliding your cursor on top of the actions and click on them.
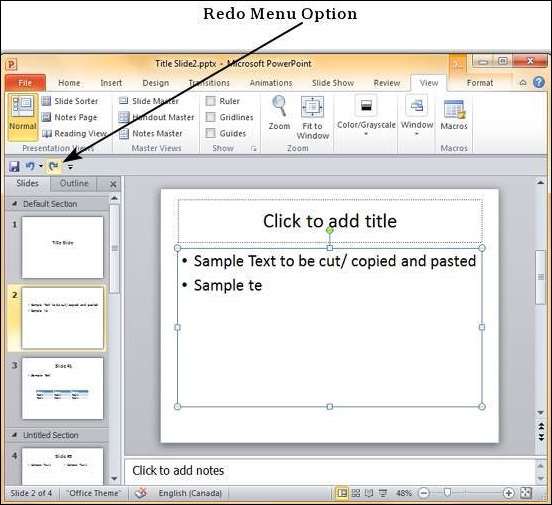
Redo is an option available only after you have undone at least one action. The redo follows the same logic as the undo option, except in the reverse order. You can click on the redo button one or more times to redo previously undone action in the sequence. You do not have the dropdown option with redo though.
Spelling Check in Powerpoint 2010
One of the best proofing tools available in PowerPoint is the spelling check. This is an automated proofing feature which will review the entire presentation for errors. To use this feature, you need to first set the Proofing language from the Language section under the Review ribbon.
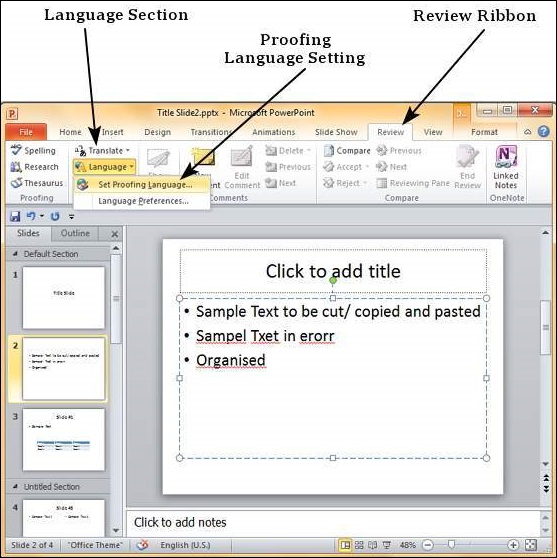
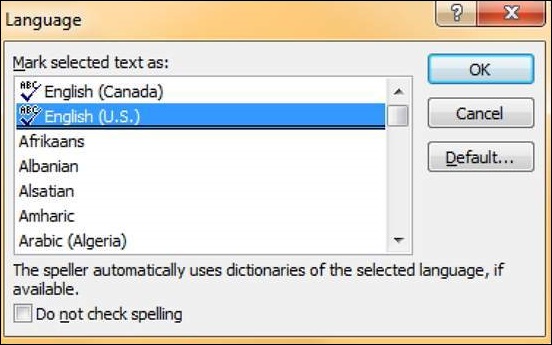
In the Language dialog, you can select the language you want to use for your presentation. If you have some content selected, you can click OK and select it for just that section. If you want to use the selected language for the entire presentation you should click default.
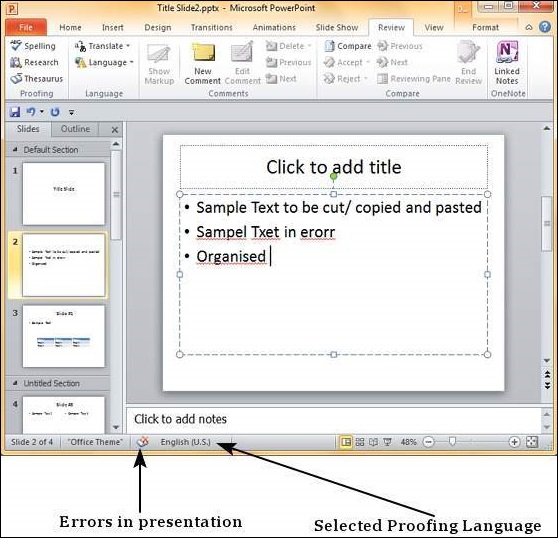
Once the proofing language is set you can see it at the bottom of the PowerPoint window. If there are proofing errors in the presentation, you will also see an icon of a book with a red cross on top of it.
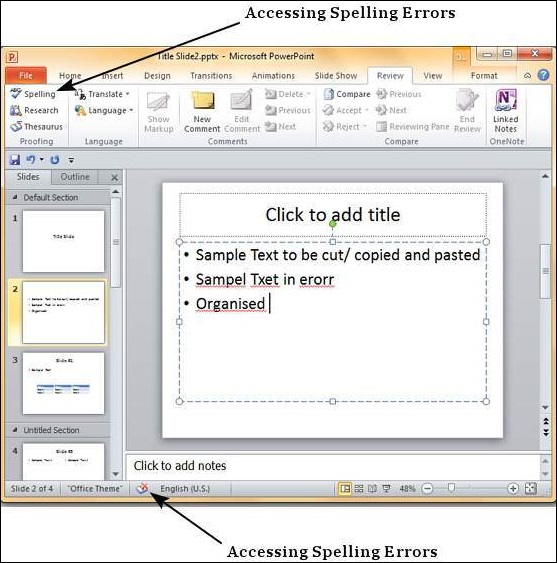
You can review the errors in the presentation by clicking on the red cross at the bottom of the window or by clicking on "Spelling" under the Proofing section in the Review ribbon.
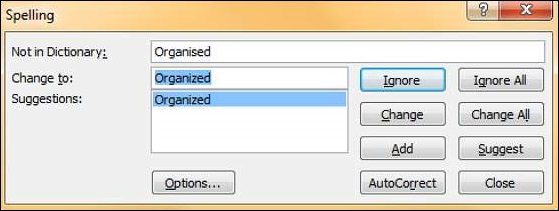
From the Spelling dialog, you can take the necessary actions to ignore, correct or edit the errors in the presentation. The table below describes the various options you have in the Spelling dialog.
| S.No | Spelling Dialog Option & Description |
|---|---|
| 1 | Ignore Ignores the error for the current instance. |
| 2 | Ignore All Ignores the error for all the instances in the presentation. |
| 3 | Change Accepts the suggested change for the current instance. |
| 4 | Change All Accepts the suggested change for all the instances in the presentation. |
| 5 | Add Uses the first suggested word each time you click Add. |
| 6 | Suggest Includes this word in the PowerPoint dictionary. |
| 7 | AutoCorrect Automatically corrects similar errors going forward. |
| 8 | Close Closes the Spelling dialog. |
| 9 | Options Sets up how PowerPoint should proof the presentation. |
Content Translation in Powerpoint 2010
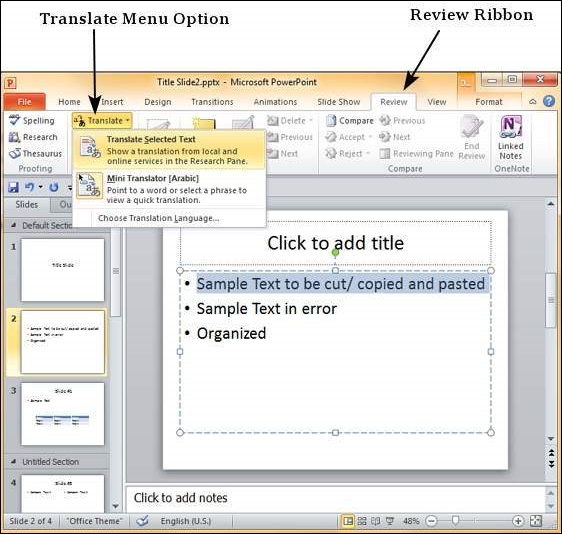
One of the newer features in PowerPoint is the content translation. This feature allows you to select content and have it translated into a different language. The following steps will help you translate content in PowerPoint.
Step 1 − Select the text to be translated and click on Translate - Translate Selected Text under the Language section of the Review ribbon.
Step 2 − In the research sidebar, the "From" language is set to default language settings for the content. The "To" language is set to the alphabetically first language supported by PowerPoint.
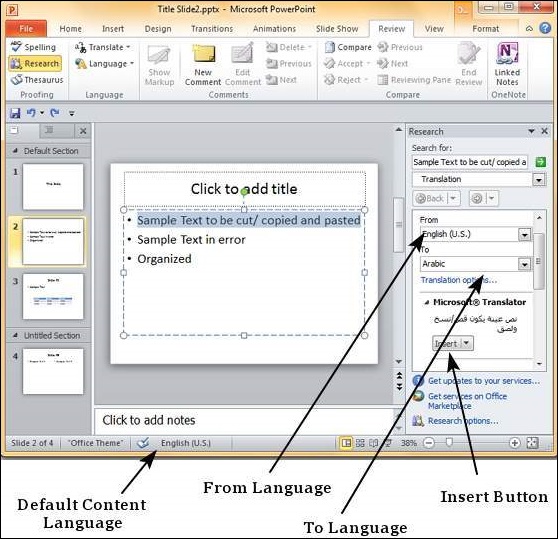
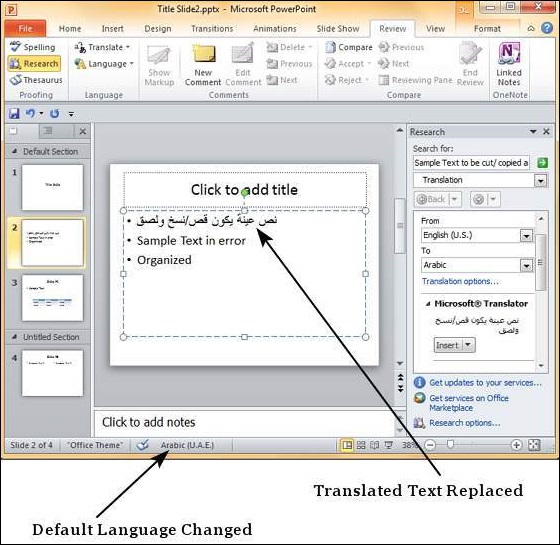
Step 3 − From the "To" language dropdown, select the language you want the selected portion of text translated into. Click on Insert to replace the selected text from the default language to the new translated text.
Step 4 − Notice that if you replace the portion of text using translation, the default language for the replaced text also changes automatically.
MS Powerpoint - Setting Language Type
PowerPoint is a multi-lingual tool; it is evident that there will be an option to set the default language to be used in the slides. The following steps will help you set the language type in PowerPoint.
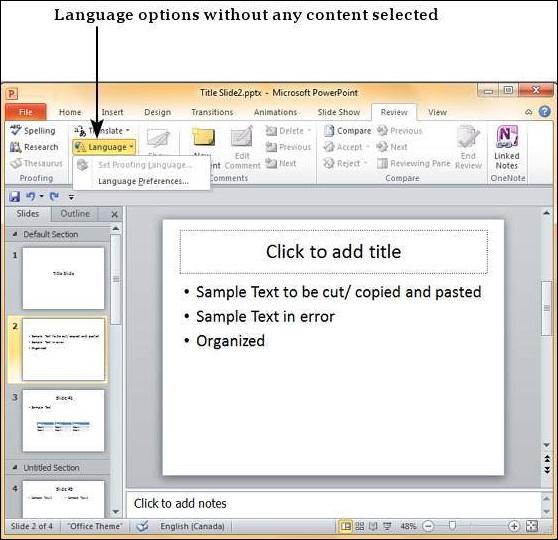
Step 1 − Under the Review ribbon, in the Language group, click on Language
Step 2 − If you have not selected any content, you will be able to just set the Language Preferences
Step 3 − If you have selected a portion of content with text in it, you can also set the proofing language.
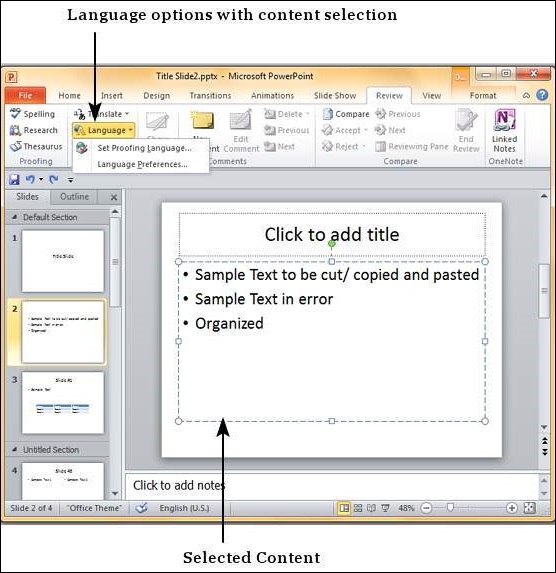
Step 4 − When you select the "Set Proofing Language", you get the language dialog. Wherein, you can select one of the many languages available in PowerPoint. If you are selecting a language just for the selected text, click OK. If you are selecting a language for the entire presentation click Default. You can also check the "Do not check spelling" checkbox, if you do not want PowerPoint to automatically check for spelling errors based on dictionaries available.
Step 5 − When you select "Language Preferences", you get the PowerPoint Options dialog where you can change the language settings like loading dictionaries for various languages, prioritizing the display and help languages, and the Screen tip language setting.

Duplicating Content in Powerpoint 2010
PowerPoint is a multi-content program that supports many non-text content types like shapes, charts, pictures, clip arts, SmartArt and multimedia files. While working with the content, it may sometimes be required to duplicate the content as part of the presentation development. PowerPoint offers options to duplicate the non-text content using the cutcopy-paste features.
Cut-Paste Procedure
In this procedure, the original content is moved to a different location. When you use the Cut option, you can also create multiple copies, it is just that the content in the original location is lost. The following steps will make you understand how to work with the cutpaste procedure.
Step 1 − Select the content you want to move. Right-click on it to access the Cut option.
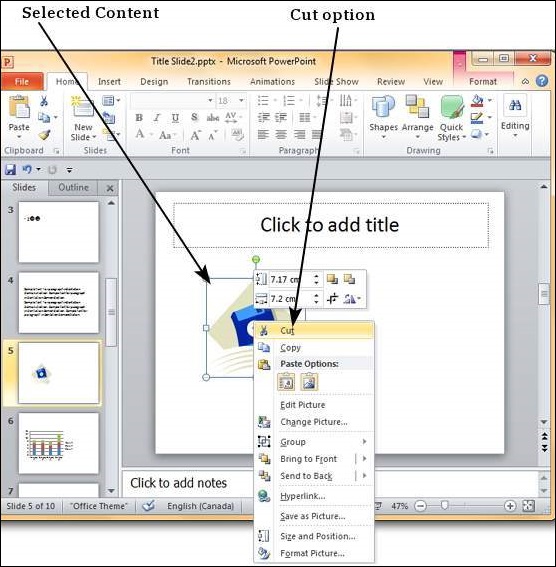
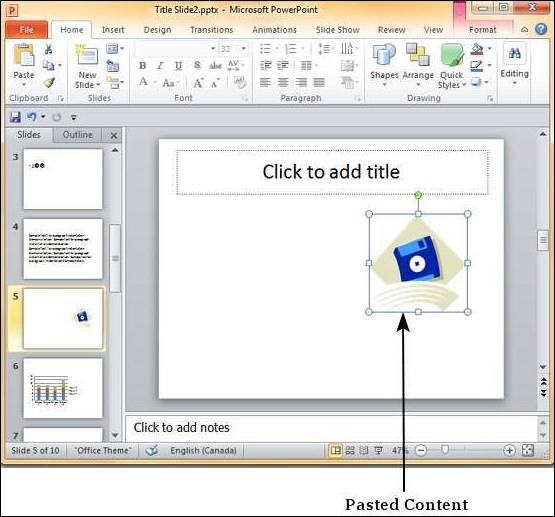
Step 2 − Now move the cursor to the location where you want the content to be moved and right-click to access the Paste options.
Step 3 − Select one of the paste options to paste the content.
Copy-Paste Procedure
This is exactly similar to the cut-paste procedure except that the original content is retained in the original location.
Step 1 − Select the content you want to move. Right-click on it to access the Copy option.
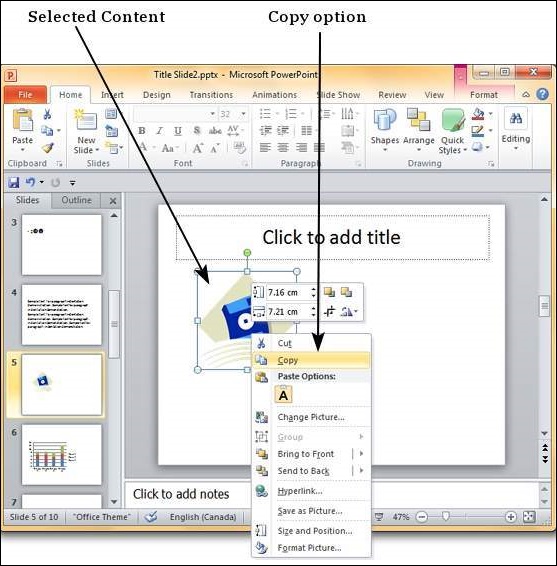
Step 2 − Now move the cursor to the location where you want the content to be moved and right-click to access the Paste options.
Step 3 − Select one of the paste options to paste the content.
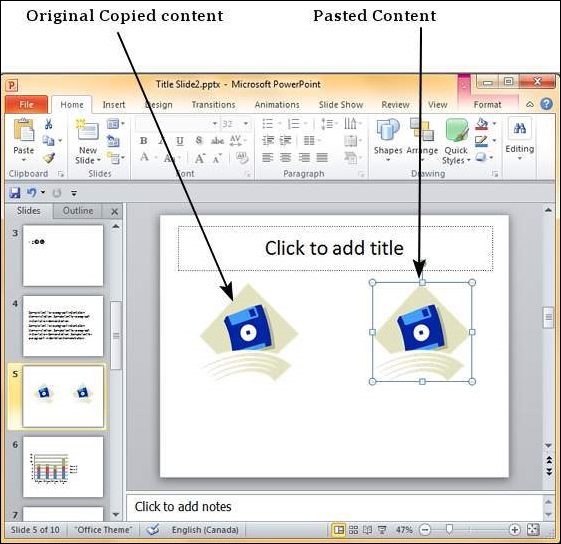
The Use Destination Theme option retains the content as the original content, but uses the destination location theme settings. The Picture option just pastes the content as an image with original settings. Once pasted as a picture you cannot change the parameters of the original content; for example, if you pasted a chart as an image, you cannot edit the data on the chart image.
Special Characters in Powerpoint 2010
PowerPoint supports the insertion of special characters. This allows the users to adjust the font characteristics of these characters just like any other text giving them greater flexibility in terms of the presentation design. The following steps will help you insert special characters.
Step 1 − In the Insert Tab, under the Symbols group, click on the Symbol command.
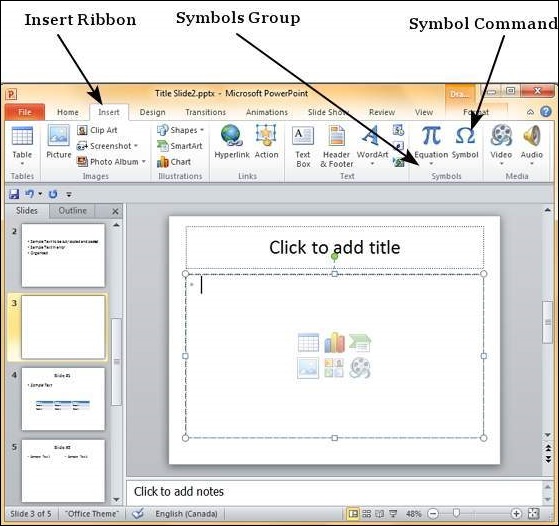
Step 2 − In the Symbol dialog, select one of the special characters you want to insert in the presentation.
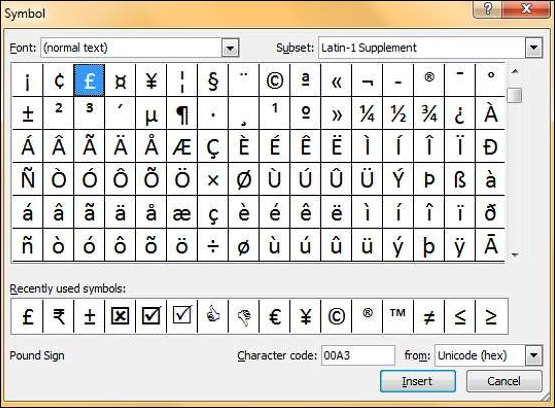
Step 3 − If you cannot find the character you are looking for, you can change the font subset from the dropdown and look at a new set of characters.
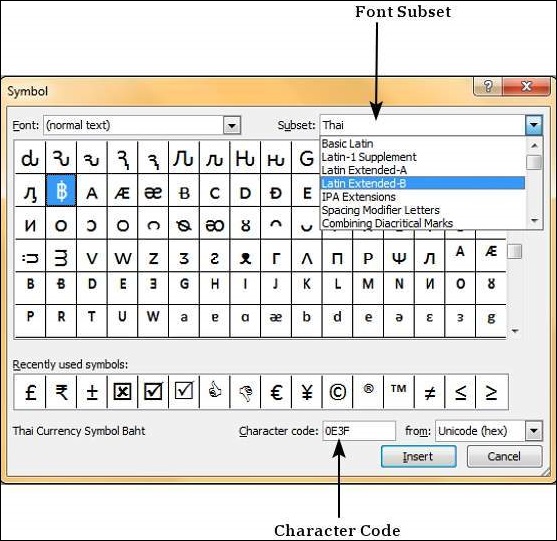
Step 4 − If you know the character code of the symbol, you can enter it in the Character Code field and search for it.
Step 5 − To insert a character, you can either double-click on it in the Symbol dialog or, select it and press the Insert button.
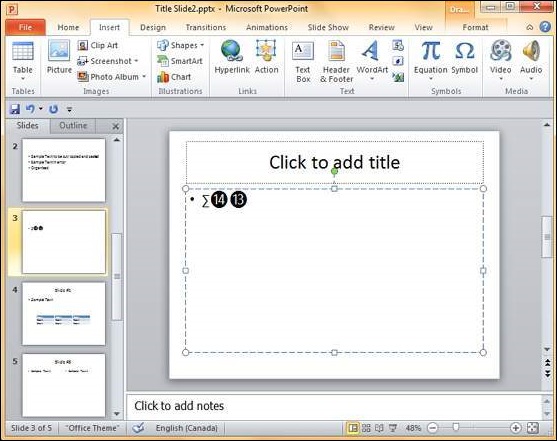
Step 6 − The Symbol dialog does not disappear after you insert a character, which means you can add as many characters as you want from this dialog.
Step 7 − Once you are done, you can click Close to close the dialog.
Slides Zoom In-Out in Powerpoint 2010
PowerPoint allows users to zoom in and zoom out of the slides to help focus on specific sections or look at the entire slide as a whole. The minimum zoom supported by PowerPoint is 10% and the maximum is 400%. The zoom bar is located in the bottom right corner of the PowerPoint window.
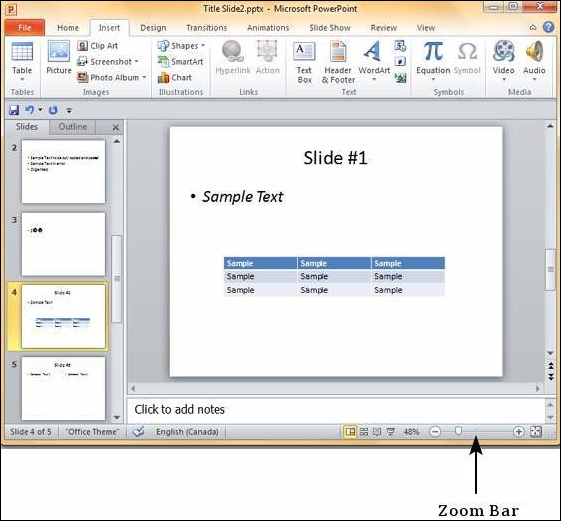
To change the zoom settings from the zoom bar, you can click on the marker and drag it. Dragging to the left will zoom out and to the right will zoom in.
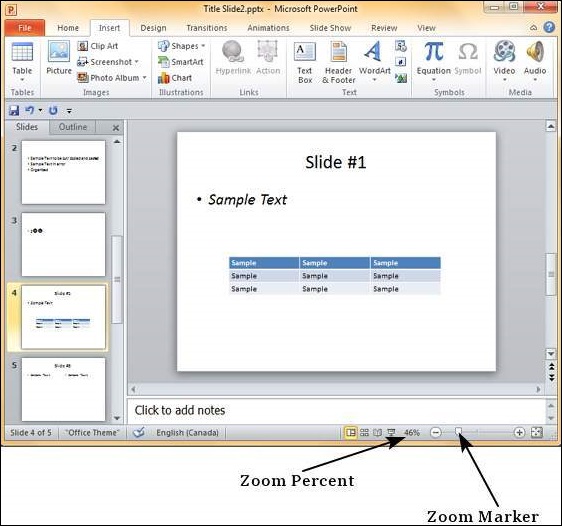
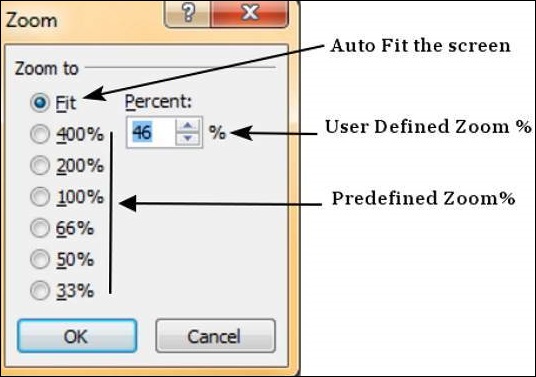
Alternately, you can click on the zoom percent to open the zoom dialog. Here you have the option to auto-fit the slide in the screen, or choose from six pre-defined zoom settings, or define your own zoom setting.
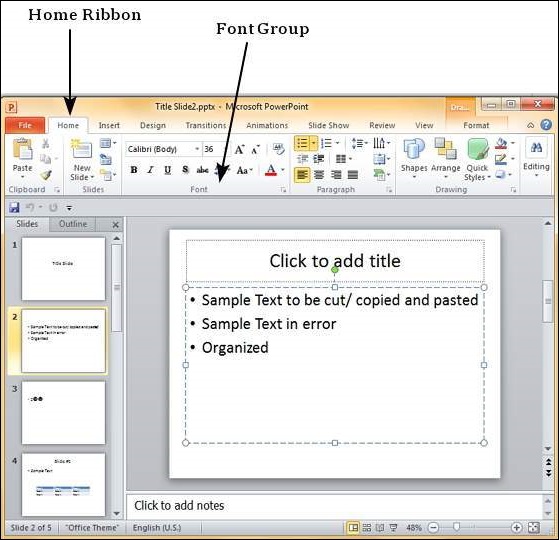
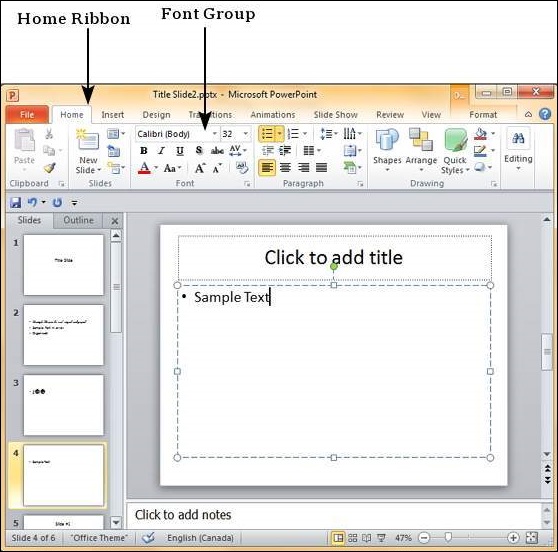
Font Management in Powerpoint 2010
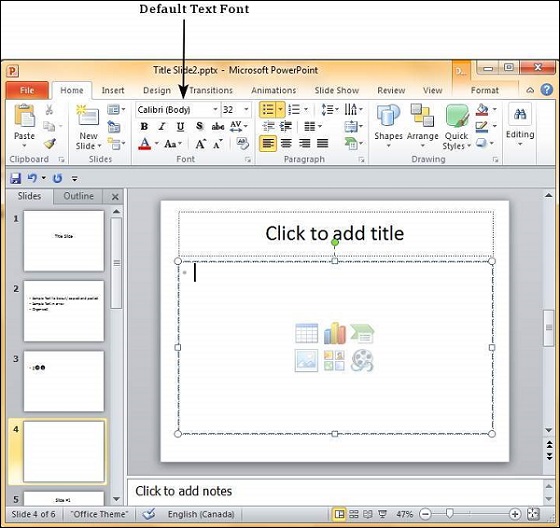
One of the key elements of any good presentation is the text, hence managing the fonts in PowerPoint is vital to designing an impressive slideshow. PowerPoint offers extensive font management features to cover various aspects of fonts. The font management can be accessed from the Home ribbon in the Font group.
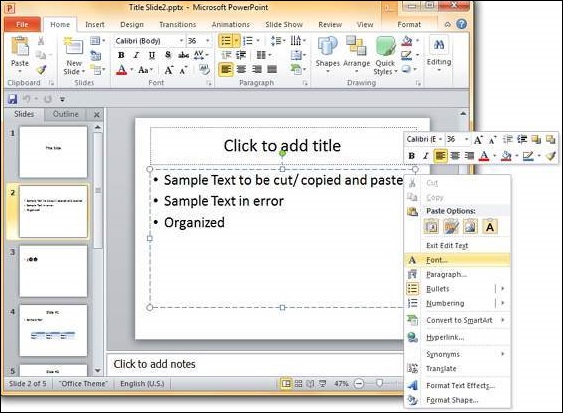
You can also access font management features by selecting a text box, right-clicking and selecting Font.
This opens up the Font dialog which contains all the font management features available under the font section in the Home ribbon.
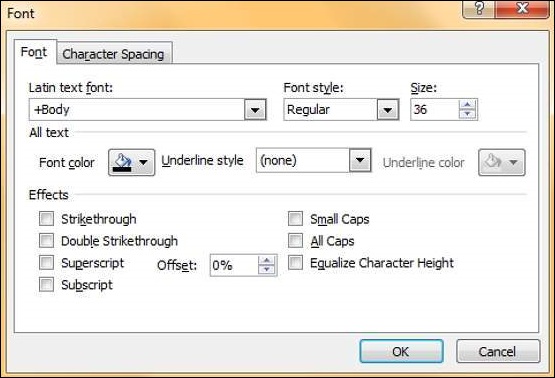
The table below describes various font management features available in PowerPoint.
| S.No | Features & Description |
|---|---|
| 1 | Font Type Defines the font type like Arial, Verdana, etc. |
| 2 | Font Size Defines the font size. Besides, there are icons to increase and decrease the font size in steps in the Font group. |
| 3 | Font Style Defines font styles like Regular, Bold, Italics or Underlined. |
| 4 | Font Color Specifies the font color. |
| 5 | Font Effects Defines effects like shadow, strikethrough, subscript, superscript, etc. |
| 6 | Character Spacing Specifies character spacing like loose, tight, normal, etc. |
Setting Text Fonts in Powerpoint 2010
PowerPoint offers a wide range of pre-built fonts to choose from. Depending on the purpose of the presentation you may want to choose a more casual font or a formal one. This section will look at the steps to set the text fonts.
Step 1 − The default font in PowerPoint 2010 is Calibri.
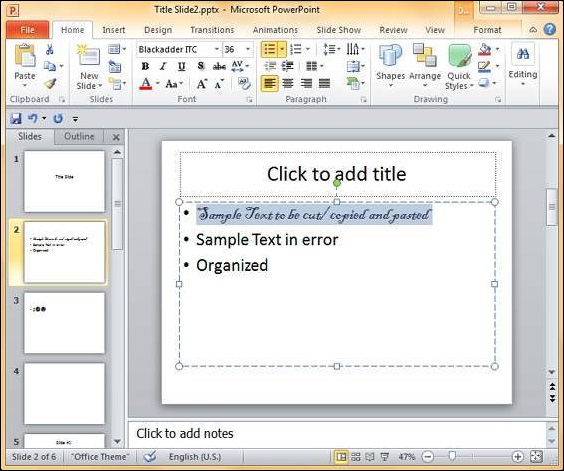
Step 2 − To change the text font, select that portion of text the font of which needs to be changed. If you select the entire text box or shape, the changes will apply to all the text in the selection. If you select specific text, the changes will apply to selection only.
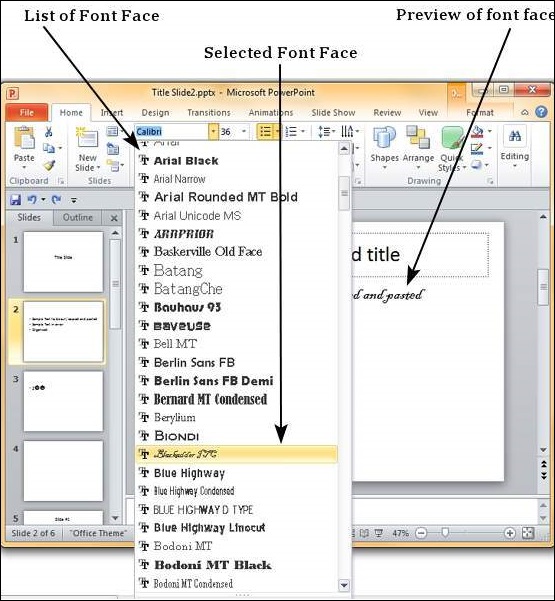
Step 3 − In the Font group, under the Home ribbon, click on the font face dropdown.

Step 4 − Scroll through the list of font faces to pick the one that suits your needs. As you move your cursor over the fonts, the selection will change accordingly to give you a preview.
Text Decoration in Powerpoint 2010
In this chapter, we will understand how to decorate text in PowerPoint 2010. PowerPoint offers many text decoration features and adds to the aesthetic sense of a presentation. These features can be accessed from the Home ribbon under the Font group.
Given below are the various font decoration features and their functions in PowerPoint.
| S.No | Icon & Description |
|---|---|
| 1 | 
Makes the font face bold |
| 2 | 
Makes the font face italics (slanted font) |
| 3 | 
Underlines the font face |
| 4 | 
Adds shadow to the font face |
| 5 | 
Strikes through the font face |
| 6 | 
Adjusts the character spacing for the font. Predefined settings are very tight, tight, normal, loose and very loose. There is a user defined space setting available too. |
Besides these, there are some other font decoration features that can be accessed from the Font dialog. To open the Font dialog, right-click on the selected text and select Font.
The table below describes the additional text decoration features in the Font dialog.
| S.No | Icon & Description |
|---|---|
| 1 | Double Strikethrough Adds two strike lines over the text |
| 2 | Superscript Raises the text above the normal text. For example, the use of "nd" in 2nd |
| 3 | Subscript Shrinks the below the normal text. For example, the '2' in H2O the chemical formula of water |
| 4 | Small Caps Changes the entire text to small caps |
| 5 | All Caps Changes the entire text to capital letters |
| 6 | Equalize Character height Adjusts the characters so that all are of the same height regardless of the caps setting |
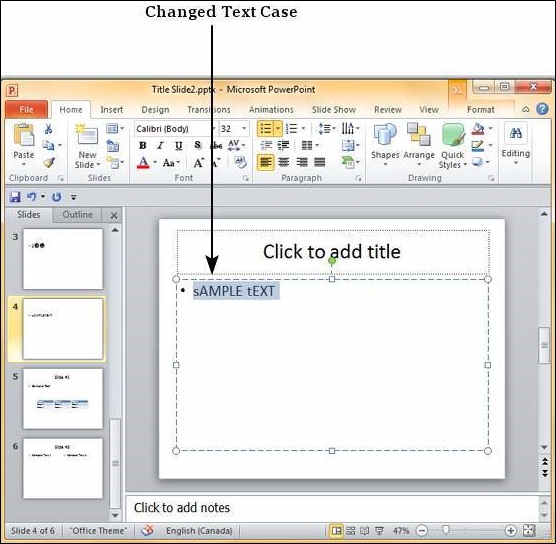
Change Text Case in Powerpoint 2010
The following steps will help you change the text case.
Step 1 − Select the text the case of which you want to change.
Step 2 − Go to the Font group under the Home ribbon.
Step 3 − From the Change Case dropdown, select the case you want to use for your text.
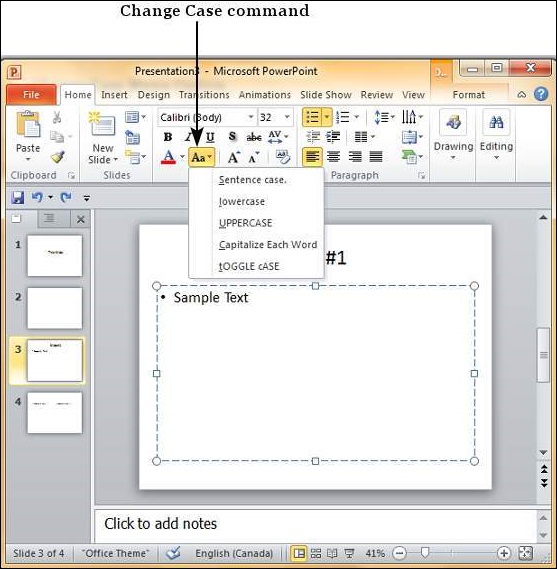
Step 4 − Click on your choice to change case for the selected text.
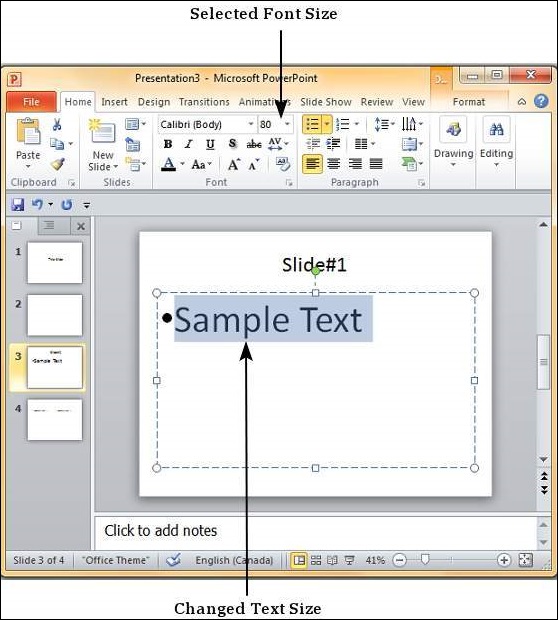
Change Text Size in Powerpoint 2010
The following steps will help you change the text size.
Step 1 − Select the text the case of which you want to change.
Step 2 − Go to the Font group under the Home ribbon.
Step 3 − From the Font Size dropdown, select the size you want to use for your text.
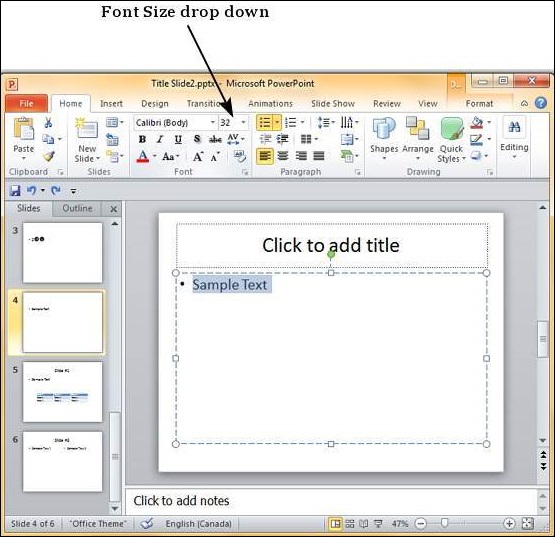
Step 4 − Click on your choice to change the font size for the selected portion of text.
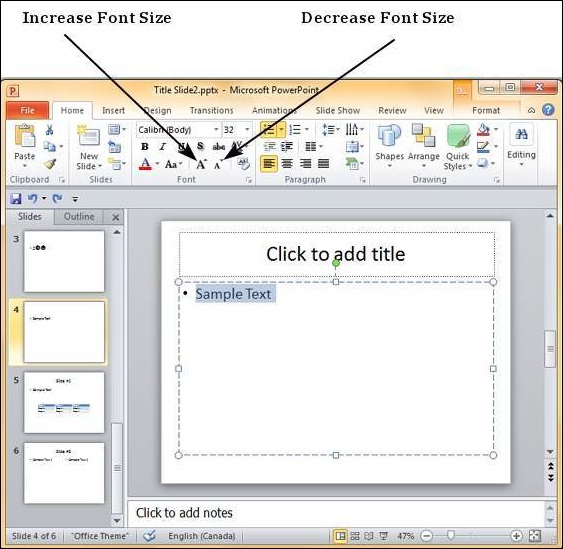
Step 5 − If you want to change the font size in steps you can also use the Increase/ Decrease Font Size options.
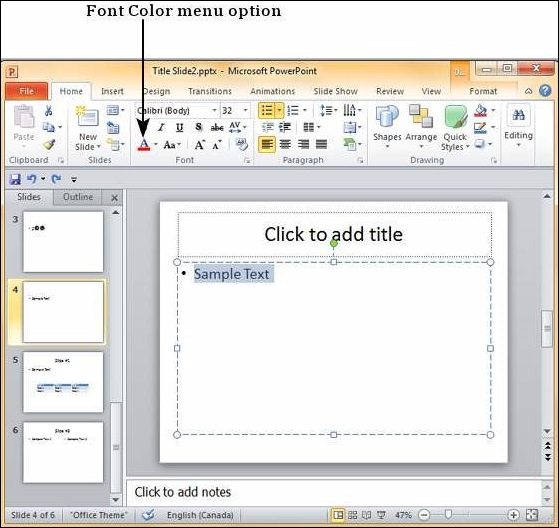
Change Text Color in Powerpoint 2010
In this chapter, we will understand how to change text color in PowerPoint 2010. The following are the steps to change text color.
Step 1 − Select the text the color of which needs to be changed.
Step 2 − Go to the Font group under the Home ribbon.
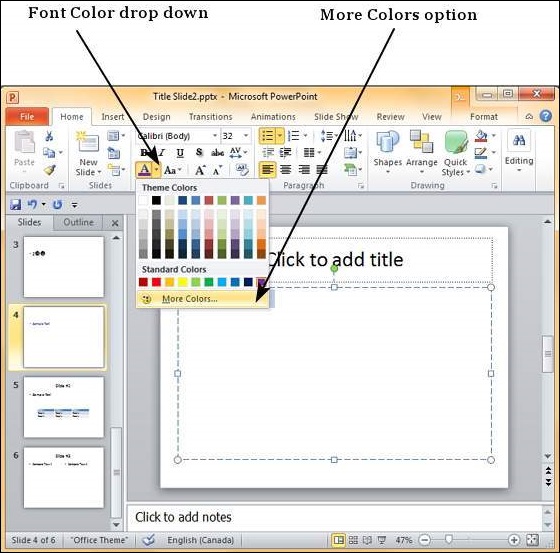
Step 3 − From the Font Color dropdown, select the color you want to use for your text.
Step 4 − Click on your choice to change the font color for the selected portion of text.
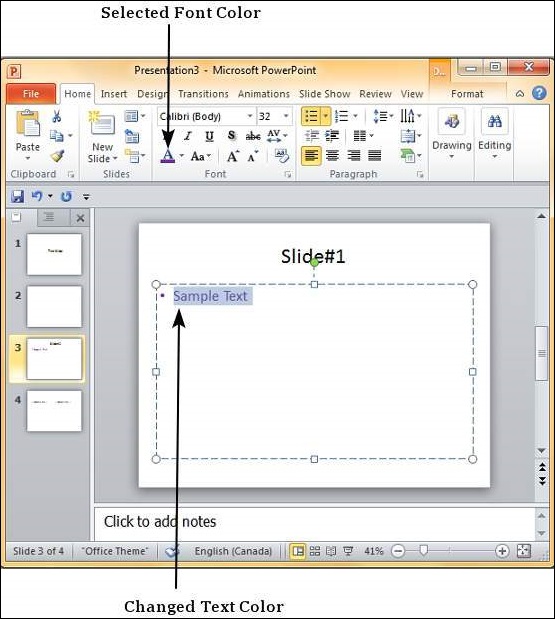
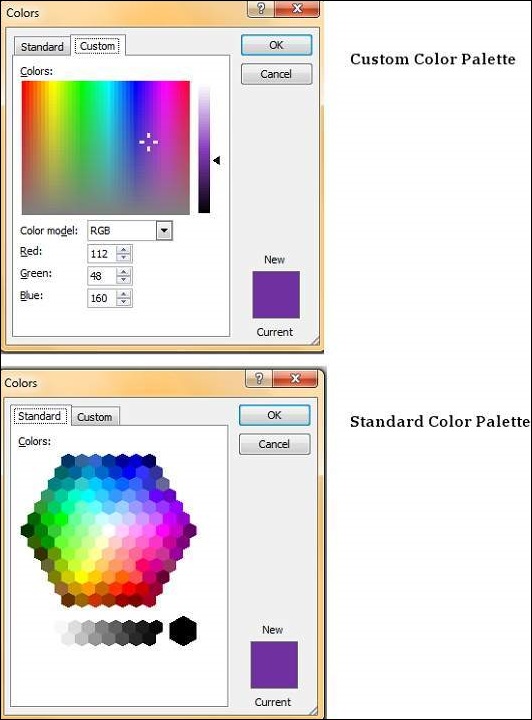
If you want to choose from a wider range of colors than what's shown in the dropdown you can click on "More Colors…"
Here you can pick from a standard color palette for a greater choice of predefined colors or create your own from the custom color palette.
Text Alignments in Powerpoint 2010
PowerPoint offers various text alignment options to create visually appealing designs and organizing the content better. The table below describes the various text alignment options available in PowerPoint.
| S.No | Alignment Icon & Description |
|---|---|
| 1 | 
Aligns the text to the left of the shape/ text box. |
| 2 | 
Aligns the text in the middle of the shape/ text box. |
| 3 | 
Aligns the text to the right of the shape/ text box. |
| 4 | 
Justifies the alignment by adjusting the character spacing so the final text looks aligned from both left and right. |
| 5 | 
Specifies text direction: horizontal (default), stacked (vertical), rotated by 90 or 270 degrees. You can also customize the text direction to other angles. |
| 6 | 
Vertically aligns the text; top, bottom or middle of the text box/ shape. |
Alignment can be done on selected portion of text in text boxes, shapes and even SmartArt. The following steps will help you align text.
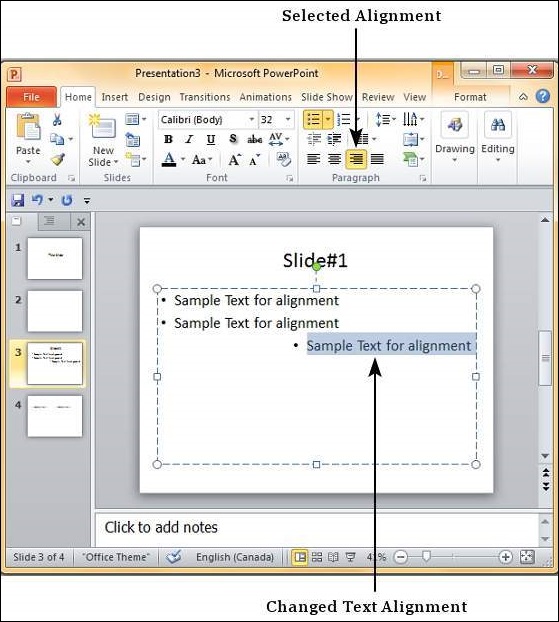
Step 1 − Select the portion of text that needs to be aligned. If you select a specific portion of text, the alignment settings will apply to that portion of text alone. If you select the entire shape/ text box, the settings will apply for the entire selection.
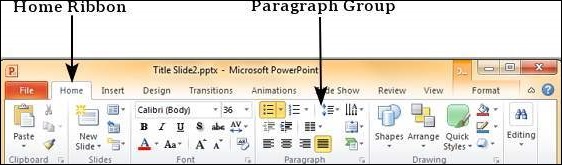
Step 2 − Go to the Paragraph group under the Home ribbon.
Step 3 − Select one of the alignment options described above to change the text alignment. Note that the default alignment for text is usually Left.
Step 4 − As long as the text is selected, you can change the text alignment multiple times.
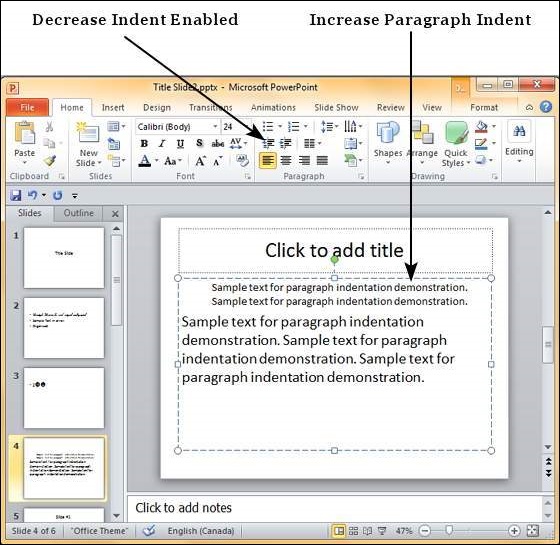
Indent Paragraphs in Powerpoint 2010
Relatively long paragraphs can get monotonous to read and this effect is accentuated in slides where the area is smaller and the contents are usually projected. Paragraph indentations can help ease the strain on eyes and also help present the content in a visually appealing way. This chapter will discuss the paragraph indentations available in PowerPoint.
Step 1 − Select the text content to be indented. Unlike most other settings, indentation works at a paragraph level, so regardless of what text you select the indent settings will apply to the entire paragraph. However, if the text box has multiple paragraphs you can have different indentations for different paragraphs.
Step 2 − Go to the Paragraph group under the Home ribbon.
Step 3 − Select one of the indentation options. You will notice that by default the text is set at the lowest indentation level, so you will not be able to decrease it further. You must increase indentation the first time you use it.

Step 4 − Once you have increased the indent, the decrease indent option is enabled.
Set Line Spacing in Powerpoint 2010
While dealing with a lot of textual content, especially during projected presentations, it is a good idea to space the lines further apart to improve the readability of the overall content. PowerPoint offers line spacing options to help you change the spacing between lines in the text. Like the indentation, these settings apply at a paragraph level. Given below are the steps to set the line spacing in PowerPoint.
Step 1 − Select the text content to be spaced. You can either select the entire paragraph or just place the cursor within the paragraph.
Step 2 − Go to the Paragraph group under the Home ribbon.
Step 3 − Select one of the line spacing option from the dropdown list to apply one of predefined spacing options.
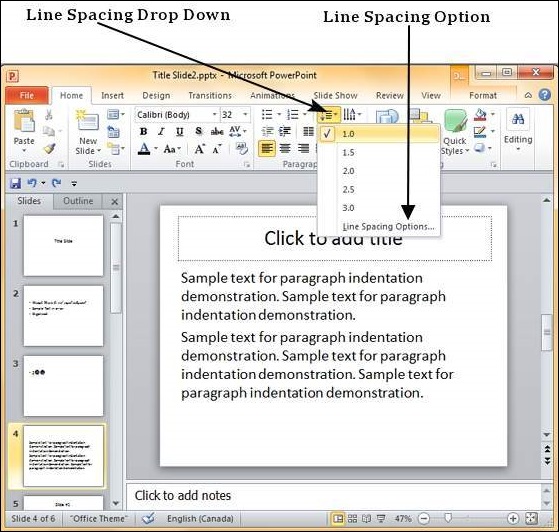
Step 4 − To customize the spacing, you can click on "Line Spacing Options…" This will launch the Paragraph dialog.
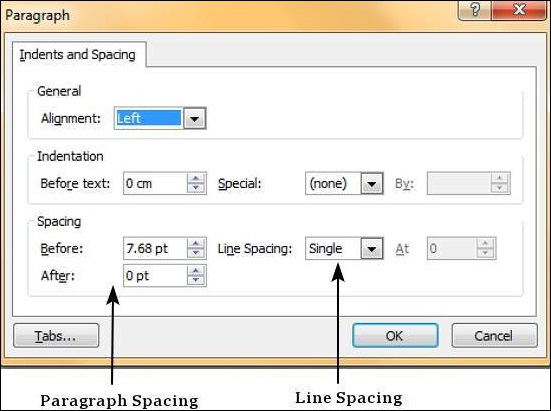
Step 5 − The spacing section in the Paragraph dialog has two settings. The Before and After are the spacing for paragraph as a whole, while Line Spacing is the spacing for lines within the paragraph itself.
Borders and Shades in Powerpoint 2010
One can change the borders and shading for most of the content in PowerPoint 2010. Let’s see how it is done
Applying Borders
The following are the steps that will help you apply borders in your presentation.
Step 1 − Select the object (text box, image, chart, picture, etc.) to which you want to apply the border.
Step 2 − Go to the Drawing group under the Home ribbon.
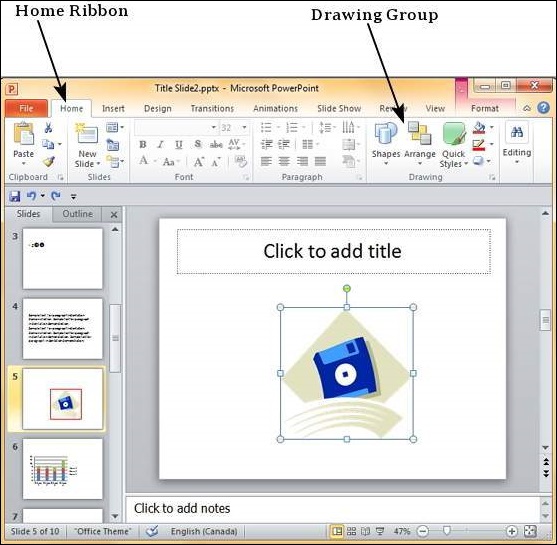
Step 3 − Click on the Shape Outline to choose the border settings.
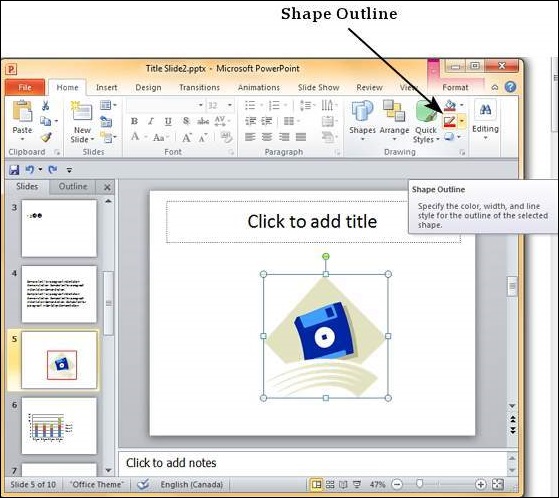
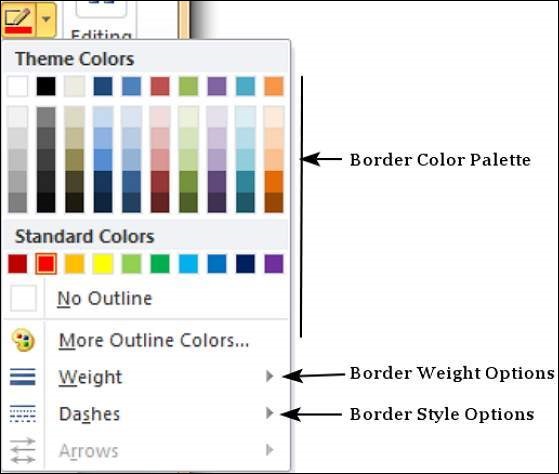
Step 4 − Use the color palette to choose the border color. You can choose More Outline Colors to get access to additional color choices
Step 5 − Use the Weight dropdown to define the thickness of the border.
Step 6 − Use the Dashes option to define the border style.
Applying Shades
The following steps will help you apply shades to your presentation.
Step 1 − Select the object (text box, shape, chart, etc.) to which you want to apply the shades.
Step 2 − Go to the Drawing group under the Home ribbon.
Step 3 − Click on the Shape Fill to choose the shade settings.
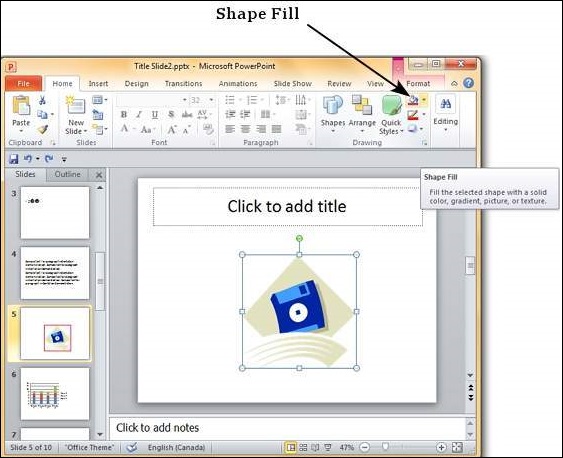
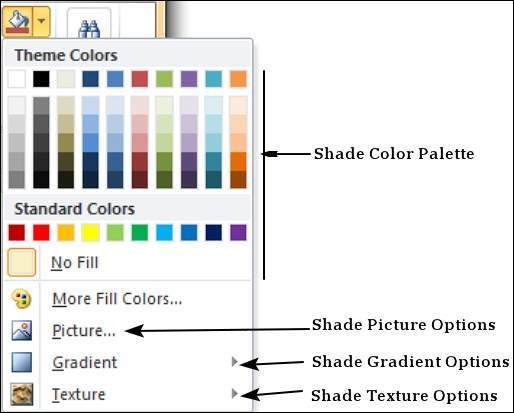
Step 4 − Use the color palette to choose the shade color. You can choose More Outline Colors to get access to a choice of colors.
Step 5 − Use the Picture to add a picture as the background rather than a color.
Step 6 − Use the Gradient option to add color gradient in the background. You can use the pre-defined gradients or click on "More Gradients…" to customize the shading with gradient colors.
Step 7 − Use the Texture option to add a pre-defined texture instead of a color shade.
Apply Formatting in Powerpoint 2010
One of the most powerful tools in Microsoft Office is the application of formatting feature. This feature basically lets you define the right format once and apply the same to a series of objects in the rest of the presentation or any other file. While working with large presentations or just working on slides for a long time, if you ever need to make a change in the style and want it applied across multiple content this is the tool to use.
The following are the steps to apply formatting to your presentation −
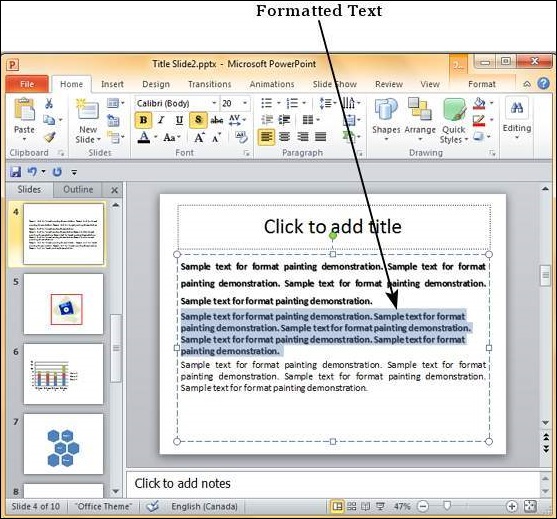
Step 1 − Select the content you want to copy the formatting from.
Step 2 − Go to the Clipboard group under the Home ribbon.
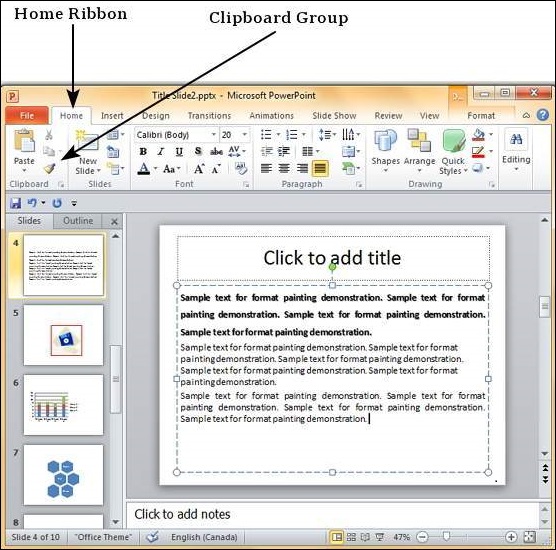
Step 3 − Click on the Format Painter icon.
Step 4 − Select the content you want to format.
Here are some key aspects about the Format Painter −
If you click on the Format Painter icon just once, the formatting will be copied just once.
If you click on the Format Painter icon twice quickly, you can copy the formatting multiple times.
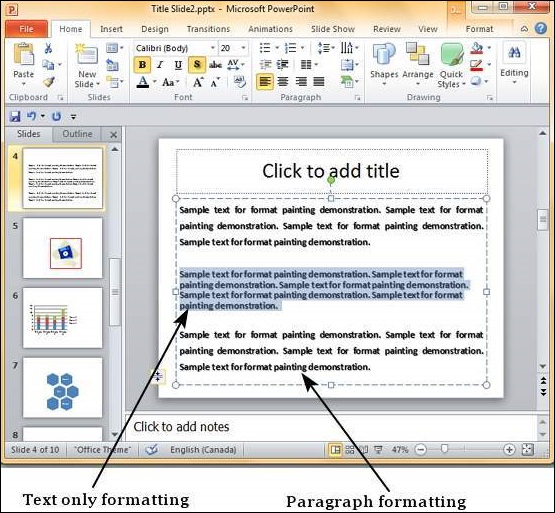
If you want to copy just the text formatting and not the paragraph features, ensure that you select just the sample text and not the entire paragraph.
If you want to copy paragraph and font formatting, you must select the entire paragraph.
Using Slide Master in Powerpoint 2010
Slide master is simple way of applying changes to the entire slide. Every presentation has at least one slide master, but you can have more than one. Using features like copy/ paste and format painting you can make changes to different sections within the presentation to make them look similar, however, if you want to use a theme and background throughout the slide, using the slide master is a simpler and more graceful way of approaching it.
Given below are the steps to customize your slide master.
Step 1 − Go to the Master Views group under the View ribbon.
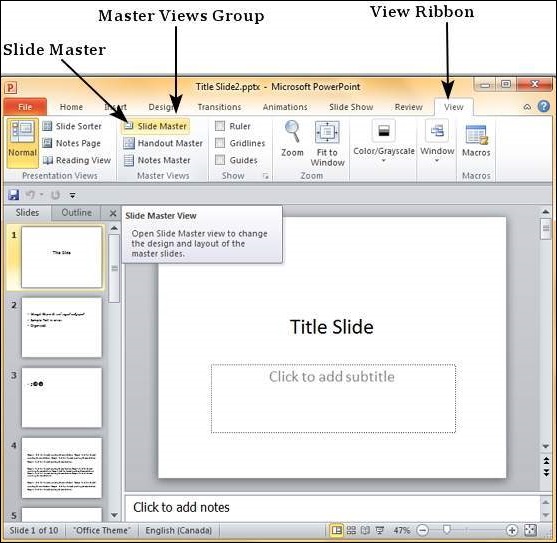
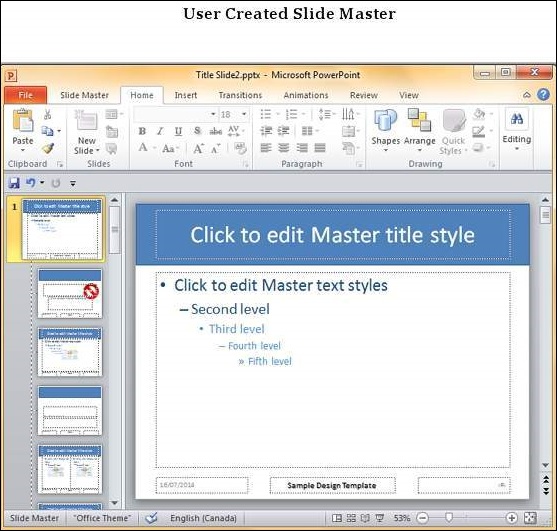
Step 2 − Click on Slide Master to open the Slide Master Ribbon. The top most slide in the left sidebar is the Master slide. All the slides within this master template will follow the settings you add on this master slide.
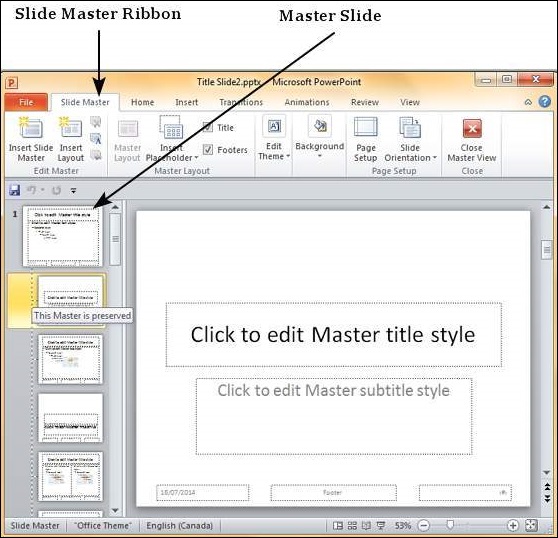
Step 3 − You can make changes to the master slide in terms of the theme, design, font properties, position and size of the title and other content using the remaining ribbons which are still accessible.
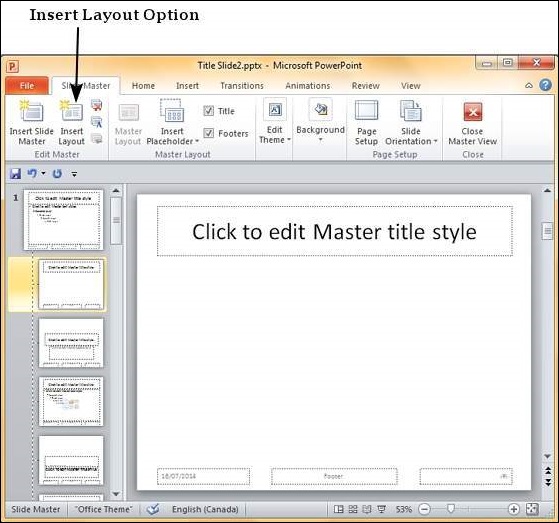
Step 4 − While PowerPoint provides some default slide layouts, you can create your own layouts by clicking on the "Insert Layout" in the Edit Master section of the Slide Master ribbon.
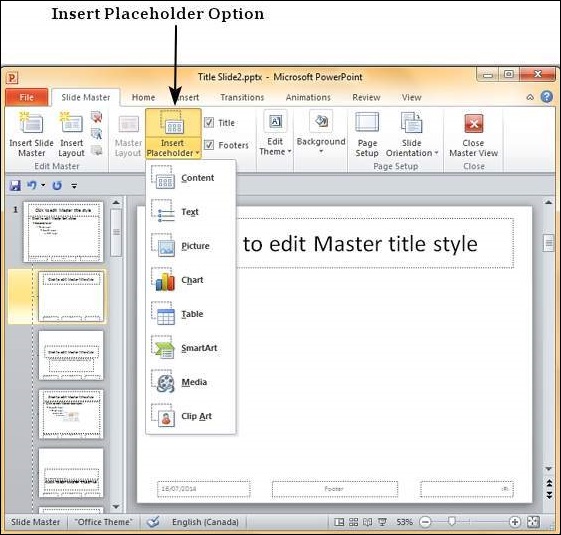
Step 5 − You can add content placeholders to the slide layouts using the "Insert Placeholder" in the Master Layout group under the Slide Master ribbon. Under the Placeholder dropdown, you can either create a generic content placeholder or specify the kind of content you want in that placeholder.
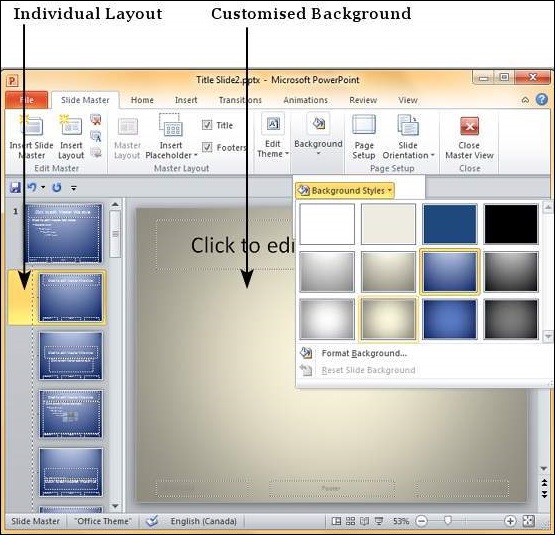
Step 6 − You can apply different themes, background and page setup settings to all the slides from the master slide
Step 7 − You can also customize individual slide layouts to be different from the master slide using the menu options available with the layouts.
Save Design Template in Powerpoint 2010
One of the best features of PowerPoint is that you can create slide masters and then save them as templates to be reused later. There are different aspects of a design which can be created and saved to ensure you can reuse the hard work you spent on creating the first copy.
Given below are the steps to save design templates.
Step 1 − Create a new design template from the Slide Master view. Depending on your needs, this template can have different colors, images, logos or symbols included in the master slide and the layout templates.
Step 2 − Go to the Edit Theme group under the Slide Master ribbon.
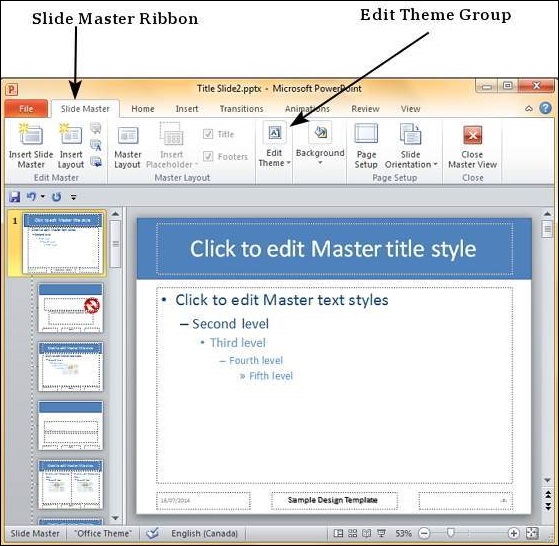
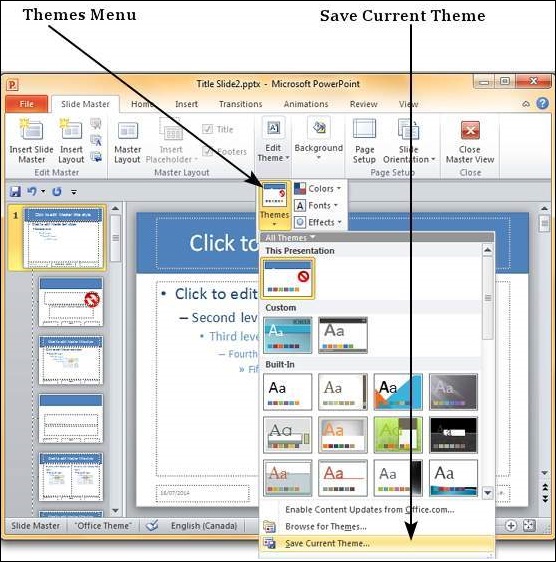
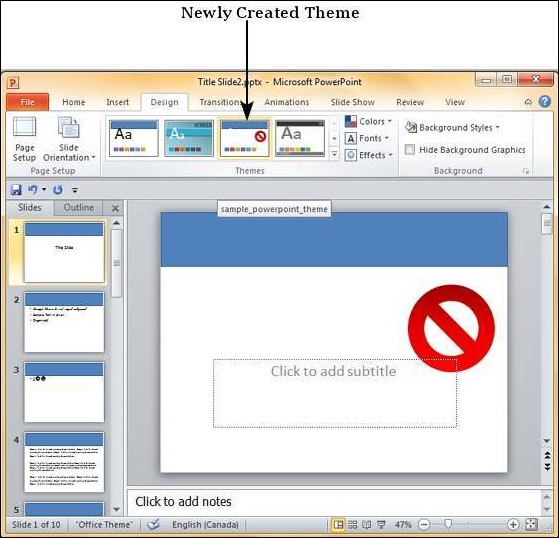
Step 3 − Navigate to Edit Themes > Themes > Save Current Theme…
Step 4 − In the Save Current Theme dialog, enter the Theme name and click Save.
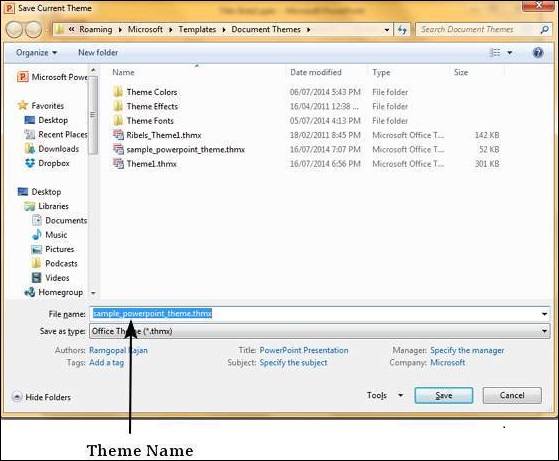
Step 5 − This template is now saved and available on your PowerPoint design template view to be applied to any presentation.
Add Pictures to Slide in Powerpoint 2010
PowerPoint supports multiple content types including images or pictures. With regards to pictures PowerPoint classifies them into two categories −
- Picture − Images and photos that are available on your computer or hard drive
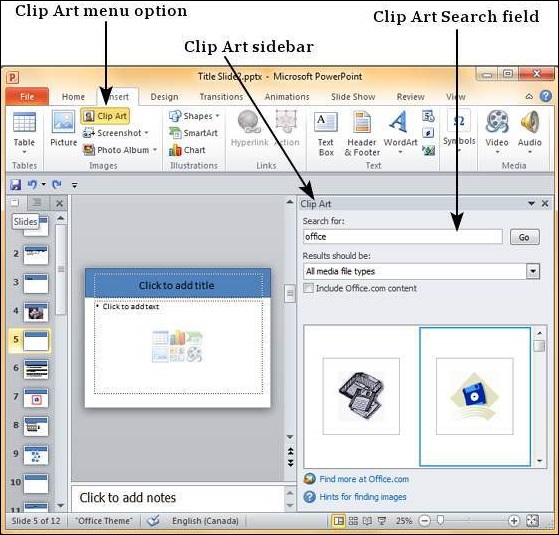
- Clip Art − Online picture collection that you can search from the clip art sidebar
Although their sources are different, both these types can be added and edited in similar fashion. Given below are the steps to add picture to a slide.
Step 1 − Go to the Images group in the Insert ribbon.
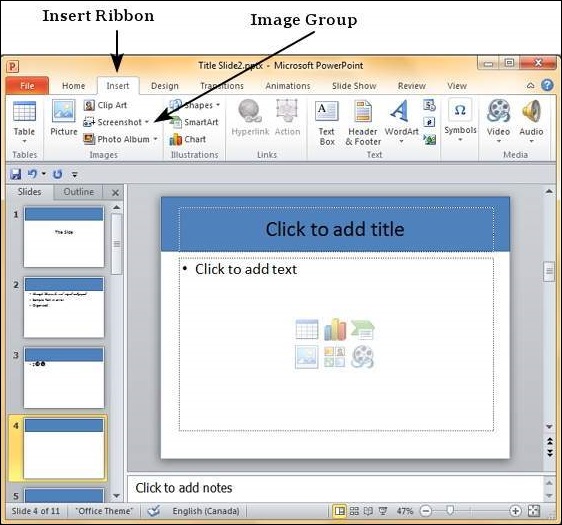
Step 2 − Click on Picture to open the Insert Picture dialog and add a picture to the slide.
Step 3 − In this dialog, you have three sections: to the left corner, you have folders that can be browsed, the section in the center shows the subfolders and files in the selected folder and to the right, you can have a preview of the selected image.
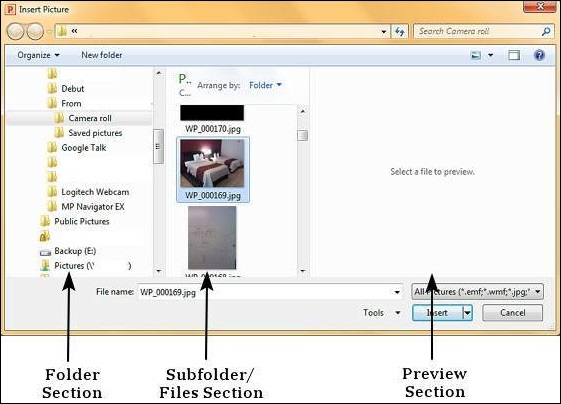
Step 4 − Select the image you want and click Open to add the picture to the slide.
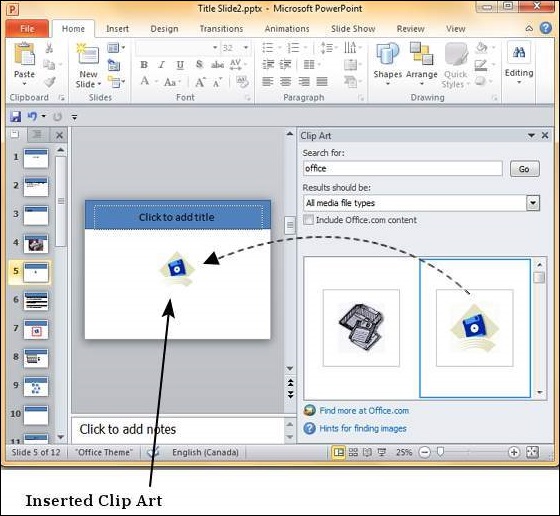
Step 5 − To add online pictures, click on Clip Art and search for keywords in the Clip Art sidebar.
Step 6 − Once you have the clipart you want to use, double-click on the image to add it to the slide.
Editing Added Pictures in Powerpoint 2010
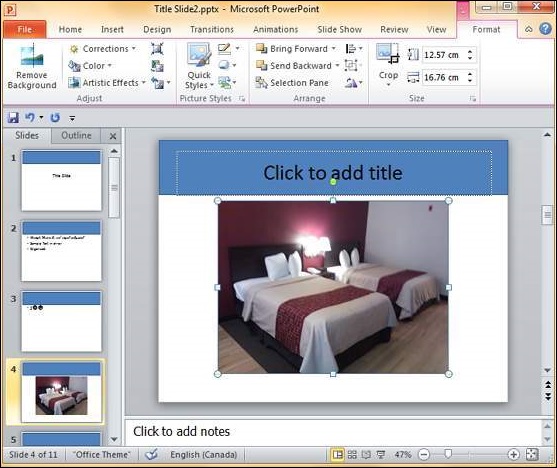
PowerPoint supports images or pictures as content and offers some standard image editing features. The picture editing features in PowerPoint can be accessed from the Format ribbon once the picture is selected. The editing features are grouped under the Adjust and Picture Styles section in the Format ribbon.
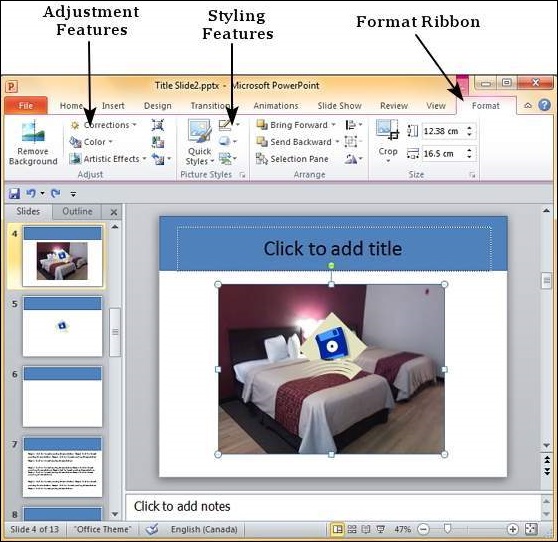
Image Adjustments
The following table describes various picture adjustment features available in PowerPoint.
| S.No | Feature & Description |
|---|---|
| 1 | Remove Background Automatically removes the unwanted sections in the image. This is similar to the magic tool in some of the other photo editing programs. You can click on different regions on the image to define the area to be removed. |
| 2 | Correction Allows you to change the brightness and contrast on the image and also change the image sharpness. |
| 3 | Color Allows you to change the color on the image by changing the saturation or tone. You can also make the image monochromatic based on different hues to match the theme of your presentation. |
| 4 | Artistic Effects Adds artistic effects to the image like plastic wrap, glowing edges, etc. |
| 5 | Compress Picture This can change the image resolution to manage the file size. |
| 6 | Change Picture Replaces the current picture with a different one. |
| 7 | Reset Picture Removes all the adjustments done on the image. |
Picture Styles
The following table describes various picture style features available in PowerPoint.
| S.No | Feature & Description |
|---|---|
| 1 | Picture Border Manages the picture border - color, weight and style. |
| 2 | Picture Effects Adds effects to the picture like reflection, shadow, etc. |
| 3 | Convert to SmartArt Graphic Transforms the picture into the selected SmartArt. |
| 4 | Quick Styles Pre-defined styles with different picture borders and effects. |
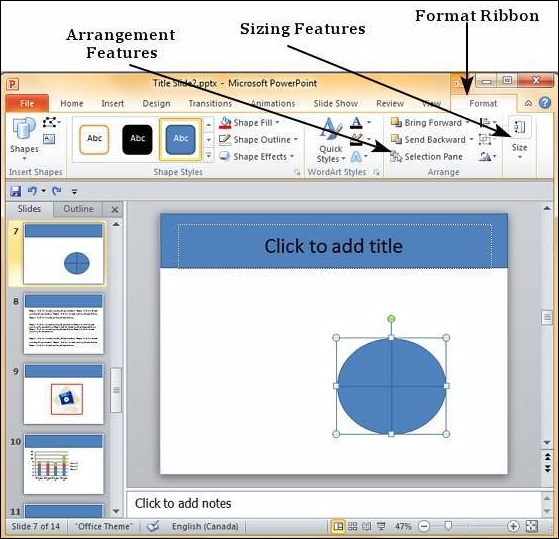
Format Added Pictures in Powerpoint 2010
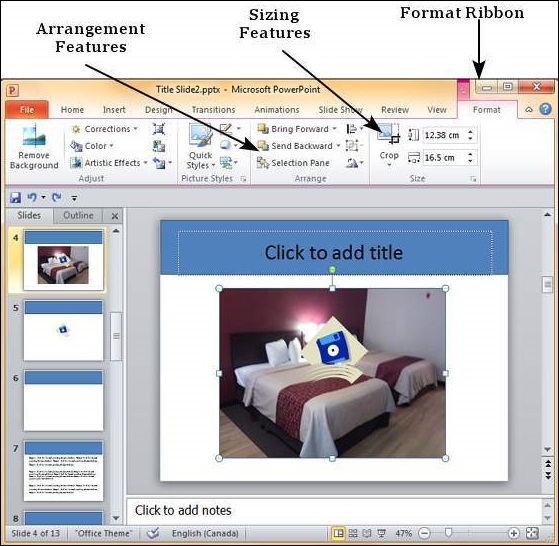
PowerPoint offers many image formatting features that can help shape the image to suit your needs. The picture formatting features in PowerPoint can be accessed from the Format ribbon once the picture is selected. The formatting features are grouped under the Arrange and Size section in the Format ribbon.
Picture Arrangement Features
The following table describes various picture arrangement features available in PowerPoint.
| S.No | Feature & Description |
|---|---|
| 1 | Bring Forward Moves the picture layer up. Bring Forward moves the picture up by one layer, Bring to Front makes the picture layer the topmost |
| 2 | Send Backward Moves the picture layer down. Send Backward moves the picture down by one layer, Send to Back makes the picture layer the bottommost |
| 3 | Selection Pane This opens up the Selection Pane sidebar where you get a better idea of the layers and can work with arrangements better. |
| 4 | Align Aligns the picture with various references in the slide. |
| 5 | Group Allows multiple images to be grouped together to create on single object or ungroup them to split them into individual pictures. |
| 6 | Rotate Rotate picture by a specific angle. |
Picture Sizing Features
The following table describes various picture sizing features available in PowerPoint.
| S.No | Feature & Description |
|---|---|
| 1 | Crop Allows you to crop the image. The cropping can be freehand, based on aspect ratio or any of the predefined shapes. |
| 2 | Shape Height/ Width Used to change the height and width of the image. When you edit these parameters from the ribbon, the aspect ratio is always maintained. |
Inserting a Screenshot in Powerpoint 2010
One of the interesting features about PowerPoint is that you can insert a screenshot of one of your applications into your presentation without having to use any other program. Given below are the steps to insert a screenshot.
Step 1 − Go to the Images group in the Insert Ribbon.
Step 2 − Click on the Screenshot dropdown to look at full screen snaps of all the applications running on your computer’s desktop.
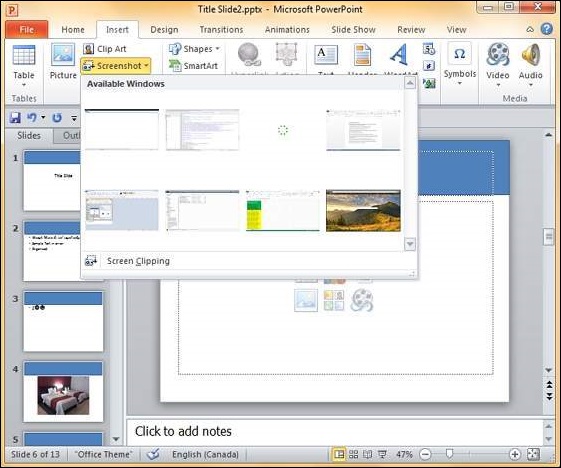
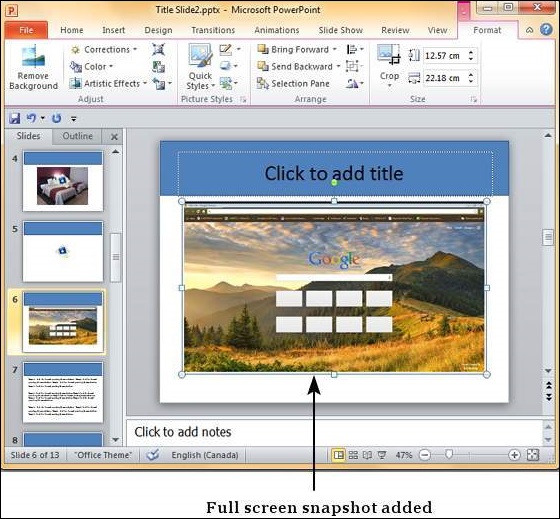
Step 3 − Select one of the screenshots to add it directly on to your presentation.
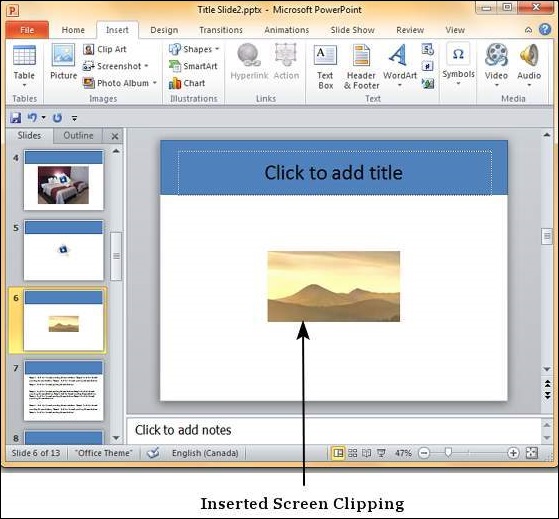
Step 4 − If you do not want the entire screen and just a portion of it, you can use the Screen Clipping option.
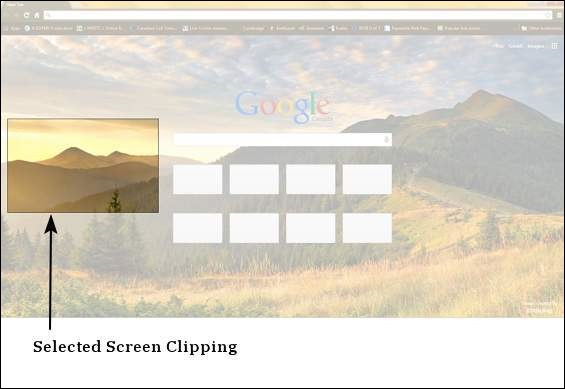
The Screen Clipping option will automatically move the focus to the program immediately below PowerPoint. So while using this option, ensure that you have the right screen behind the PowerPoint program.
Adding Shapes to Slide in Powerpoint 2010
PowerPoint supports the addition of shapes in presentations. It also includes Shapes like basic geometric shapes, flowchart components, arrows, callouts, lines and other predefined special shapes. These shapes also double up as text boxes as they support adding text to them directly. Besides, you can also use these shape to crop pictures to shape.
Given below are the steps to add a shape in PowerPoint.
Step 1 − Go to the Illustrations group under the Insert Tab.
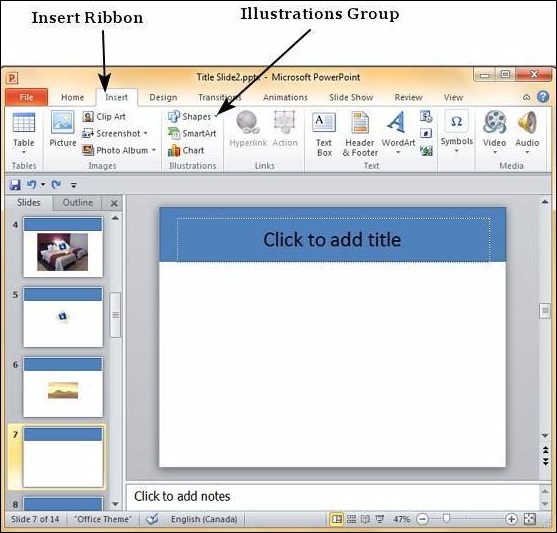
Step 2 − Click on the Shapes dropdown to view the available shapes.
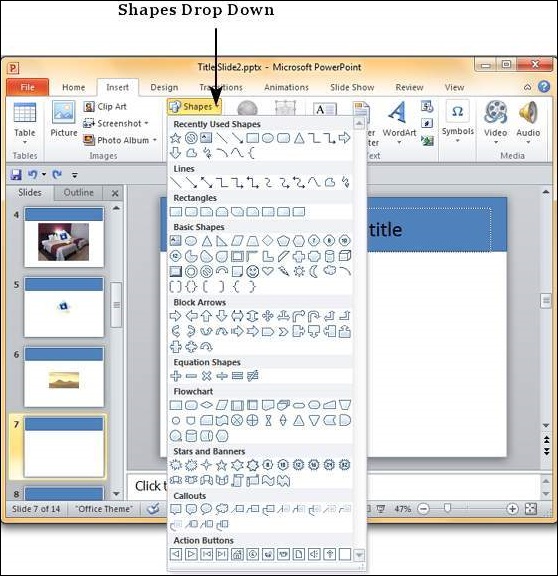
Step 3 − Select the shape you want to insert. This will change the cursor to a + sign.
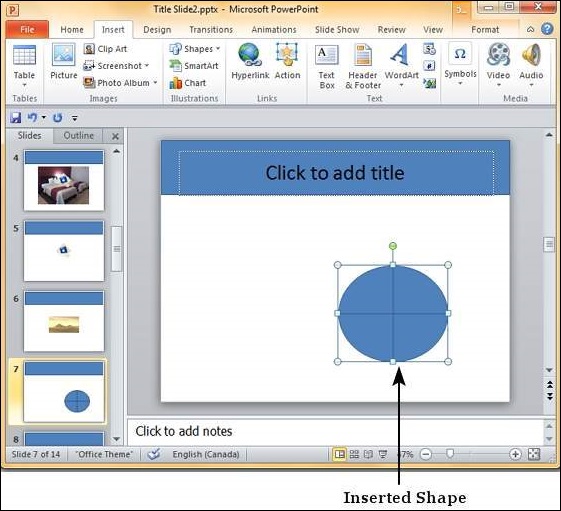
Step 4 − Click and drag on the slide to create the shape. As you drag, the shape will show up on the slide. Continue to drag and adjust the size and the symmetry of the shape.
Editing Added Shapes in Powerpoint 2010
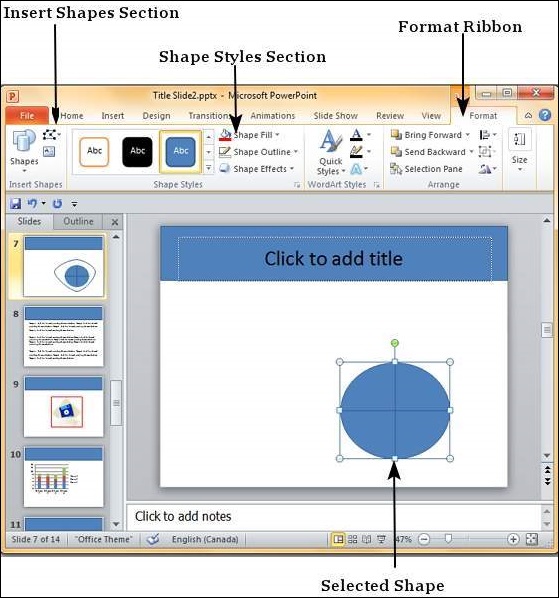
Just like images and pictures, PowerPoint also supports editing of shapes inserted in the presentation. The shape editing features in PowerPoint can be accessed from the Format ribbon once the shape is selected. The editing features are grouped under the Insert Shapes and the Shape Styles section in the Format ribbon.
Insert Shape Features
The table below describes various insert shape features available in PowerPoint.
| S.No | Feature & Description |
|---|---|
| 1 | Shape List Adds another shape to the slide. |
| 2 | Edit Shape Replaces the shape completely, or use the edit points to change the existing shape. |
| 3 | Text Box Inserts a text box anywhere in the slide. |
Shape Styles Features
The table below describes various shape style features available in PowerPoint.
| S.No | Feature & Description |
|---|---|
| 1 | Shape Fill Selects the shape fill color and style. You can add a single solid color from the palette, or a picture, gradient or texture. |
| 2 | Shape Outline Selects the shape border color, thickness and style. |
| 3 | Shape Effects Adds special effects to the shape like reflection, 3D rotation, bevel, shadow, etc. |
| 4 | Predefined Styles These are a combination of the style features that can be applied to the shape with a single click. |
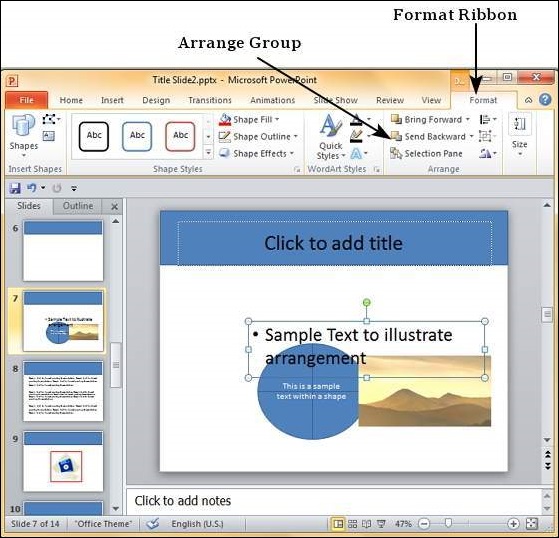
Format Added Shapes in Powerpoint 2010
PowerPoint offers formatting features for shapes along the same lines as pictures. This consistency in the features makes it easy for people to grasp the functionality and also makes PowerPoint very versatile. The shape formatting features in PowerPoint can be accessed from the Format ribbon once the shape is selected. The formatting features are grouped under the Arrange and Size section in the Format ribbon.
Shape Arrangement Features
The table given below describes the various shape arrangement features available in PowerPoint.
| S.No | Feature & Description |
|---|---|
| 1 | Bring Forward Moves the shape layer up. Bring Forward moves the shape up by one layer, Bring to Front makes the shape layer the topmost. |
| 2 | Send Backward Moves the shape layer down. Send Backward moves the shape down by one layer, Send to Back makes the shape layer the bottommost. |
| 3 | Selection Pane This opens up the Selection Pane sidebar where you get a better idea of the layers and can work with arrangements better. |
| 4 | Align Aligns the shape with various references in the slide. |
| 5 | Group Allows multiple shapes to be grouped together to create on single object or ungroup them to split them into individual shapes. |
| 6 | Rotate Rotates shape by a specific angle. |
Shape Sizing Features
The table given below describes various shape sizing features available in PowerPoint.
| S.No | Feature & Description |
|---|---|
| 1 | Shape Height/ Width Used to change the height and width of the shape. When you edit these parameters from the ribbon, the aspect ratio is always maintained |
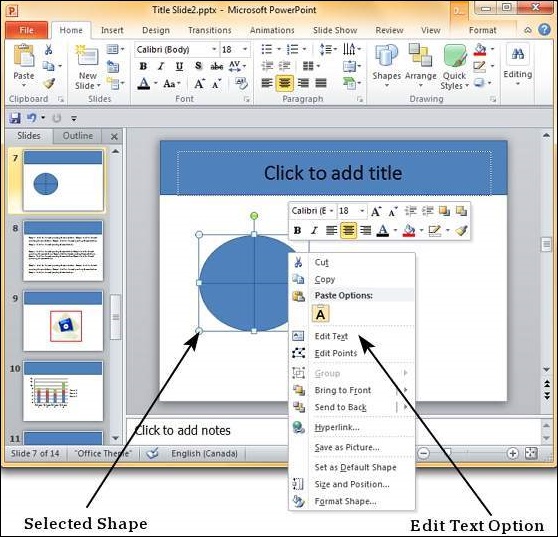
Adding Text to Shapes in Powerpoint 2010
One of the great aspects of PowerPoint is that you can treat the shapes as text boxes too. This becomes useful when you want to type some text within a shape and ensure the text does not overflow the boundaries of the shape. By being able to enter text within the shape, PowerPoint will ensure the text stays contained and you do not have to worry about fixing it.
The following steps will help you add text to the shapes in PowerPoint.
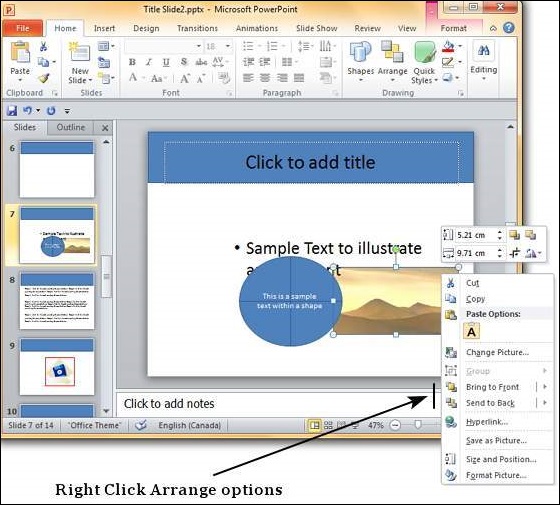
Step 1 − Right-click on the shape to which you want to add the text and select the Edit Text option.
Step 2 − Start typing the text into the shape. Once you are done, click the cursor anywhere outside the shape.
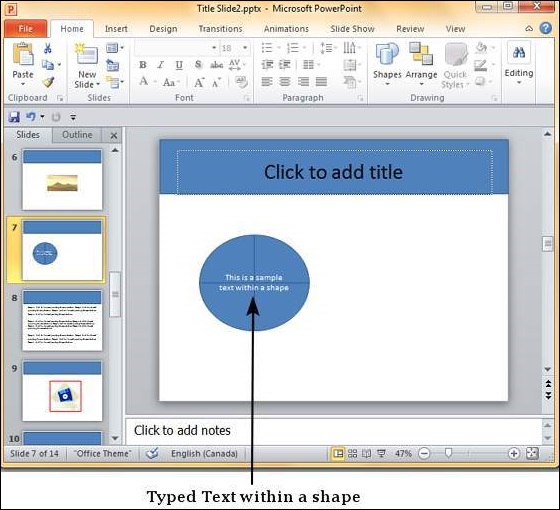
An alternative way of adding text to shape is to select the shape and start typing directly. Once you have the text within the shape you can format the text using the font related features available in PowerPoint.
Arrange Shapes/Images in Powerpoint 2010
PowerPoint supports multiple content types and invariably different contents coexist in a slide. While it is ideal to have each content standout separately, there are times when you cannot do that or when overlapping of content is desirable. In such cases, it is important that you can determine which content stays on top of which one.
PowerPoint has arrangement features to help achieve this goal. While working with arrangement features, you must think of each content as a separate layer and that these layers are laid over one another. To arrange the content, you must basically play with these layers.
The following steps will help you arrange content in a presentation slide.
Step 1 − Select one of the contents and go the Arrange group under the Format ribbon.
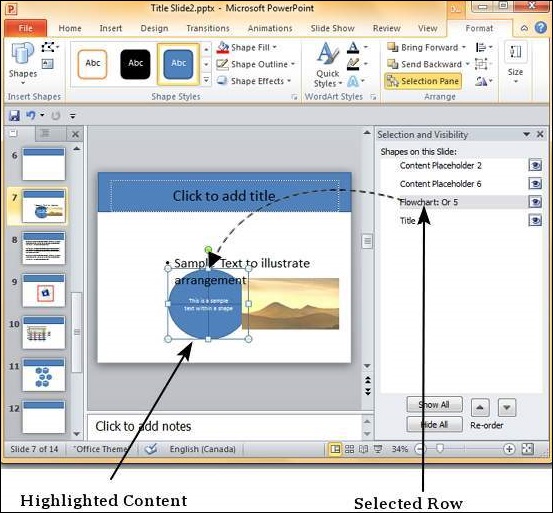
Step 2 − Click on the Selection Pane to open the Selection and Visibility sidebar.
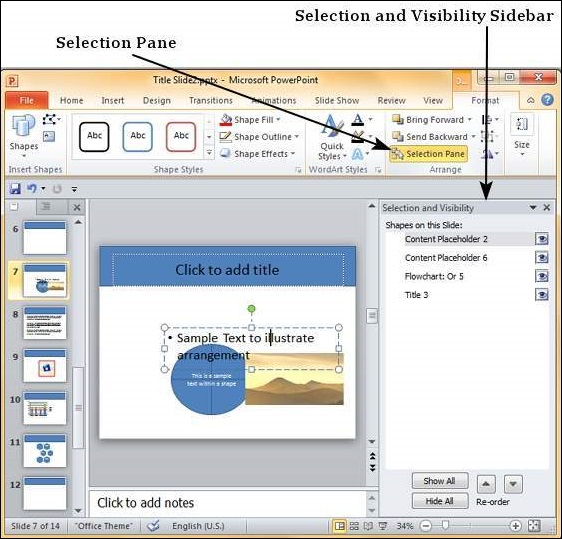
Step 3 − Select one of the rows in the sidebar to highlight the corresponding content in the slide.
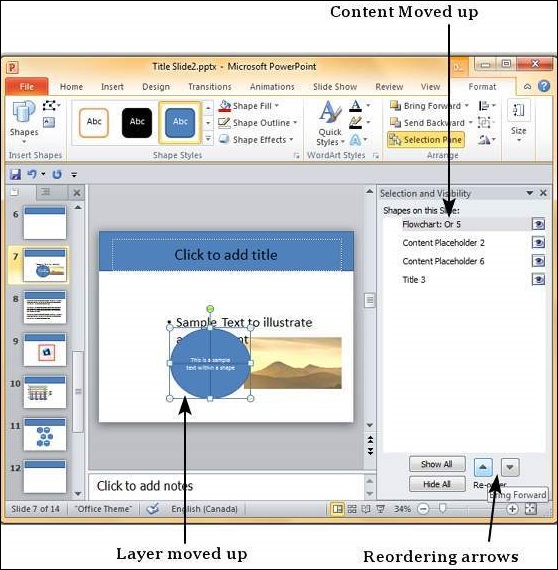
Step 4 − Use the reordering arrows in the sidebar to move the content layer up or down.
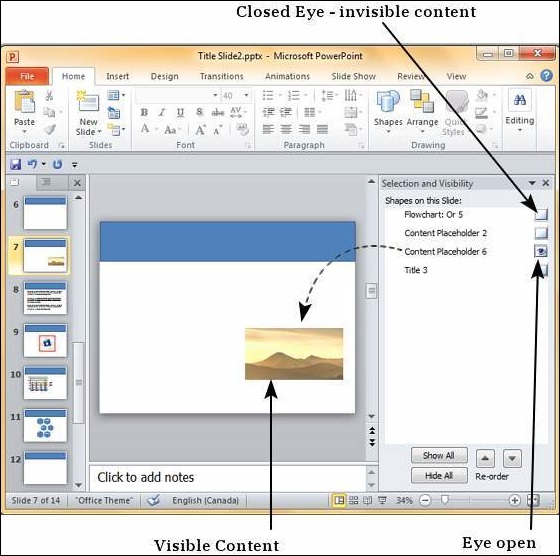
Step 5 − Click on the eye next to each content in the sidebar to toggle its visibility on the slide.
Instead of using the Selection Pane option, you can also right-click on the content to move it up or down. When you right-click, besides moving the layers by one step at a time using Bring Forward or Send Backward, you can also move the content directly to the top or bottom using Bring to Front or Send to Back respectively.
Group/Ungroup Objects in Powerpoint 2010
While working with PowerPoint, you might need to carry out a set of actions on a bunch of objects. PowerPoint allows you to group objects within a slide and apply the same action on all the objects simultaneously. This feature in PowerPoint is called grouping.
The following steps will help you group and ungroup objects −
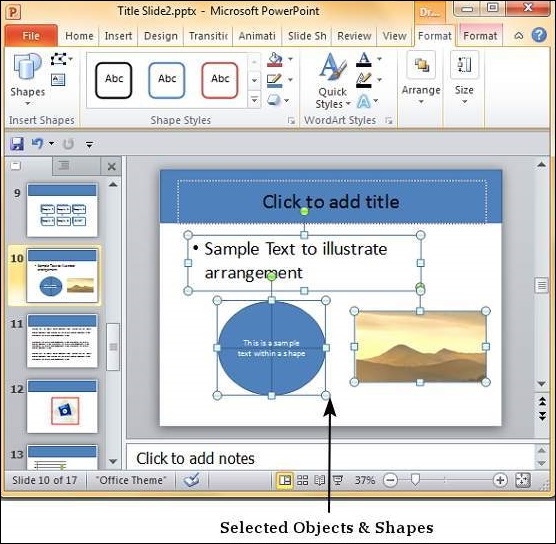
Step 1 − Select a set of shapes or objects together. To select the objects, press the Ctrl key and select each object individually. If the objects are together, you can also click and drag the cursor to select them; however with the click and drag everything that falls within the selected area will be selected.
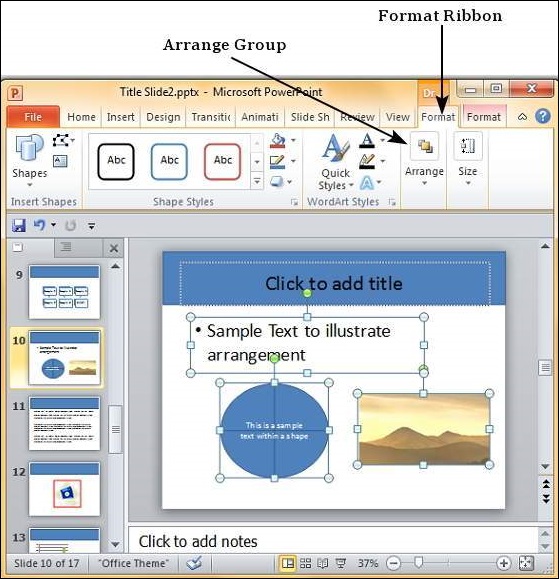
Step 2 − Go to the Arrange Group under the Format ribbon.
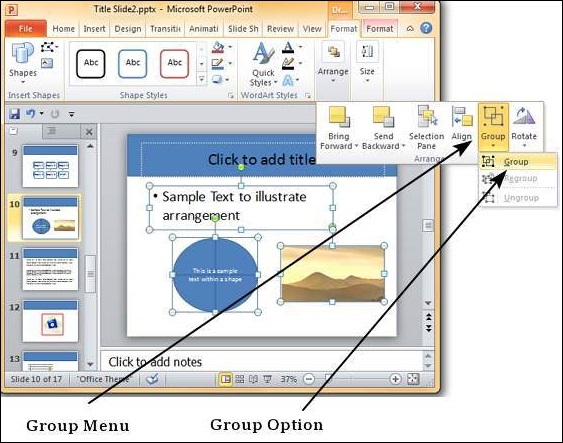
Step 3 − Click on Group under the Group menu item - this will group the objects and shapes into a single object.
Step 4 − Apply the common changes you want to make to these objects.
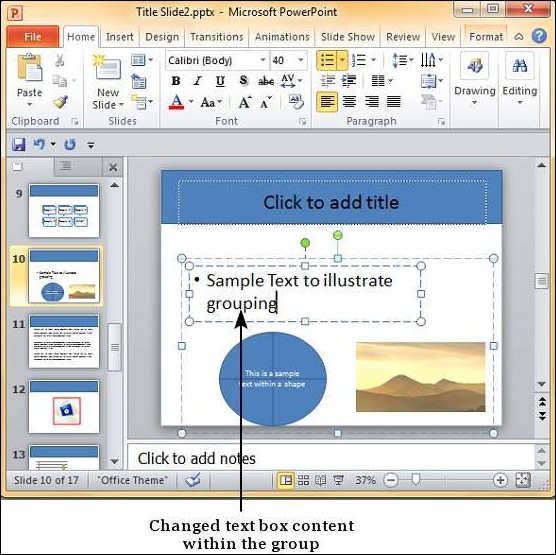
Step 5 − Even though the objects are grouped, you can still edit them individually if need be.
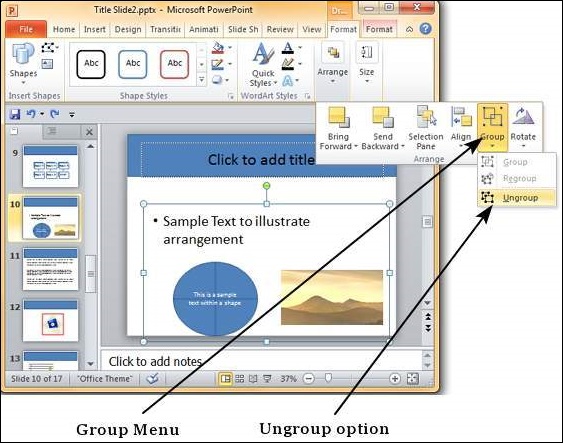
Step 6 − If you want to edit the shapes or objects individually, go back to the Group menu item and select Ungroup.
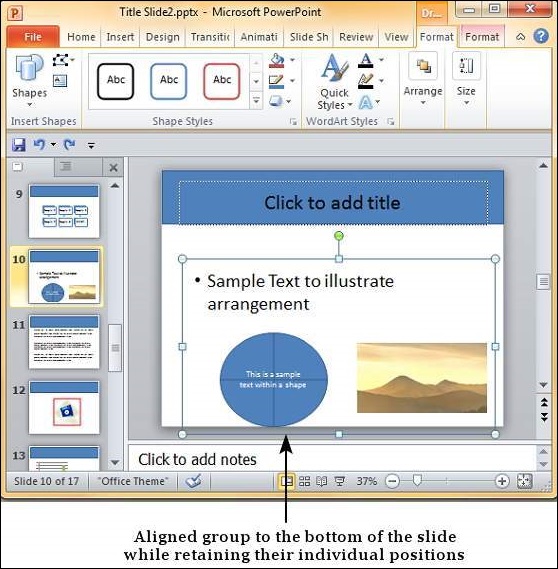
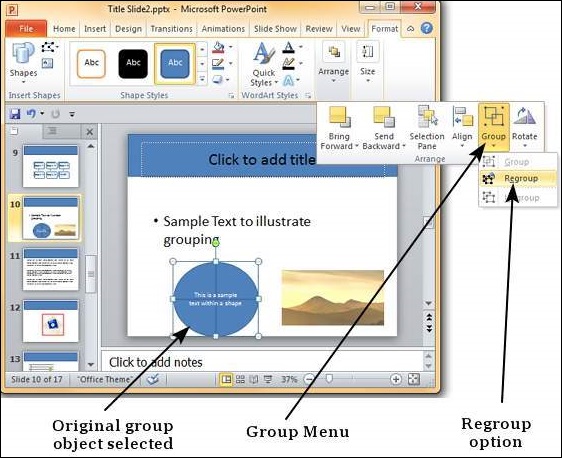
Step 7 − After making changes, if you want to regroup the objects as per original grouping, you select one of the objects and use the Regroup option under the Group menu.
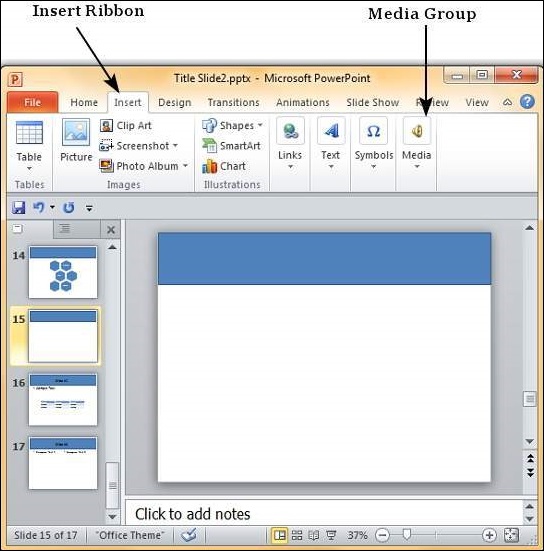
Adding Audio & Video in Powerpoint 2010
PowerPoint supports multimedia in the slides. You can add audio or video clips to the slides which can be played during the presentation.
The following steps will help you add audio or video file to the slides.
Step 1 − Go to the Media group under the Insert ribbon
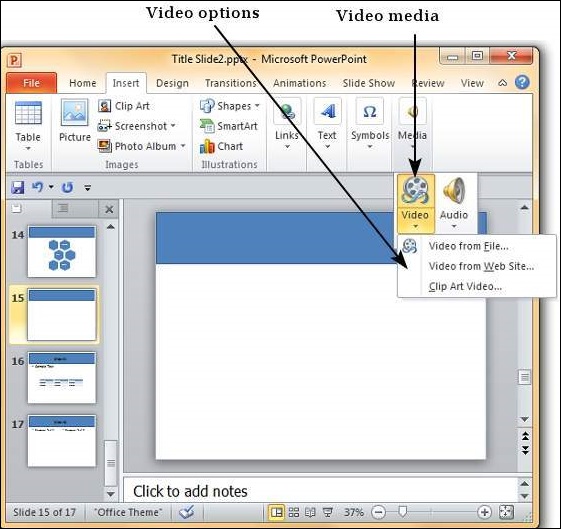
Step 2 − To insert video file select Video as media type and Video from File to insert a video from your computer or hard drive.
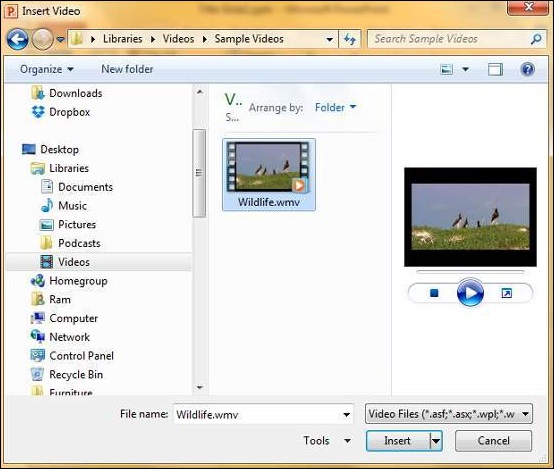
Step 3 − In the Insert Video dialog, browse for a video file and click Insert.
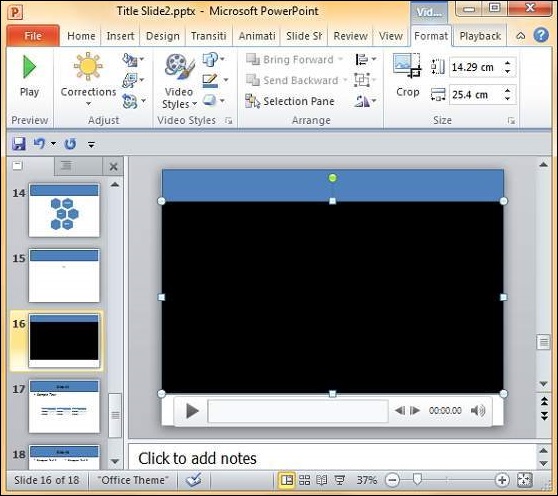
Step 4 − You will now see that a Video file is added to the slide.
Step 5 − To insert audio file select Audio as media type and Audio from File to insert an Audio from your computer or hard drive.
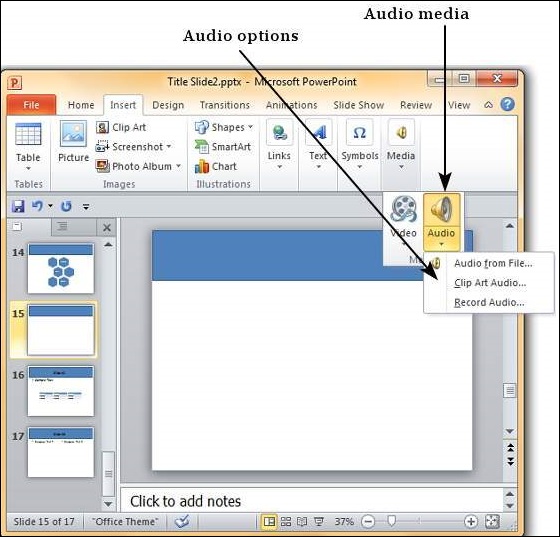
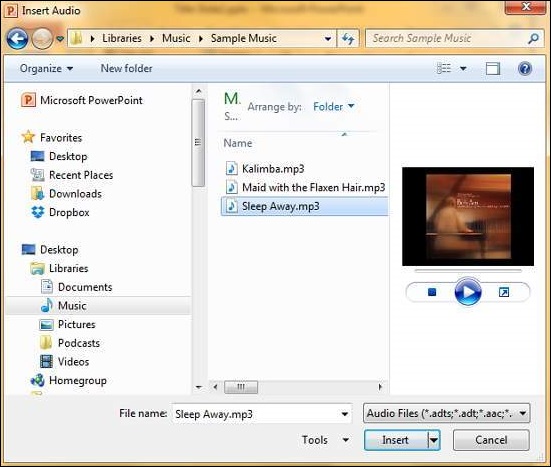
Step 6 − In the Insert Audio dialog, browse for an audio file and click Insert.
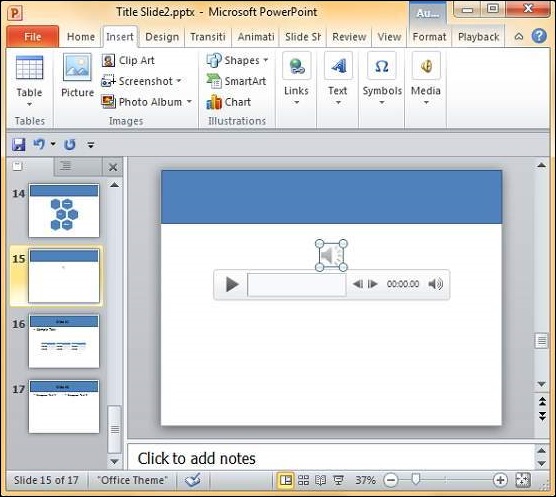
Step 7 − You will now see that an Audio file is added to the slide.
Add & Format Tables Powerpoint 2010
One of the most powerful data representation techniques is the use of tables. Table allows information to be segregated making it easy to read. PowerPoint has features that let you add tables in slides and also format them to enhance their visual effects. What's more, these tables are also compatible with Microsoft Excel, so you can basically take a spreadsheet or a section of a spreadsheet and paste it into a slide as a table.
The following steps will help you add a table in PowerPoint.
Step 1 − Go to the Tables group under the Insert ribbon.
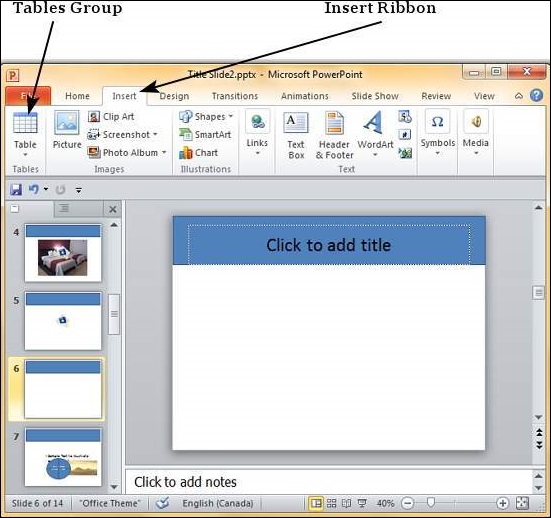
Step 2 − Click on the dropdown and select your table dimension from the matrix.
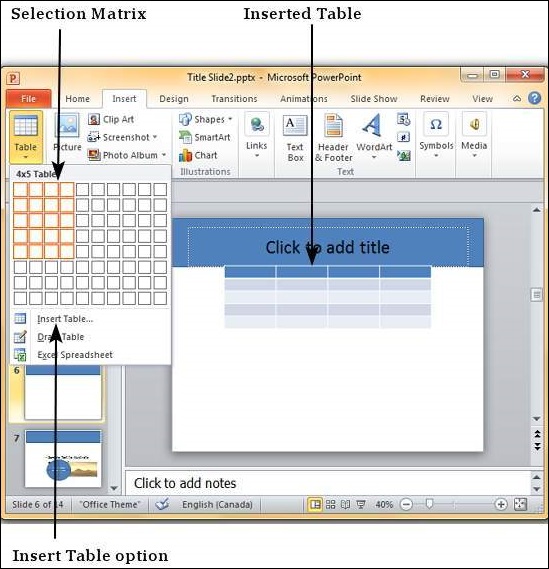
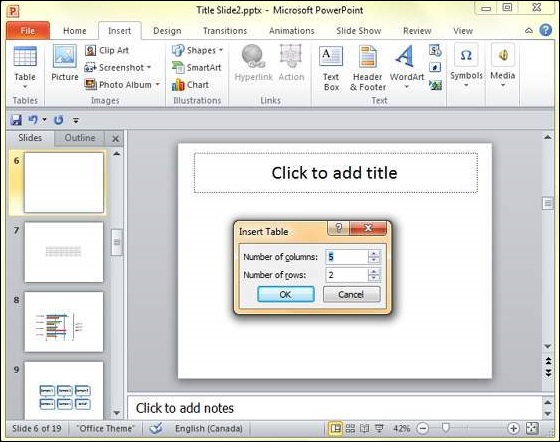
Step 3 − If you require more than 10 columns or 8 rows click on "Insert Table" to open the Insert Table dialog where you can specify the column and row count.
PowerPoint table is a simple table that does not support the mathematical features of an Excel spreadsheet. If you want to carry out some calculations, you can insert an Excel spreadsheet instead of a regular table.
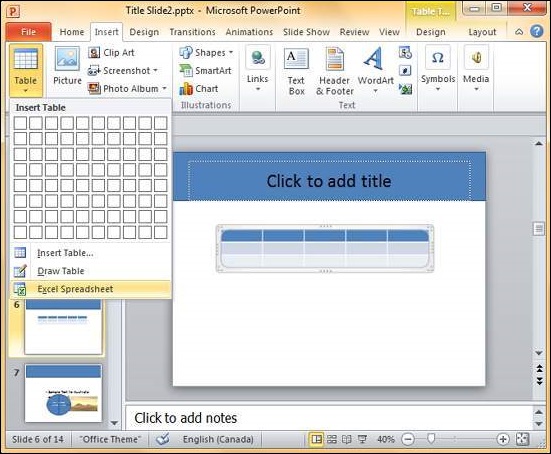
This will insert the spreadsheet in the slide and as long as the spreadsheet is selected, the ribbon at the top will be changed to an Excel ribbon instead of a PowerPoint one.

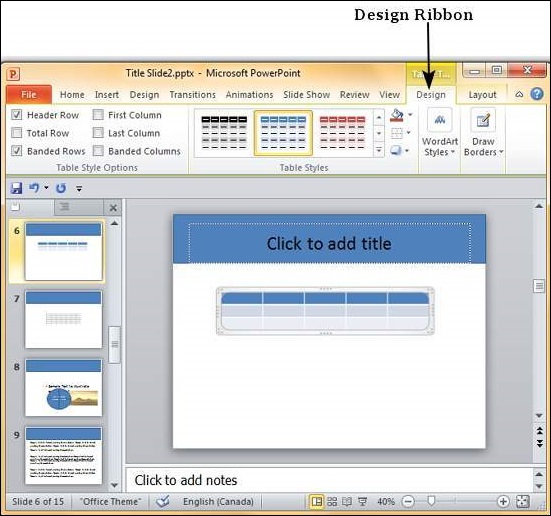
The PowerPoint table formatting features have been grouped under two ribbons: Design and Format. The sections below discuss the features under each ribbon. To access these ribbons, you must select the table first.
Table Design Features
We will now understand the table design features in PowerPoint.
The following table shows the different table design features −
| Feature | Sub Features | Description |
|---|---|---|
| Table Style Options | Header Row | Adds a different shade to the first row to distinguish it. |
| Total Row | Adds a different shade to the last row to distinguish it. | |
| Banded Rows | Shades alternate rows in the table with the same color. | |
| First Column | Adds a different shade to the first column to distinguish it. | |
| Last Column | Adds a different shade to the last row to distinguish it. | |
| Banded Columns | Shades alternate columns in the table with the same color. | |
| Table Styles | Shading | Offers different shades to be added to selected table/ row/ column/ cell. You can pick from solid shade, texture, image or gradient shading. |
| Border | Offers different border options for the table. You can edit the border color, thickness and style | |
| Effects | Offers the ability to create table shadow or reflection. You can also create bevels for individual cells. | |
| Word Art Styles | Text Fill | Allows you to change the color of the text within the table. |
| Text Outline | Allows you to add an outline to the text within the table and change the outline color, weight and style. | |
| Text Effects | Allows you to add special effects (like reflection, shadow etc.) to the text within the table. | |
| Quick Styles | Contains a list of pre-defined Word Art styles that can be applied to the selected text within the table with a single click. | |
| Draw Borders | Pen Style | Defines the style of the table border when you draw it. |
| Pen Weight | Defines the thickness of the table border when you draw it. | |
| Pen Color | Defines the color of the table border when you draw it. | |
| Draw Table | Allows you to append new rows, columns, cells to existing table, split existing rows, columns or cells and draw brand new tables. | |
| Eraser | Allows you to delete table borders and merge cells, rows or columns. |
Table Format Features
We will now understand the various table format features in PowerPoint.

The following table shows the various table format features −
| Feature | Sub Features | Description |
|---|---|---|
| Table | Select | Allows you to select the entire table or the row(s) or column(s) depending on the position of your cursor. |
| View Gridlines | Toggles the gridline display within the table. | |
| Rows & Columns | Delete | Allows you to delete selected row(s) or column(s) or the entire table. |
| Insert Above | Inserts a row above the row where the cursor is currently. If you haven't placed the cursor within the table, it adds a new row at the top of the table. | |
| Insert Below | Inserts a row below the row where the cursor is currently. If you haven't placed the cursor within the table, it adds a new row at the bottom of the table. | |
| Insert Left | Inserts a column to the left of the column where the cursor is currently. If you haven't placed the cursor within the table, it adds a new column to the left of the table. | |
| Insert Right | Inserts a column to the right of the column where the cursor is currently. If you haven't placed the cursor within the table, it adds a new column to the right of the table. | |
| Merge | Merge | Allows you to merge cells, rows or columns. This is enabled only if you have selected more than one cell, row or column. |
| Split Cells | Allows you to specify the number of rows and columns into which the current section of cell(s) need to be split. | |
| Cell Size | Height/ Width | Defines the height and width of the selected cell. Usually if you change these aspects for a single cell, the change affects the entire row or column too. |
| Distribute Rows | Equalizes the height of all the rows to fit the current table height. | |
| Distribute Columns | Equalizes the width of all the columns to fit the current table width. | |
| Alignment | Horizontal Alignment | Allows you to align the selected text to the left, right or center of the cell. |
| Vertical Alignment | Allows you to align the selected text to the top, bottom or middle of the cell. | |
| Text Direction | Allows you to change the direction of the selected text within the cells. | |
| Cell Margins | Allows you to define the margins within the cell. | |
| Table Size | Height | Allows you to adjust the table height - it retains the relative heights of the individual rows while changing the overall table height. |
| Width | Allows you to adjust the table width - it retains the relative widths of the individual columns while changing the overall table width. | |
| Lock Aspect Ratio | Checking this box will ensure the ratio between the table height and width is maintained when one of these is changed. | |
| Arrange | Bring Forward | Allows you to move the table up by one layer or right to the top. |
| Send Backward | Allows you to move the table down by one layer or right to the bottom of the slide. | |
| Selection Pane | Toggles the Selection and Visibility sidebar. | |
| Align | Allows you to align the entire table with reference to the slide. |
Add & Format Charts in Powerpoint 2010
Charts are an effective way of representing data. Long list of confusing numbers can instantly become trends which can be spotted when they are captured as charts. PowerPoint supports the addition and formatting of charts.
Given below are the steps to add a chart to PowerPoint.
Step 1 − Go to the Illustrations group under the Insert ribbon.
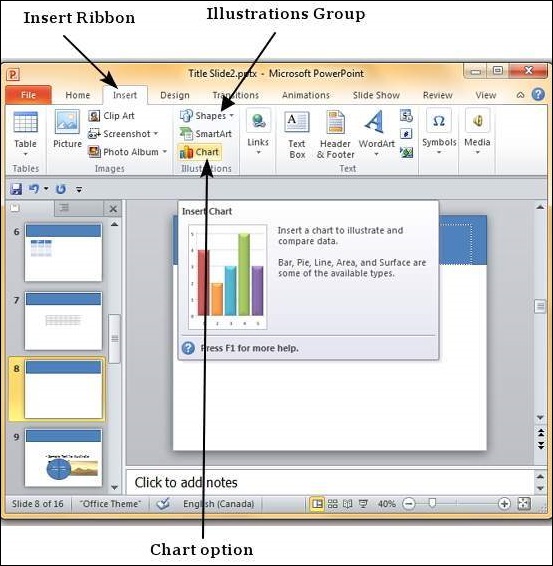
Step 2 − Click on the Chart option to open the Insert Chart dialog. You can choose the chart category and pick individual chart types from the list.
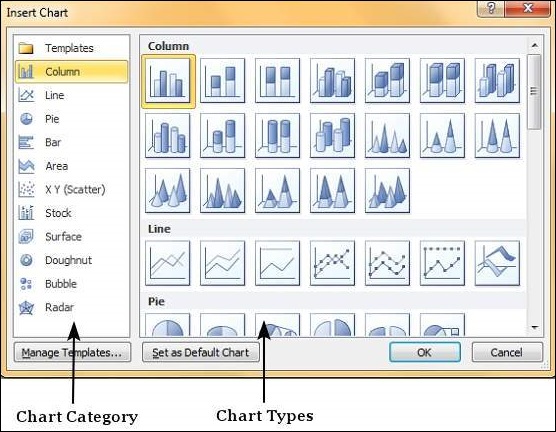
Step 3 − Select the chart type and click OK or double-click on the chart type to insert the chart in the slide.
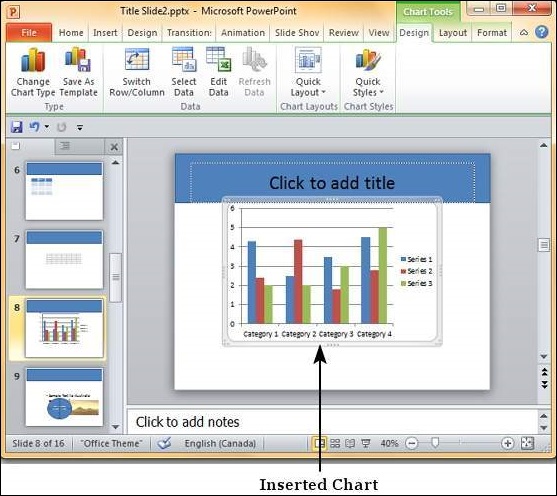
Step 4 − Along with the chart, an Excel spreadsheet is also launched. This spreadsheet is the source for your chart. You can change the category names, series names and individual values to suit your needs.
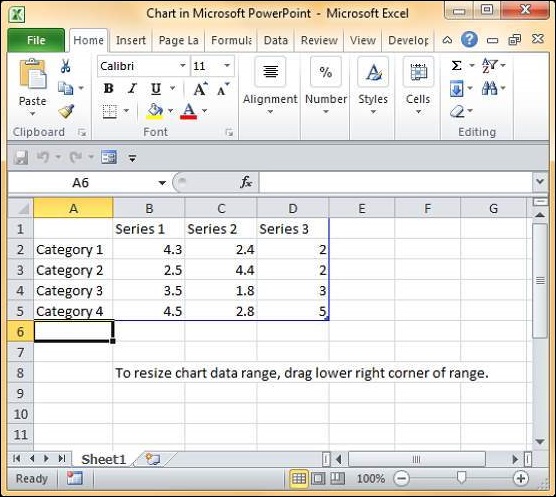
As you edit the values and the table in Excel the chart gets modified accordingly.
The PowerPoint chart formatting features have been grouped under three ribbons: Design, Layout and Format. The sections below discuss the features under each ribbon. To access these ribbons you must select the chart first.
Chart Design Features
We will now understand the various chart design features in PowerPoint.
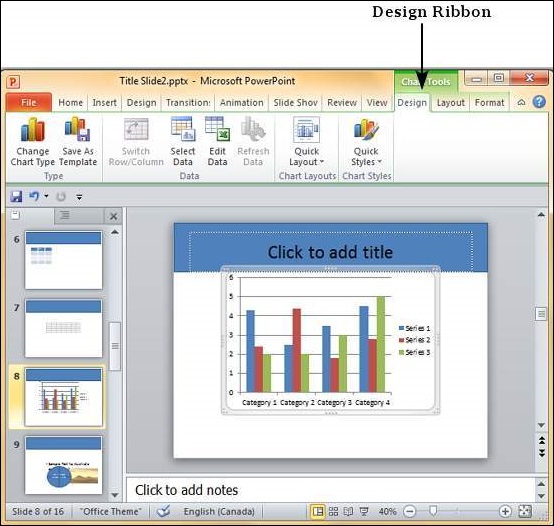
The table given below describes the various chart design features −
| Feature | Sub Features | Description |
|---|---|---|
| Type | Change Chart Type | Changes the chart type retaining the same data. |
| Save As Template | Saves current chart type as a template. | |
| Data | Switch Row/Column | Transposes current excel data - this is enabled when you have the source data excel sheet open. |
| Select Data | Changes the data range covered in the chart. | |
| Edit Data | Changes the chart source data. | |
| Refresh Data | Refreshes the chart to show the latest data. | |
| Chart Layouts | Chart Layouts | Offers a list of predefined layouts which can be instantly applied to current chart with a single click. |
| Chart Styles | Chart Styles | Offers a list of predefined styles which can be instantly applied to current chart with a single click. |
Chart Layout Features
We will now understand the various chart layout features in PowerPoint.
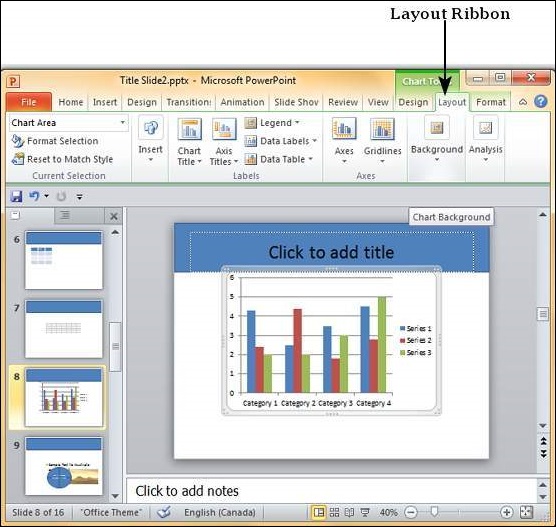
The following table describes the various chart layout features in PowerPoint.
| Feature | Sub Features | Description |
|---|---|---|
| Current Selection | Drop down | Shows the currently selected chart element. |
| Format Selection | Shows the selection format dialog to update the selection. | |
| Reset to Match Style | Discards all the chart customizations and matches the chart with the overall presentation theme. | |
| Insert | Picture | Superimposes an image on top of the chart. |
| Shape | Adds a shape to the slide. | |
| Text Box | Adds a text box to the slide. | |
| Labels | Chart Title | Defines the visibility, position and style of the chart title. |
| Axis Titles | Defines the visibility, position and style of the axis titles. | |
| Legend | Defines the visibility and position of the chart legend. | |
| Data Labels | Defines the visibility and position of the data labels. | |
| Data Table | Defines the visibility, position and format of the data table. | |
| Axes | Axes | Defines the position and scale of axes. |
| Gridlines | Defines the visibility and scale of axes. | |
| Background | Plot Area | Toggles chart plot area - available only for 2D charts. |
| Chart Wall | Toggles the chart wall - available only for 3D charts. | |
| Chart Floor | Toggles the chart floor - available only for 3D charts. | |
| 3-D Rotation | Toggles the chart 3D rotation- available only for 3D charts. |
Chart Format Features
We will now understand the various chart format features in PowerPoint.
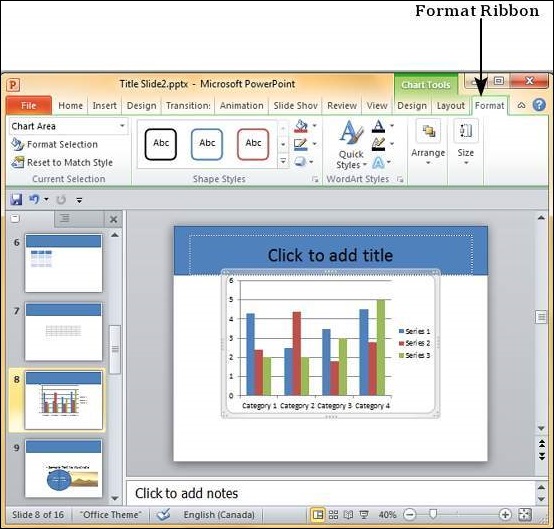
The following table describes the various chart format features in PowerPoint.
| Feature | Sub Features | Description |
|---|---|---|
| Current Selection | Drop down | Shows the currently selected chart element. |
| Format Selection | Shows the selection format dialog to update the selection. | |
| Reset to Match Style | Discards all the chart customizations and matches the chart with the overall presentation theme. | |
| Shape Styles | Shape Fill | Offers different shades to be added to selected chart series item. You can pick from solid shade, texture, image or gradient shading. |
| Border | Offers different border options for selected chart series item. You can edit the border color, thickness and style. | |
| Effects | Offers the ability to add special effects to selected chart series item. | |
| Word Art Styles | Text Fill | Allows you to change the color of the text within the chart. |
| Text Outline | Allows you to add an outline to the text within the chart and change the outline color, weight and style. | |
| Text Effects | Allows you to add special effects (like reflection, shadow etc.) to the text within the chart. | |
| Quick Styles | Contains a list of pre-defined Word Art styles that can be applied to the selected text within the chart with a single click. | |
| Arrange | Bring Forward | Allows you to move the chart up by one layer or right to the top. |
| Send Backward | Allows you to move the chart down by one layer or right to the bottom of the slide. | |
| Selection Pane | Toggles the Selection and Visibility sidebar. | |
| Align | Allows you to align the entire chart with reference to the slide. | |
| Group | Allows you to group multiple charts as one group object, or split a group object into individual charts. | |
| Size | Height | Allows you to adjust the chart height. |
| Width | Allows you to adjust the chart width. |
Add & Format SmartArt in Powerpoint 2010
PowerPoint offers a unique feature called SmartArt which allows users to add text to predefined art designs. The advantage with SmartArt is that although each component of the SmartArt can be edited individually, you can also modify the SmartArt as a whole while retaining the settings on each individual component.
The following steps will help you add a SmartArt to PowerPoint.
Step 1 − Go to the Illustrations group under the Insert ribbon.
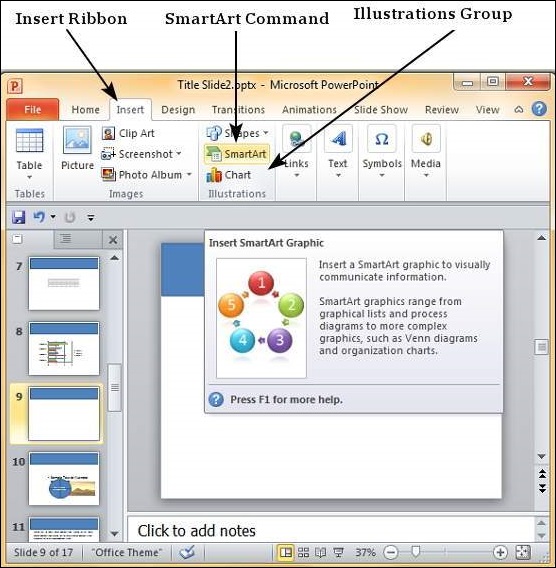
Step 2 − Click on the SmartArt command to open the Choose a SmartArt Graphic dialog. You can choose the SmartArt category and pick individual SmartArt types from the list. You also get a preview and a short description of the graphic in the preview section.

Step 3 − Select the SmartArt type and click OK or double-click on the SmartArt type to insert the graphic in the slide.
Step 4 − The graphic is inserted in the slide along with a text pane where you can enter/ modify the SmartArt text.
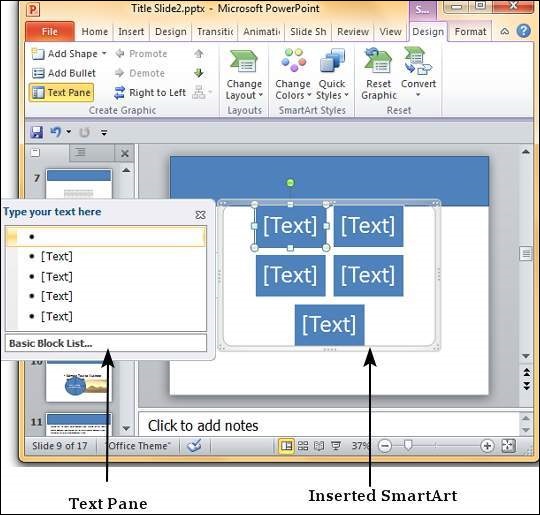
Step 5 − Add the necessary details and close the text pane to complete the SmartArt insertion.
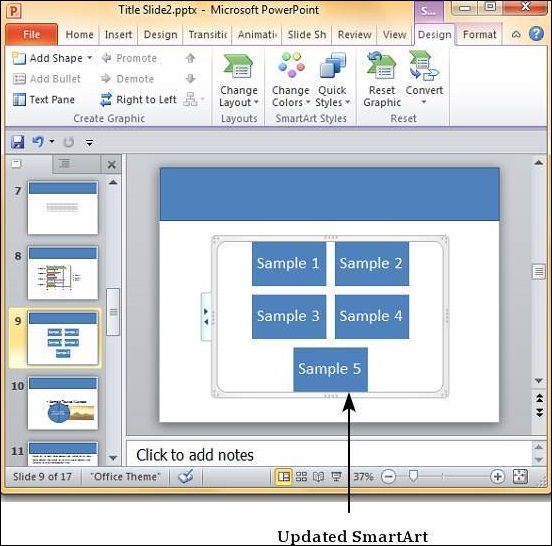
The PowerPoint SmartArt formatting features have been grouped under two ribbons: Design and Format. The sections below discuss the features under each ribbon. To access these ribbons, you must select the SmartArt first.
SmartArt Design Features
We will now understand the various SmartArt design features in PowerPoint.
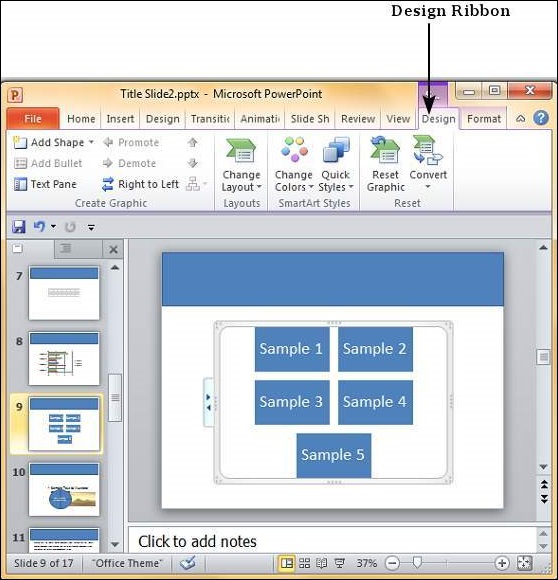
The following table describes the various SmartArt design features in PowerPoint.
| Feature | Sub Features | Description |
|---|---|---|
| Create Graphic | Add Shape | Adds another shape to the current SmartArt graphic; this also adds another bullet in the text pane. |
| Add Bullet | Adds another bullet in the text pane; this also adds another shape to the graphic. | |
| Text Pane | Toggles text pane visibility. | |
| Promote | Indents bullet to higher level in text pane - useful only in multi-level SmartArt. | |
| Demote | Indents bullet to lower level in text pane - useful only in multi-level SmartArt. | |
| Right to Left | Helps reverse the direction of the SmartArt flow. | |
| Move Up | Moves the bullet up in the text pane or the shape to the left in the graphics. | |
| Move Down | Moves the bullet down in the text pane or the shape to the right in the graphics. | |
| Layouts | Layouts | Allows you to change the layout of SmartArt graphics to one from the list. |
| Smart Styles | Change Colors | Changes the color scheme for the SmartArt graphics. |
| SmartArt Styles | Allows you to change the SmartArt graphics styles to one of the predefined ones from the list with one click. | |
| Reset | Reset Graphic | Removes all the customization done on the SmartArt graphic. |
| Convert | Converts SmartArt graphic to regular shapes or plain text. |
SmartArt Format Features
We will now understand the various SmartArt format features in PowerPoint.
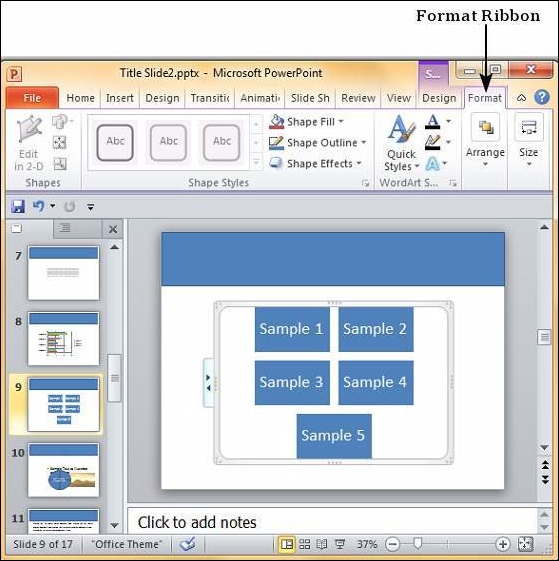
The following table describes the various SmartArt format features in PowerPoint.
| Feature | Sub Features | Description |
|---|---|---|
| Shapes | Change Shape | Changes the selected shape in the SmartArt to one of those in the list. |
| Larger | Increases the size of the selected shape. | |
| Smaller | Decreases the size of the selected shape. | |
| Shape Styles | Shape Fill | Offers different shades to be added to selected SmartArt graphics item. You can pick from solid shade, texture, image or gradient shading. |
| Border | Offers different border options for selected SmartArt graphics item. You can edit the border color, thickness and style. | |
| Effects | Offers the ability to add special effects to selected SmartArt graphics item. | |
| Word Art Styles | Text Fill | Allows you to change the color of the text within the SmartArt. |
| Text Outline | Allows you to add an outline to the text within the SmartArt and change the outline color, weight and style. | |
| Text Effects | Allows you to add special effects (like reflection, shadow etc.) to the text within the SmartArt. | |
| Quick Styles | Contains a list of pre-defined Word Art styles that can be applied to the selected text within the SmartArt with a single click. | |
| Arrange | Bring Forward | Allows you to move the SmartArt up by one layer or right to the top. |
| Send Backward | Allows you to move the SmartArt down by one layer or right to the bottom of the slide. | |
| Selection Pane | Toggles the Selection and Visibility sidebar. | |
| Align | Allows you to align the entire SmartArt with reference to the slide. | |
| Group | Allows you to group multiple SmartArt as one group object, or split a group object into individual SmartArt. | |
| Size | Height | Allows you to adjust the SmartArt height. |
| Width | Allows you to adjust the SmartArt width. |
Add & Preview Animations Powerpoint 2010
PowerPoint offers animation support which can be used effectively to add some motion in a monotonous presentation and make it more interesting. Animation can be applied to any object on the slide and the motions can the automated, timed or trigger.
The following steps will help you add and preview animations in the slide.
Step 1 − Go to the Animation ribbon and click on the Animation Pane to display the animation sidebar.
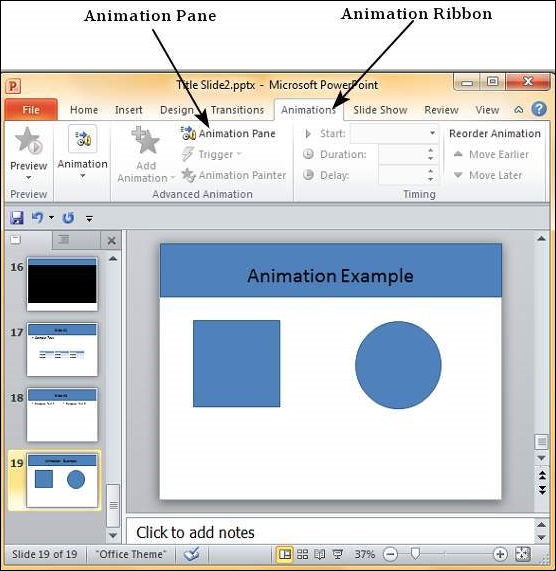
Step 2 − Select one of the objects in the slide and click on the Add Animation menu option.
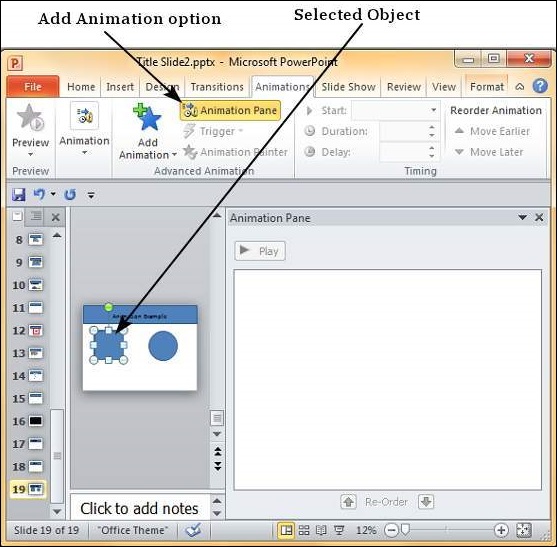
Step 3 − Choose from one of the Animation options.
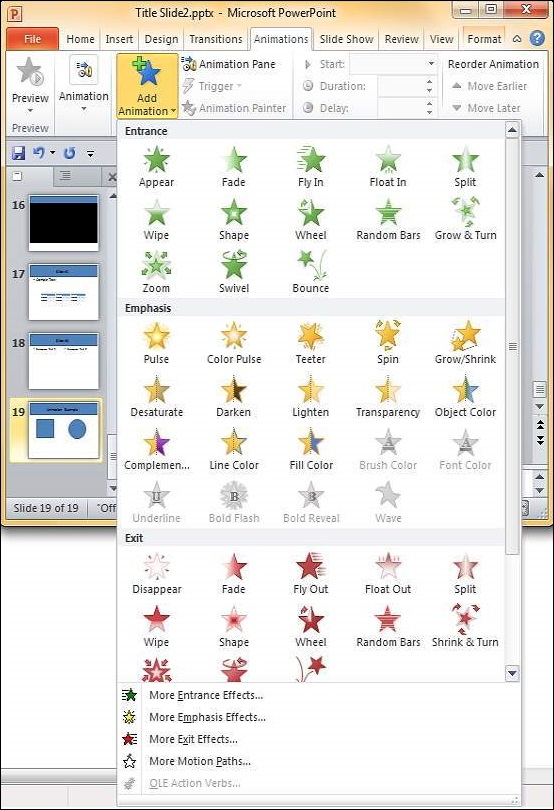
Entrance will cause the object to appear in the screen.
Emphasis will cause the object to emphasis without appearing or leaving the screen.
Exit will cause the object to disappear from the screen.
Step 4 − Once you add the animation for an object, it will show up in the Animation pane.
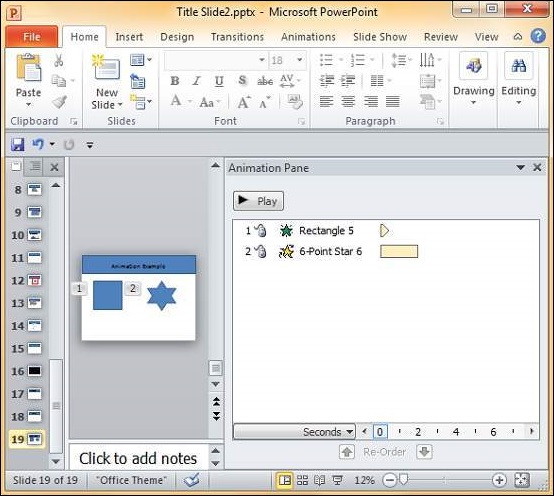
Step 5 − By default, all the animations are initiated by a click, but you can change this. To change the trigger, right-click on the animation object on the pane and choose an alternate trigger.
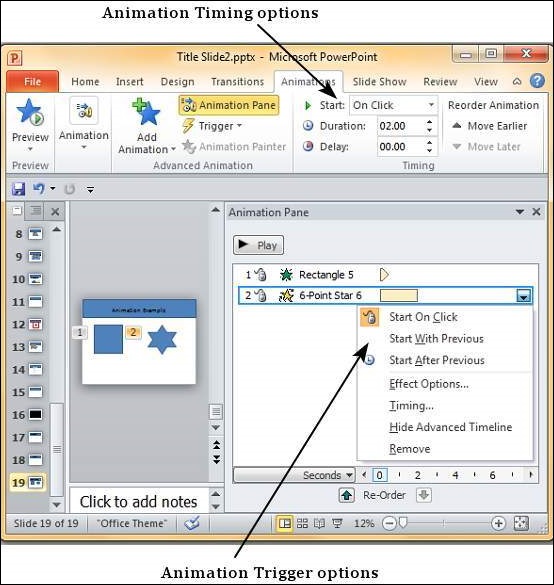
Start On Click will cause the animation to start when you click the mouse.
Start With Previous will cause the animation to begin with the previous animation; if this is the first object, it will begin as soon as you reach the slide during the slide show.
Start After Previous will cause the animation to begin after the previous animation ends.
Step 6 − From the timing section, you can also manipulate the animation timings.
Step 7 − To preview the animation settings, just click Play on the animation pane.
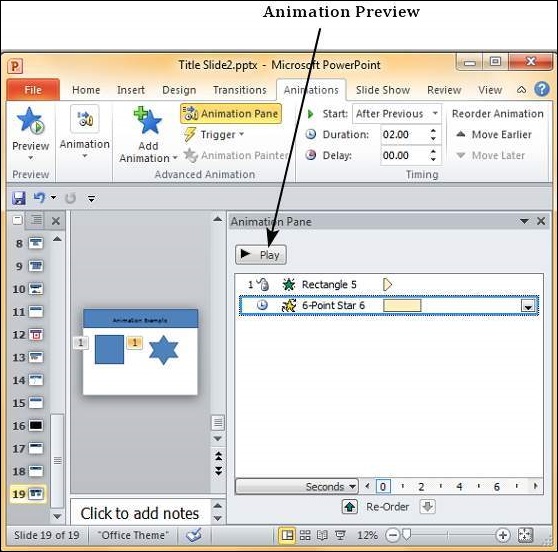
Add & Preview Transitions in Powerpoint 2010
PowerPoint supports slide transition feature which allows you to specify how should the slides transition during the slide show.
Given below are the steps to add and preview slide transitions.
Step 1 − Select the slide to which you want to apply the transition.
Step 2 − Go to the Transition Scheme under the Transitions ribbon.
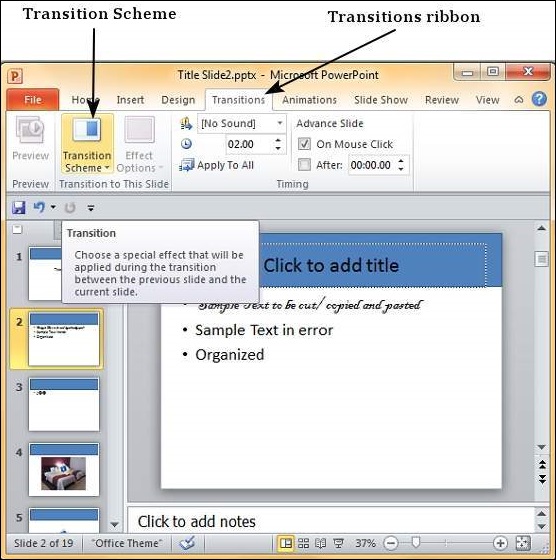
Step 3 − Select one of the transition schemes from the list available. PowerPoint will instantly show you a preview of the scheme. If you are not satisfied, you can pick an alternate scheme. The last selected scheme will apply to the slide.
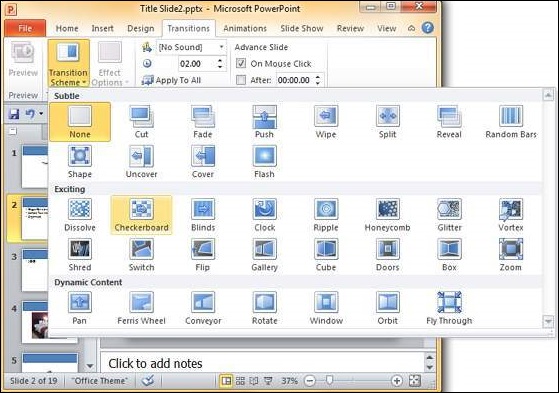
Step 4 − You can change the effects on the selected transition scheme from the Effect Options menu. Every scheme has a unique set of effect options.
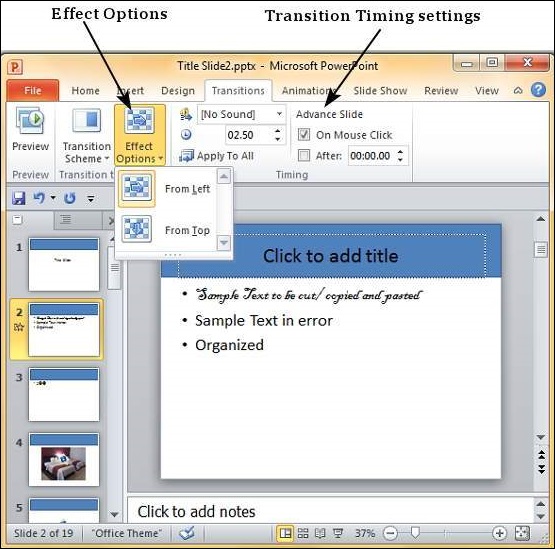
Step 5 − You can also modify the transition timing settings from the Timing section.
Step 6 − To preview the slide transition, click on Preview.
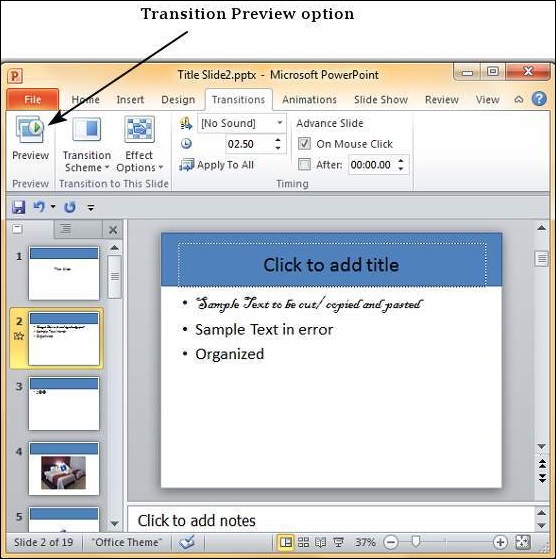
Create a PDF File in Powerpoint 2010
Although PowerPoint is used to create presentations, it supports various file types when it comes to saving the content. With a host of operating systems and Office versions available in the market, using a pdf file type can be a great way of ensuring everyone sees the same slides.
Given below are the steps to save a presentation as a pdf file.
Step 1 − Go to the Backstage view under the File tab.
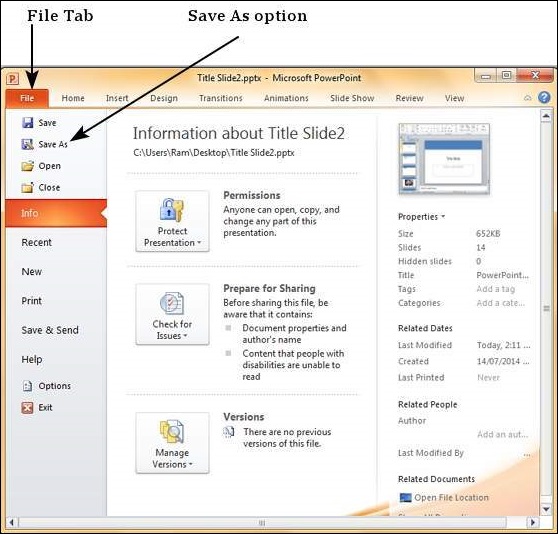
Step 2 − Click on Save As to open the Save As dialog.
Step 3 − Select the file type as .pdf from the list of supported file types.
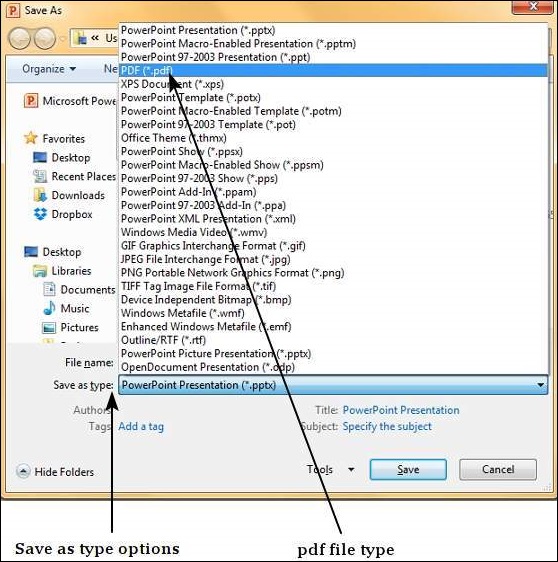
Step 4 − Add a proper name to the file and click Save.
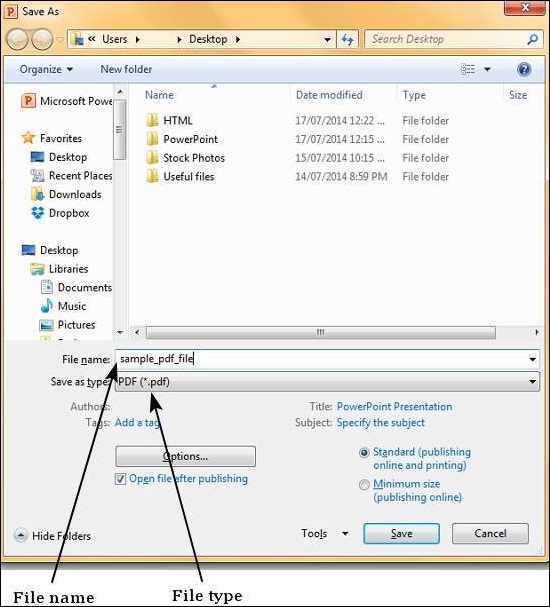
Step 5 − The .pdf file is created in the specified location.
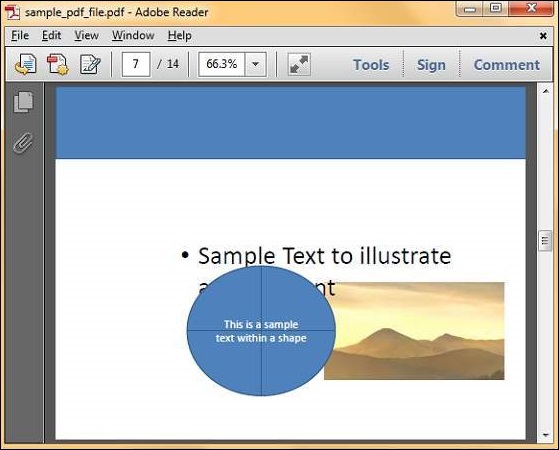
Create a Video File in Powerpoint 2010
PowerPoint allows presentations to be saved as video files that can be posted on video sharing platform like YouTube or just played on any other media.
Given below are the steps to save a presentation as a video file.
Step 1 − Go to the Backstage view under the File tab.
Step 2 − Click on Save As to open the Save As dialog.
Step 3 − Select the file type as .wmv from the list of supported file types.
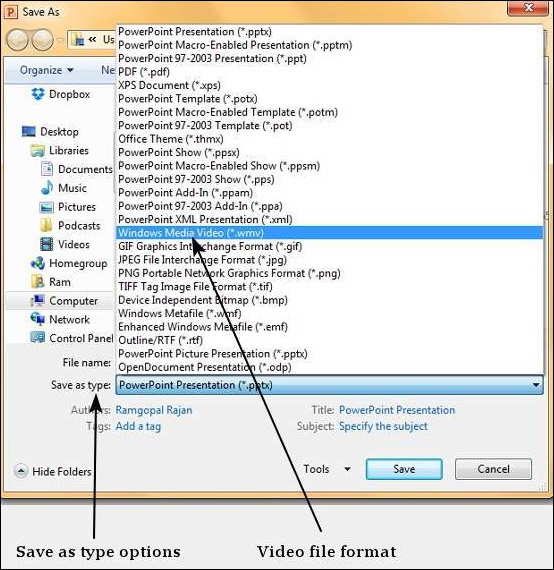
Step 4 − Add a proper name to the file and click Save.
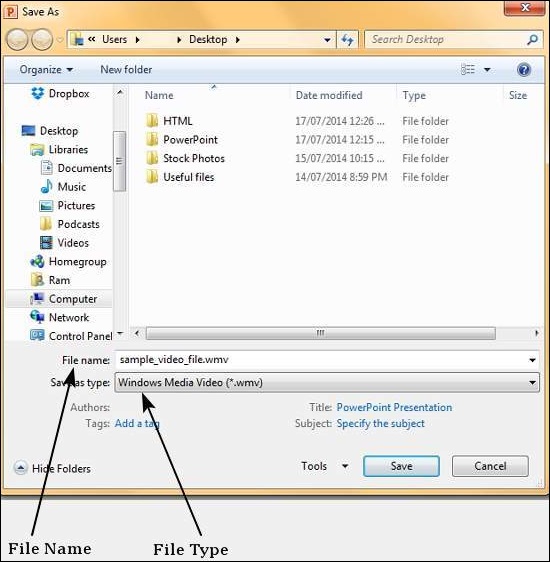
Step 5 − The video creation is not an instant process like other file types as PowerPoint needs to create the video file. You can track the progress of video creation at the bottom of your presentation window.
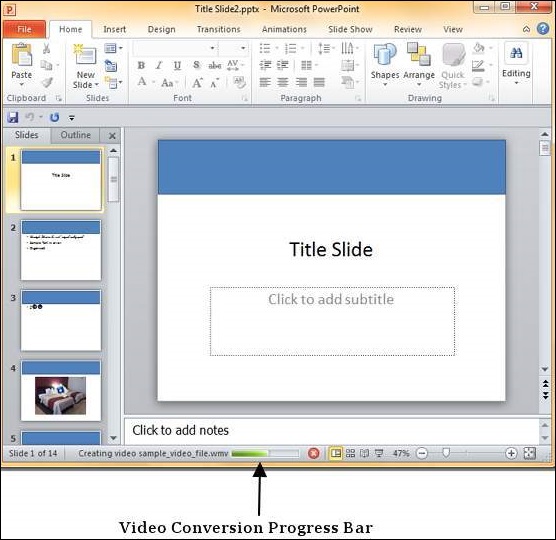
Step 6 − Once the creation is complete, the video file is created in the specified location.

Create Image File in Powerpoint 2010
Among the many file types that PowerPoint supports are a set of extensions for image files. The image file extensions supported by PowerPoint include JPEG (.jpg), GIF (.gif), TIFF (.tiff) and Bitmap (.bmp).
Given below are the steps to save a presentation as an image file.
Step 1 − Go to the Backstage view under the File tab.
Step 2 − Click on Save As to open the Save As dialog.
Step 3 − Select one of the image file types from the list of supported file types.
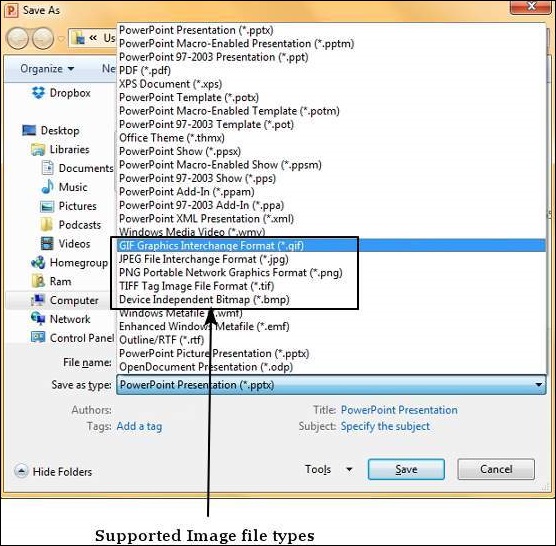
Step 4 − Add a proper name to the file and click Save.
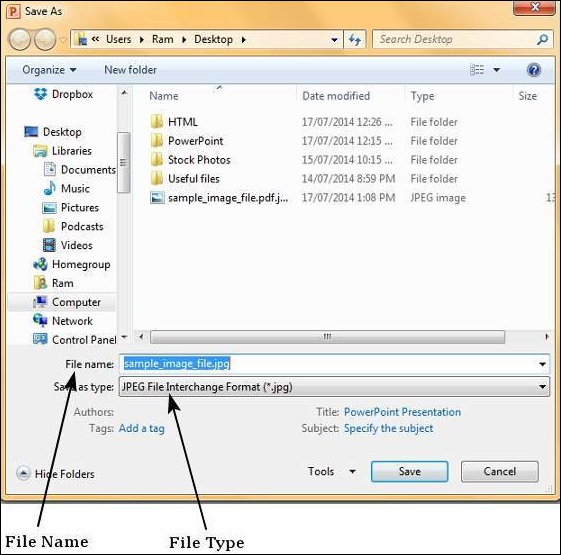
Step 5 − Microsoft PowerPoint dialog will pop up asking if you need just the selected slide or the entire presentation, make your selection.
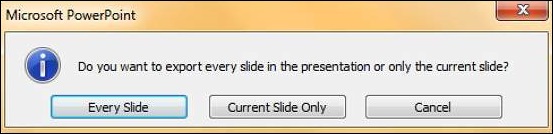
The respective image file is created in the specified location.
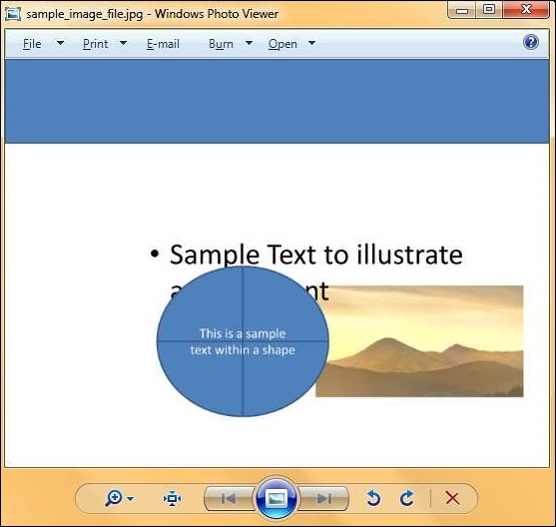
If you selected a single image, the image file is created at the specified location. If you selected entire presentation, then PowerPoint will create a folder with same name as the presentation file at the specified location. Every slide in the presentation will be converted into individual image files and stored under this folder.
Printing Presentation in Powerpoint 2010
It is sometimes necessary that you share your slides with your audience in printed format before you begin presenting them so they can take notes. There are other times when you want to give your audience handouts with additional notes.
To print slides, you must go to the Backstage view under the File tab and click on the Print menu.
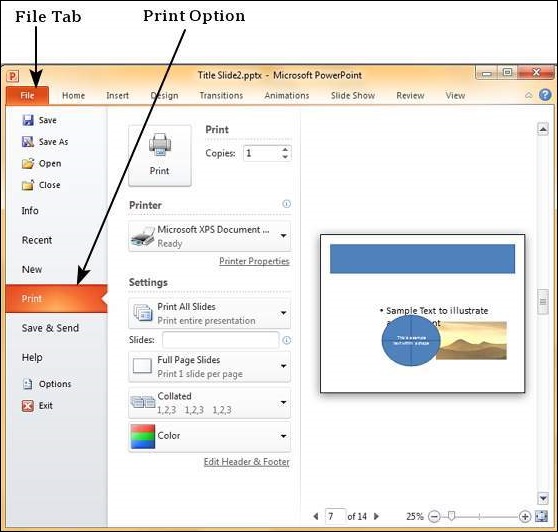
The following table describes the various printing options available in PowerPoint.
| Main Settings | Options | Description |
|---|---|---|
| Printing Slides | Print All Slides | Prints all the slides in the presentation. |
| Print Selection | Prints just the selected objects. | |
| Print Current Slide | Prints just the selected slide. | |
| Custom Range | Defines the slides you want printed. | |
| Slides | This is same as the Custom Range. | |
| Print Layout | Full Page Slides | One slide per page. |
| Notes Page | Slide and notes for every slide printed one below another - one slide per page. | |
| Outline | Print Slide outline. | |
| Handouts | Prints 1 or 2 or 3 or 4 or 6 or 9 slides per page - aligned vertically or horizontally. When you print handouts with 3 slides, you get the slide and the notes printed next to each other. | |
| Collation | Collating Options | Prints slides in sequence or prints multiple copies of each slide one after another. |
| Printing Color | Color | Selects color, greyscale or black & white printing options. Although you can select any color settings, the output will depend on the kind of printer you use. A non-color printer cannot print color slides. |
Broadcast Slide Show in Powerpoint 2010
PowerPoint 2010 offers users to broadcast their presentations on the internet to worldwide audience. Microsoft offers the free broadcast Slide Show service; all you need to do is share the link with your audience and they can watch the presentation from anywhere. There is no special setup or charges required to do this; all you need is a Windows Live account.
Given below are the steps to broadcast your presentation.
Step 1 − Go to the Backstage view under the File tab.
Step 2 − Click on Save & Send, select Broadcast Slide Show option and click on Broadcast Slide Show button.
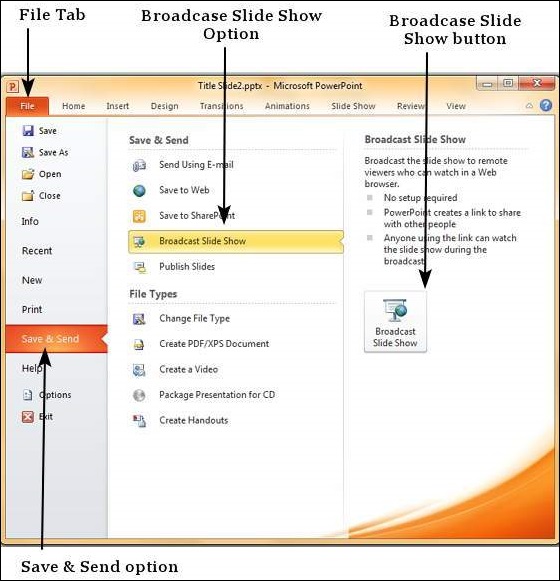
Step 3 − In the Broadcast Slide Show dialog, click on Start Broadcast.
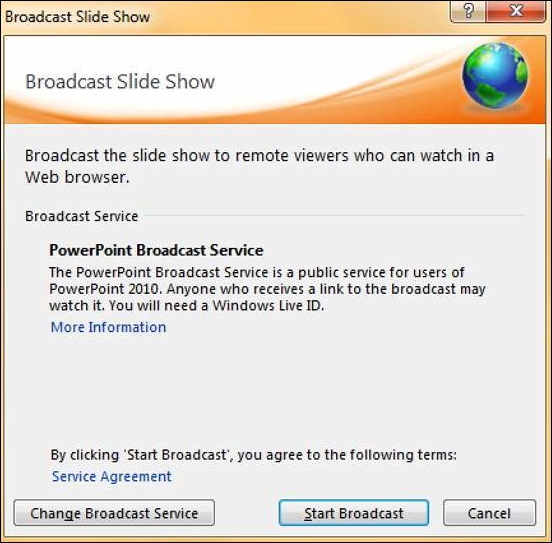
Step 4 − Log on to your Windows Live account in the login dialog.
Step 5 − Once the login is successful, PowerPoint will prepare the presentation for broadcast.
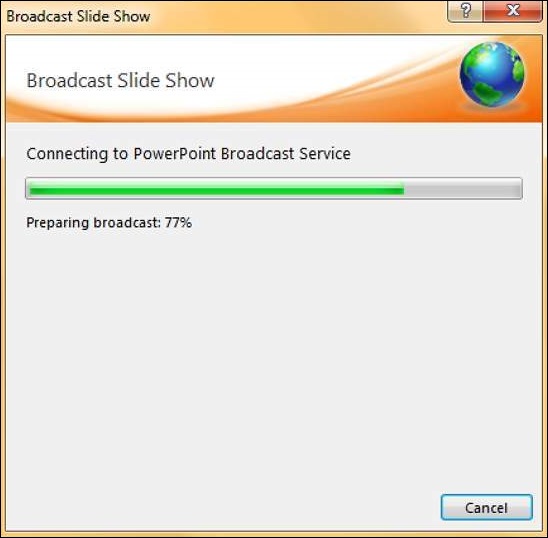
Step 6 − PowerPoint will provide the broadcast service link which you can share with your audience. If you are not using Outlook service, click on "Copy Link" to paste the link in your emails. If you are using Microsoft Outlook service, click on "Send in Email" and list the names of your audience.
Step 7 − Click on Start Slideshow to begin the presentation.
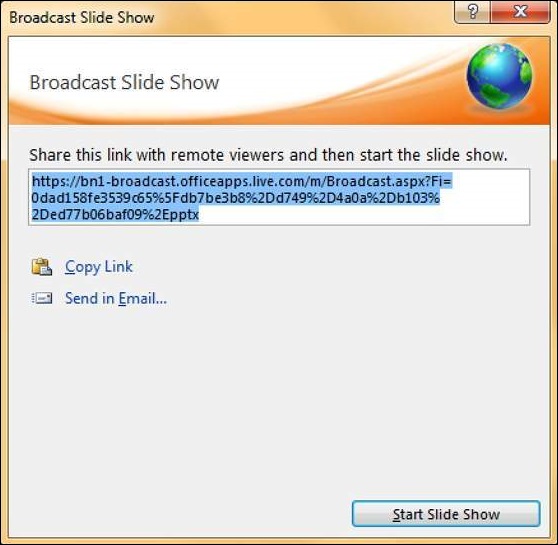
Step 8 − When you are done, you can click on the End Broadcast to stop the online presentation.
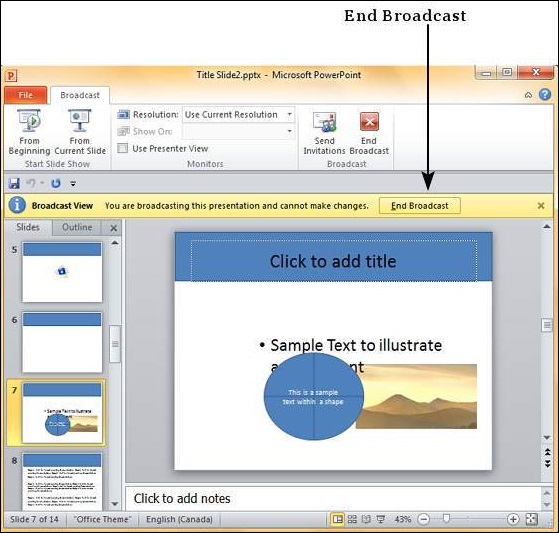
Packaging Presentation in Powerpoint 2010
Certain presentations are better suited for distribution as a CD to audience. In such cases, you can create a CD packaging which can be burned into a CD and distributed.
Given below are the steps to package your presentation for CD.
Step 1 − Go to the Backstage view under the File tab.
Step 2 − Click on Save & Send, select Package Presentation for CD option and click on Package for CD button.
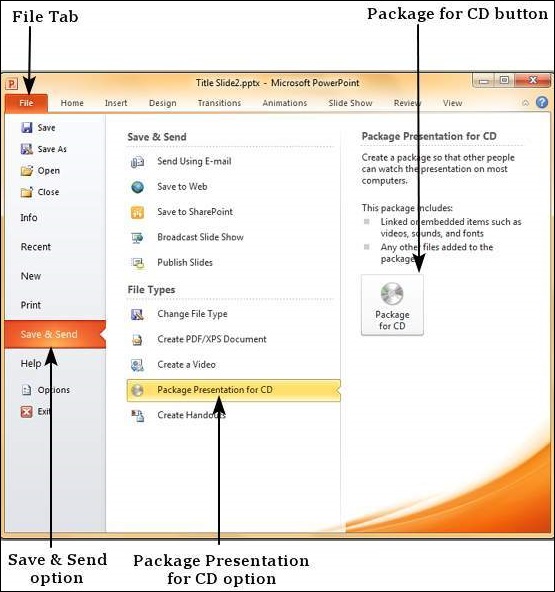
Step 3 − On the Package for CD dialog, select the package or CD name. Use the file management options of Add and Remove to add or remove more files to the package.
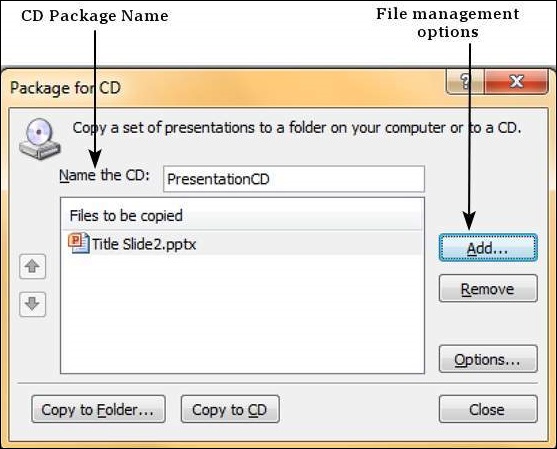
Step 4 − Use the Add Files to add files to the package. The default file type filter is set to presentations and shows, but you can change it to search any file type.
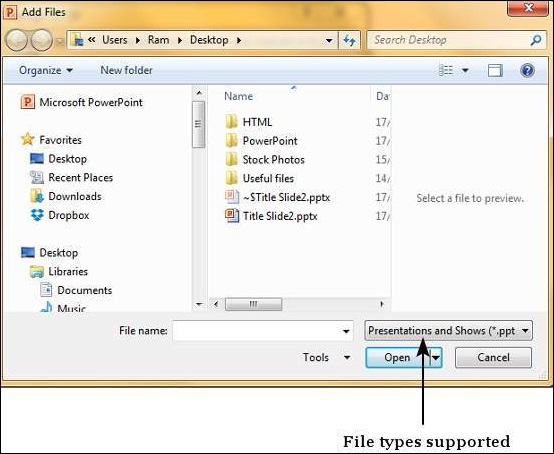
Step 5 − Once you have all the files ready for the package, click on "Copy to Folder" or "Copy to CD" and follow the steps to create the final package.

Setting Document Password in Powerpoint 2010
Sometimes it is important to protect the presentation and ensure unauthorized audience does not get to view the slides. PowerPoint offers users the ability to protect the presentations.
Given below are the steps to password protect the presentation
Step 1 − Go to the Backstage view under the File tab.
Step 2 − On the Info section, click on the Permissions dropdown.
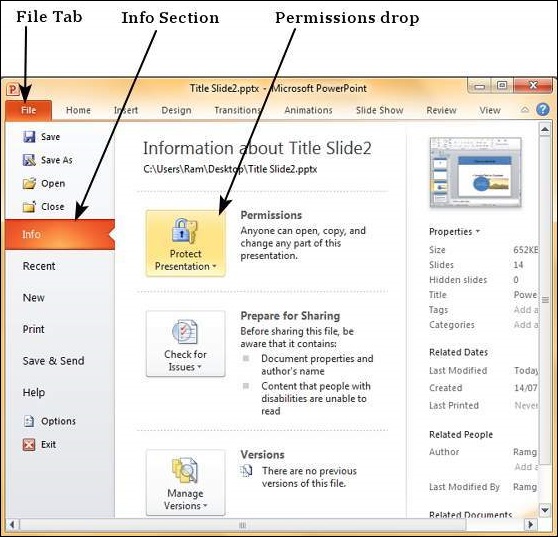
Step 3 − Select "Encrypt with Password" to enable password protection.
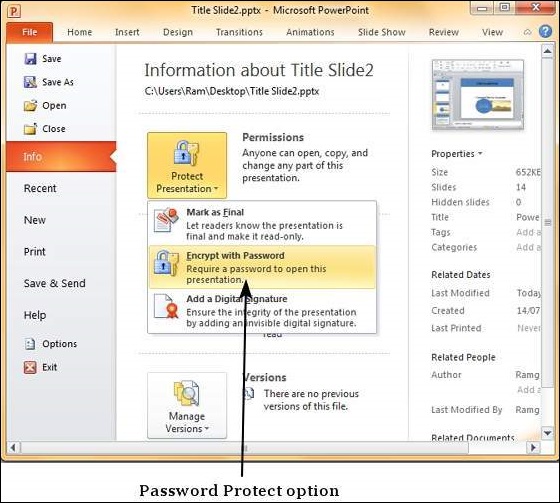
Step 4 − Enter the password in the Encrypt Document dialog.
Step 5 − Re-enter the password in the Confirm Password dialog.
Step 6 − Your presentation is now password protected.
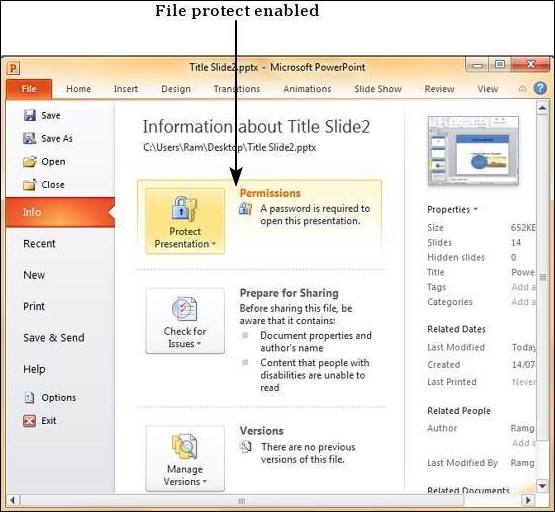
Step 7 − Readers will now have to enter the password in the Password dialog to open the file.
Step 8 − To unprotect the file, follow the steps up to Step 3 and delete the password in the Encrypt Document dialog.
Email Slide Show in Powerpoint 2010
PowerPoint allows users to share the presentation as an email attachment too. Although you can attach the presentation from outside the program, the ability to send the emails directly from PowerPoint is quite convenient; this is because you need not leave the PowerPoint program to send the email.
Given below are the steps to send an email from PowerPoint.
Step 1 − Go to the Backstage view under the File tab.
Step 2 − Click on Save & Send, select Send Using E-mail option and click on Send as Attachment button.
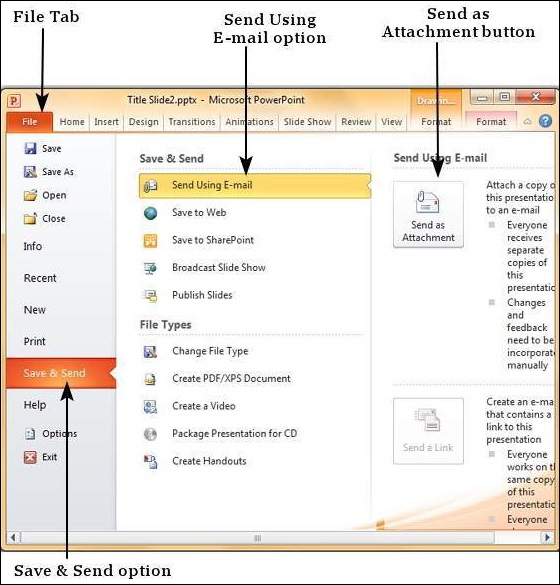
Step 3 − This launches the Outlook Send Email window with the presentation added as attachment. You can add the emails of recipients and send the email.
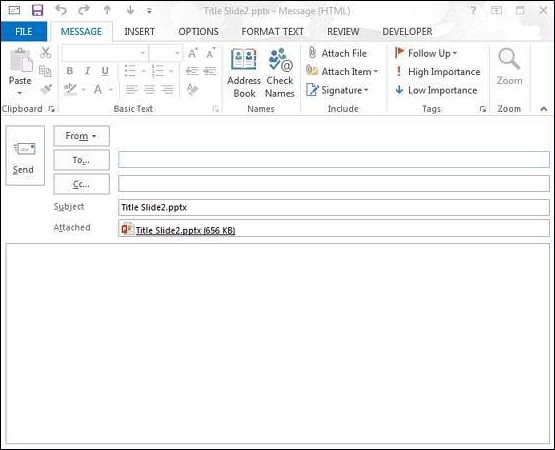
Step 4 − Instead of "Send as Attachment" you select "Send as PDF", you will get a pdf attachment instead of a .pptx attachment.