MongoDB - Environment
Let us now see how to install MongoDB on Windows.
Install MongoDB On Windows
To install MongoDB on Windows, first download the latest release of MongoDB from https://www.mongodb.org/downloads. Make sure you get correct version of MongoDB depending upon your Windows version. To get your Windows version, open command prompt and execute the following command.
C:\>wmic os get osarchitecture
OSArchitecture
64-bit
C:\>
32-bit versions of MongoDB only support databases smaller than 2GB and suitable only for testing and evaluation purposes.
Now extract your downloaded file to c:\ drive or any other location. Make sure the name of the extracted folder is mongodb-win32-i386-[version] or mongodb-win32-x86_64-[version]. Here [version] is the version of MongoDB download.
Next, open the command prompt and run the following command.
C:\>move mongodb-win64-* mongodb
   1 dir(s) moved.
C:\>
In case you have extracted the MongoDB at different location, then go to that path by using command cd FOOLDER/DIR and now run the above given process.
MongoDB requires a data folder to store its files. The default location for the MongoDB data directory is c:\data\db. So you need to create this folder using the Command Prompt. Execute the following command sequence.
C:\>md data
C:\md data\db
If you have to install the MongoDB at a different location, then you need to specify an alternate path for \data\db by setting the path dbpath in mongod.exe. For the same, issue the following commands.
In the command prompt, navigate to the bin directory present in the MongoDB installation folder. Suppose my installation folder is D:\set up\mongodb
C:\Users\XYZ>d:
D:\>cd "set up"
D:\set up>cd mongodb
D:\set up\mongodb>cd bin
D:\set up\mongodb\bin>mongod.exe --dbpath "d:\set up\mongodb\data"
This will show waiting for connections message on the console output, which indicates that the mongod.exe process is running successfully.
Now to run the MongoDB, you need to open another command prompt and issue the following command.
D:\set up\mongodb\bin>mongo.exe
MongoDB shell version: 2.4.6
connecting to: test
>db.test.save( { a: 1 } )
>db.test.find()
{ "_id" : ObjectId(5879b0f65a56a454), "a" : 1 }
>
This will show that MongoDB is installed and run successfully. Next time when you run MongoDB, you need to issue only commands.
D:\set up\mongodb\bin>mongod.exe --dbpath "d:\set up\mongodb\data"
D:\set up\mongodb\bin>mongo.exe
Install MongoDB on Ubuntu
Run the following command to import the MongoDB public GPG key −
sudo apt-key adv --keyserver hkp://keyserver.ubuntu.com:80 --recv 7F0CEB10
Create a /etc/apt/sources.list.d/mongodb.list file using the following command.
echo 'deb https://downloads-distro.mongodb.org/repo/ubuntu-upstart dist 10gen'
   | sudo tee /etc/apt/sources.list.d/mongodb.list
Now issue the following command to update the repository −
sudo apt-get update
Next install the MongoDB by using the following command −
apt-get install mongodb-10gen = 2.2.3
In the above installation, 2.2.3 is currently released MongoDB version. Make sure to install the latest version always. Now MongoDB is installed successfully.
Start MongoDB
sudo service mongodb start
Stop MongoDB
sudo service mongodb stop
Restart MongoDB
sudo service mongodb restart
To use MongoDB run the following command.
mongo
This will connect you to running MongoDB instance.
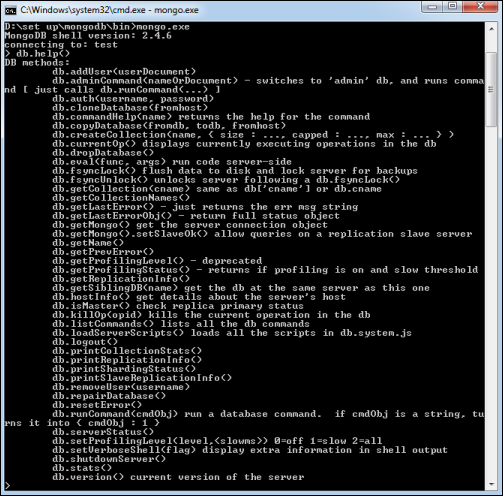
MongoDB Help
To get a list of commands, type db.help() in MongoDB client. This will give you a list of commands as shown in the following screenshot.
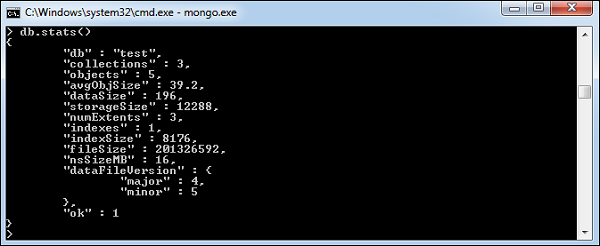
MongoDB Statistics
To get stats about MongoDB server, type the command db.stats() in MongoDB client. This will show the database name, number of collection and documents in the database. Output of the command is shown in the following screenshot.