ASP.NET Core - DBContext
The Entity Framework enables you to query, insert, update, and delete data, using Common Language Runtime (CLR) objects known as entities. The Entity Framework maps the entities and relationships that are defined in your model to a database. It also provides facilities to −
Materialize data returned from the database as entity objects.
Track changes that were made to the objects.
Handle concurrency.
Propagate object changes back to the database.
Bind objects to controls.
The primary class that is responsible for interacting with data as objects is the DbContext. The recommended way to work with context is to define a class that derives from the DbContext and exposes the DbSet properties that represent collections of the specified entities in the context.
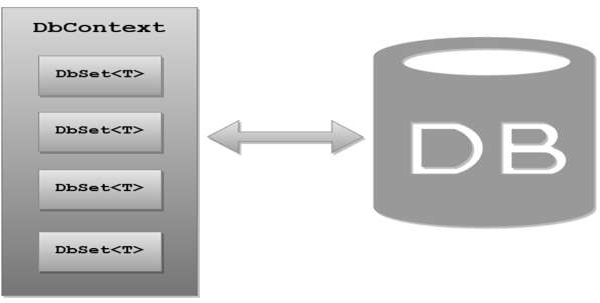
Logically, a DBContext maps to a specific database that has a schema that the DBContext understands. And on that DBContext class, you can create properties that are type DbSet<T>. The generic type parameter T will be a type of entity like Employee is an entity in the FirstAppDemo application.
Example
Let us take a simple example, wherein we will create a DbContext class. Here, we need to add a new class in Models folder and call it FirstAppDempDbContext. Even though this class is not a model in itself, it does put together all our Models so that we can use them with the database.
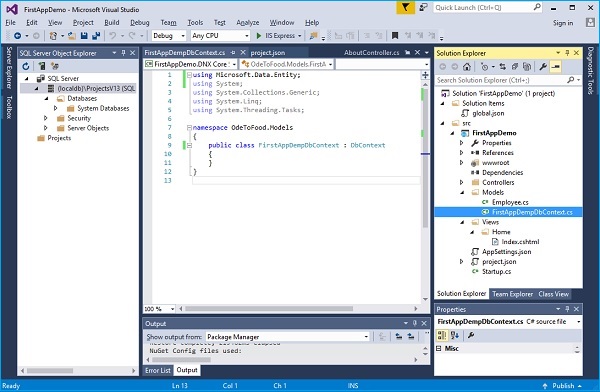
Inherit your context class from the DbContext class which is in Miscrosoft.Data.Entity namespace. Now implement a DbSet of Employee on that class.
Each DbSet will map to a table in the database. If you have a property DbSet of employee, and the name of that property is Employees, the Entity Framework will by default look for an Employees table inside your database.
using FirstAppDemo.Models;
using Microsoft.Data.Entity;

using System;
using System.Collections.Generic;
using System.Linq;
using System.Threading.Tasks;

namespace OdeToFood.Models {
   public class FirstAppDemoDbContext : DbContext {
      public DbSet<Employee> Employees { get; set; }
   }
}
The implementation is very simple because we only have a single model to work with. We need only one property, the DbSet of Employee and we can name this property Employees.
Let us now insert this class directly into controllers, and the controllers could then use FirstAppDemoDbContext to query the database. We will simplify all these by adding a new class to the HomeController class in which we implement methods to Add employee and Get employee as shown in the following program.
using Microsoft.AspNet.Mvc;

using FirstAppDemo.ViewModels;
using FirstAppDemo.Services;
using FirstAppDemo.Entities;
using FirstAppDemo.Models;

using System.Collections.Generic;
using System.Linq;

namespace FirstAppDemo.Controllers {
   public class HomeController : Controller {
      public ViewResult Index() {
         var model = new HomePageViewModel();

         using (var context = new FirstAppDemoDbContext()) {
            SQLEmployeeData sqlData = new SQLEmployeeData(context);
               model.Employees = sqlData.GetAll();
         }
         return View(model);
      }
   }
   public class SQLEmployeeData {
      private FirstAppDemoDbContext _context { get; set; }
      public SQLEmployeeData(FirstAppDemoDbContext context) {
         _context = context;
      }
      public void Add(Employee emp) {
         _context.Add(emp);
         _context.SaveChanges();
      }
      public Employee Get(int ID) {
         return _context.Employees.FirstOrDefault(e => e.Id == ID);
      }
      public IEnumerable<Employee> GetAll() {
         return _context.Employees.ToList<Employee>();
      }
   }
   public class HomePageViewModel {
      public IEnumerable<Employee> Employees { get; set; }
   }
}
In the above SQLEmployeeData class, you can see that we have defined the Add method which will add a new employee object to the context and then it will save the changes. In the Get method, it will return an employee based on the ID. Whereas, in the GetAll method it will return the list of all the employees in the database.
Configuring the Entity Framework Services
To have a usable Entity Framework DBContext, we need to change the configuration of the application. We will need to add a connection string so that our DBContext knows which server to go to and which database to query.
We will put the connection string in a JSON configuration file.
We also need to add some more services during the ConfigureServices method of the Startup class.
The Entity Framework, just like ASP.NET and the MVC framework, the Entity Framework relies on dependency injection, and for injection to work, the runtime needs to know about the various services that the Entity Framework uses.
There is an easy configuration API that will add all the default services that we need.
Let us go to the AppSettings.json file and add the connections string as shown in the following program.
{
   "message": "Hello, World! this message is from configuration file...",
   "database": {
      "connection": "Data Source=(localdb)\\mssqllocaldb;Initial Catalog=FirstAppDemo"
   }
}
Let us now go to the Startup class where we need to add some additional services for the Entity Framework to work properly. Specifically, there are three things that we need to do that are related to the Entity Framework −
We need to add the core Entity Framework services.
We also need to add the SQL Server-related Entity Framework services.
We need to tell the Entity Framework about our DBContext.
All this can be done through methods that are available as extension methods on IServiceCollection as shown in the following program.
public void ConfigureServices(IServiceCollection services) {
   services.AddMvc();
   services.AddEntityFramework()
      .AddSqlServer()
      .AddDbContext<FirstAppDemoDbContext>

   (option => option.UseSqlServer(Configuration["database:connection"]));
}
The first method is the AddEntityFramework. This will add the core Entity Framework services, the default services.
But since the Entity Framework is now designed to work with different sorts of databases, including non-relational databases, we need to make a second call to tell the Entity Framework to add its default SQL Server-related services.
Then we also need to tell the Entity Framework about my DBContext class so it can construct instances of that class appropriately and we can do that through a third method, the AddDbContext method.
This one takes a generic type parameter where we specify the type of the DBContext derived class, the FirstAppDemoDbContext.
Inside the AddDbContext, we need to describe the options for our DBContext.
This can be done by a lambda expression; it is an action where we receive an option parameter and the Entity Framework can support the different databases. All we need to do is, tell the Entity Framework that this particular DBContext is going to UseSqlServer.
This method requires a parameter which is the connectionString to use.
The following is the complete implementation of the Startup.cs file.
using Microsoft.AspNet.Mvc;

using FirstAppDemo.ViewModels;
using FirstAppDemo.Services;
using FirstAppDemo.Entities;
using FirstAppDemo.Models;

using System.Collections.Generic;
using System.Linq;

namespace FirstAppDemo.Controllers {
   public class HomeController : Controller {
      public ViewResult Index() {
         var employee = new Employee { Id = 1, Name = "Mark Upston1" };
         using (var context = new

         FirstAppDemoDbContext()) {
            SQLEmployeeData sqlData = new SQLEmployeeData(context);
            sqlData.Add(employee);
         }

         //var employee = new Employee { ID = 1, Name = "Mark Upston" };
         return View(employee);
      }
   }
   public class SQLEmployeeData {
      private FirstAppDemoDbContext _context { get; set; }
      public SQLEmployeeData(FirstAppDemoDbContext context) {
         _context = context;
      }
      public void Add(Employee emp) {
         _context.Add(emp);
         _context.SaveChanges();
      }
      public Employee Get(int ID) {
         return _context.Employees.FirstOrDefault(e => e.Id == ID);
      }
      public IEnumerable<Employee> GetAll() {
         return _context.Employees.ToList<Employee>();
      }
   }
}
Now we need to set up the database. One way to get a database set up is to use the Entity Framework to create the database and this is a two-step process −
The First Step
This involves the following −
Adding migration code to our project.
The migration code is C# code. This can be executed to create a database in a database schema.
The Entity Framework can generate this migration code for us.
The Entity Framework looks at the database and at our models and figures out what the schema changes are required to make the application work.
So when we add additional models or make changes to the existing models, like the Employee class, we can continue to add migrations to our project and keep our database schema in sync.
The Second Step
This involves the following −
Here, we need to explicitly apply those migrations to update a database.
Both of these tasks can be achieved by using some easy commands from a console window.
We have made project.json.
That is why we have made project.json to add a command where “ef” maps to EntityFramework.Commands.
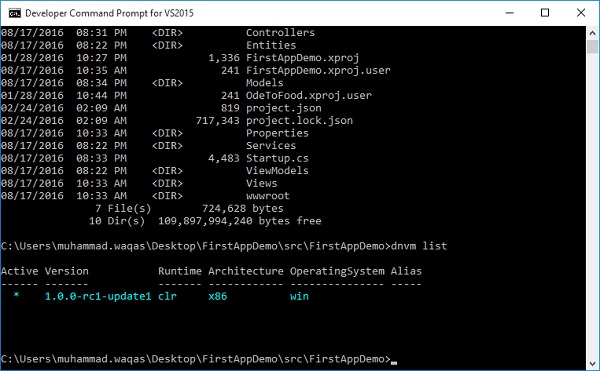
Let us open the Developer Command Prompt for Visual Studio to run the commands that we need to add the migrations and apply the migrations. The easiest way to do this is to go to the application root directory.
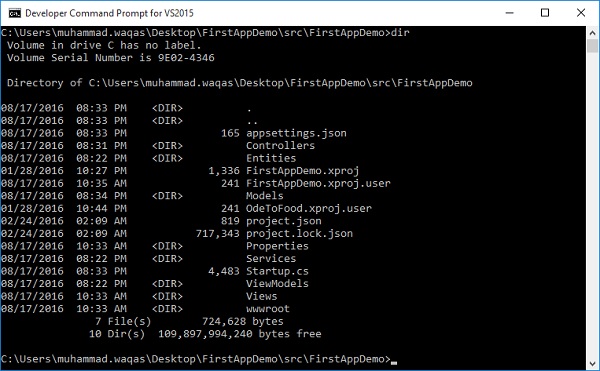
If you are in the folder that has the project.json file, then you are in the correct folder. Here, we need to execute a command known as dnvm. This is the .NET version manager which will tell the system what runtime we want to use.
Let us now use the following command.
dnvm list
You will see the following output when you press Enter.
We need to tell the dnvm that we want to use the specific runtimes. This will give us access to the dotnet command or the dnx command that we want to execute.
Execute the following command.
dnvm use1.0.0-rc1-update1 -p
Press Enter.
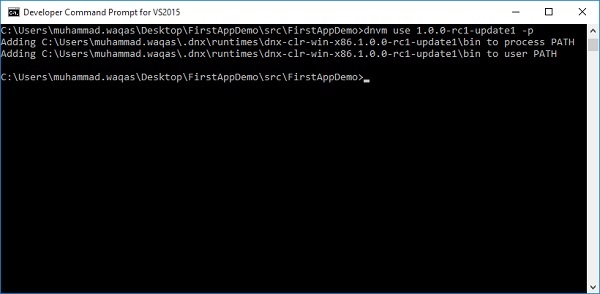
dnvm will set up our path and the environment variables to include a bin directory that will give us access to this dnx utility. Let us execute the dnx ef command.
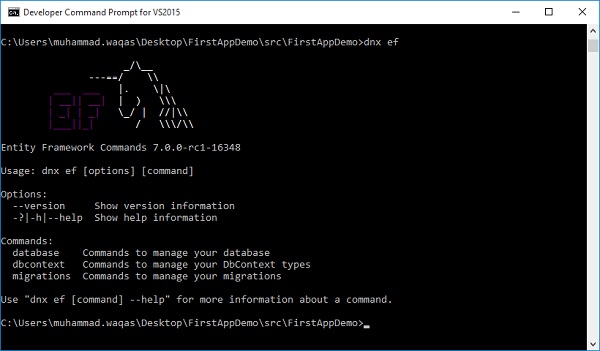
This is the .NET execution environment, using dnx, we can call the commands that we have listed in our project.json file. Executing these commands is generally very easy. When you type dnx ef, you will get a help screen. You don't have to remember all the options. You can see the available commands from the Entity Framework Commands and there are three of them.
First, we need to add migration to execute the following command.
dnx ef migrations add v1
Press Enter.
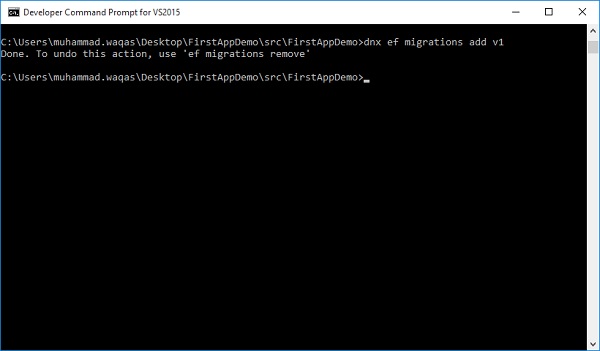
The Entity Framework will find that context and look at the models that are inside. It will know that there is no previous migration and so it is going to generate the first migration. Here, v1 is the version 1 of the database. It will create a new folder in Solution Explorer and generate code.
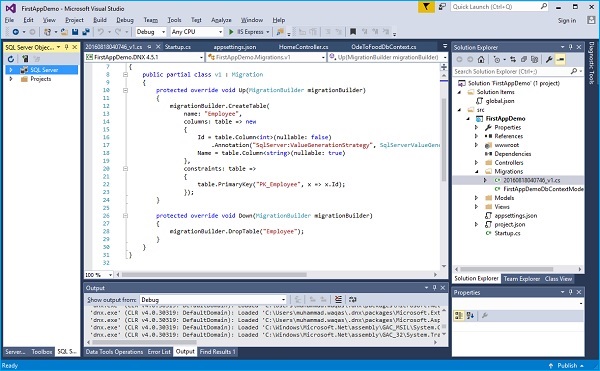
A migration is essentially a C# code that is used to generate SQL commands to modify the schema in a SQL database.
using System;
using System.Collections.Generic;

using Microsoft.Data.Entity.Migrations;
using Microsoft.Data.Entity.Metadata;

namespace FirstAppDemo.Migrations {
   public partial class v1 : Migration {
      protected override void Up(MigrationBuilder migrationBuilder) {

         migrationBuilder.CreateTable(name: "Employee", columns: table => new {
            Id = table.Column<int>(nullable: false)
               .Annotation("SqlServer:ValueGenerationStrategy",
               SqlServerValueGenerationStrategy.IdentityColumn),
               Name = table.Column<string>(nullable: true)
         },
         constraints: table => {
            table.PrimaryKey("PK_Employee", x => x.Id);
         });
      }
      protected override void Down(MigrationBuilder migrationBuilder) {
         migrationBuilder.DropTable("Employee");
      }
   }
}
You can see it will create a table called Employees.
This table should have two columns — an ID, and a Name column.
By convention, when the Entity Framework sees that you have a property called Id, it will make that property or, rather, make that column a primary key in the database.
Here, we will use the SQL Server. By default, the Entity Framework will make that an IdentityColumn, which means the SQL Server will generate the IDs for us.
Let us apply these IDs to a database by typing the “dnx ef database update” command.
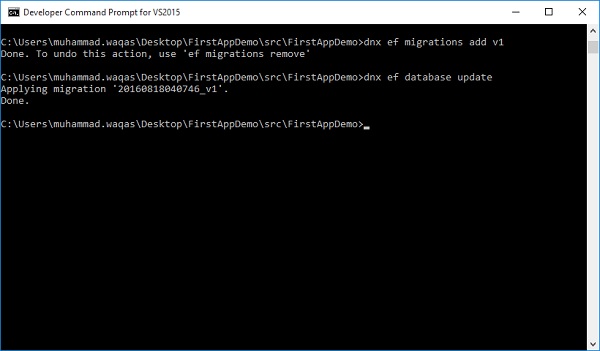
You can see that the command has applied migration.
Let us now go to the SQL Server Object Explorer, and refresh the databases, you can now see we have a FirstAppDemo database.
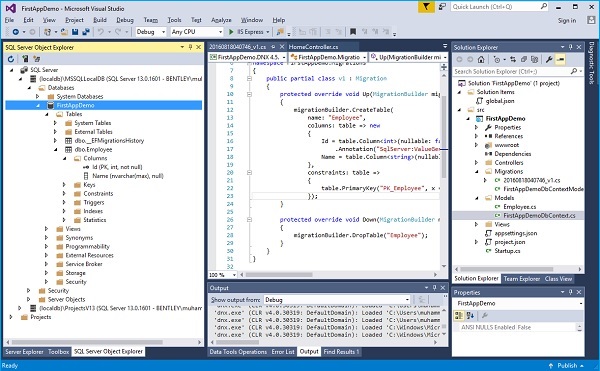
You can also see our Employee table and we can even look at the columns for that table in which the ID column is the primary key.
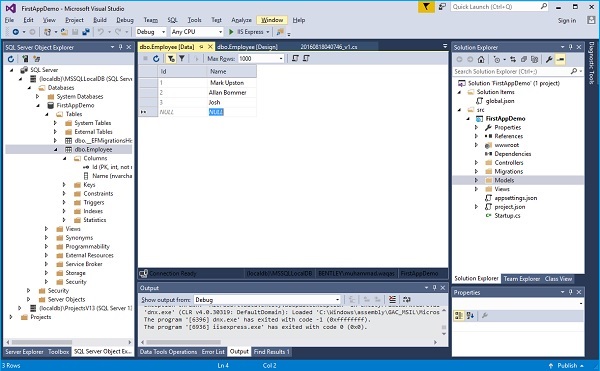
Let us right-click on the dbo.Employee table and select View Data.

Before we run the application, let us add some data. When we launch the application, we should see some data from the database.
Let us just add a couple of rows of data here.
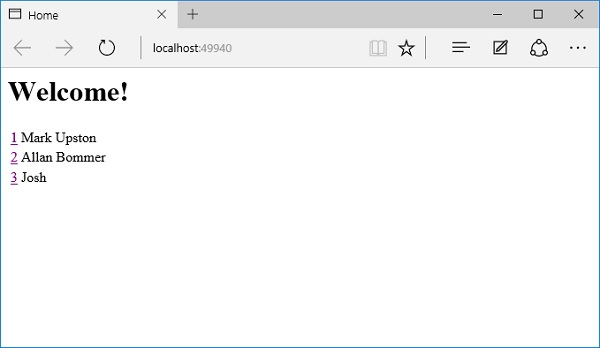
Let us now update the index.cshtml file. It shows all the data in tabular form.
@model FirstAppDemo.Controllers.HomePageViewModel
<html xmlns="https://www.w3.org/1999/xhtml">
   <head>
       <title>Home</title>
   </head>

   <body>
      <h1>Welcome!</h1>

      <table>
         @foreach (var employee in Model.Employees) {
            <tr>
               <td>
                  @Html.ActionLink(employee.Id.ToString(), "Details", new
                     { id = employee.Id })
               </td>
               <td>@employee.Name</td>
            </tr>
         }
      </table>
   </body>
</html>
Once you run the application, it should produce the following output.