
ASP.NET Core - Razor Layout Views
In this chapter, we will understand the Razor Layout Views. Most websites and web applications will want to create pages that present some common elements.
You typically have a top area on every page where you display a logo and a navigational menu.
You might also have a sidebar with additional links and information and probably a footer at the bottom of the page with some content.
Every page of the application will want to have these common factors. Here, we make use of the Layout view to avoid duplication of factors in every page that we write.
Layout View
Let us now understand what a Layout View is.
A Layout view is a Razor view with a *.cshtml extension. You have a choice to name a Layout view the way you want. In this chapter, we will be using a Layout view with the name _Layout.cshtml.
This is a common name for a Layout view, and the leading underscore is not required. That is just a convention that many developers follow to identify a view that is not a view; you render this as a view result from a controller action.
It is a special kind of view, but once we have a Layout view, we can set up our controller views like the Index view for the home page.
We can set up this view to render inside the Layout view at a specific location.
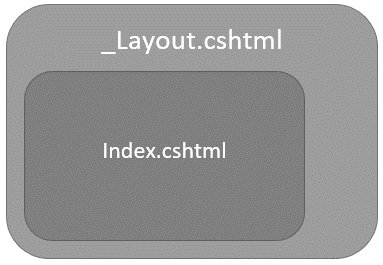
This Layout view approach means that the Index.cshtml doesn't need to know anything about the logo or the top level navigation.
The Index view only needs to render the specific content for the model the controller action gives this view and the Layout view takes care of everything else.
Example
Let us take a simple example.
If you have multiple views, then you will see that all the views will contain some amount of duplicate markup. They all will have an opening HTML tag, a head tag, and a body tag.
Even though we don't have a navigational menu in this application, chances are in a real application it might be also available and we don't want to duplicate that markup in every view.
Let us create a Layout view and we will add the Layout view to a new folder named Shared inside the Views folder. This is a conventional folder that the MVC framework knows about. It knows that views inside here might be used by multiple controllers across the application. Let us right-click on the Shared folder and select Add → New Item.
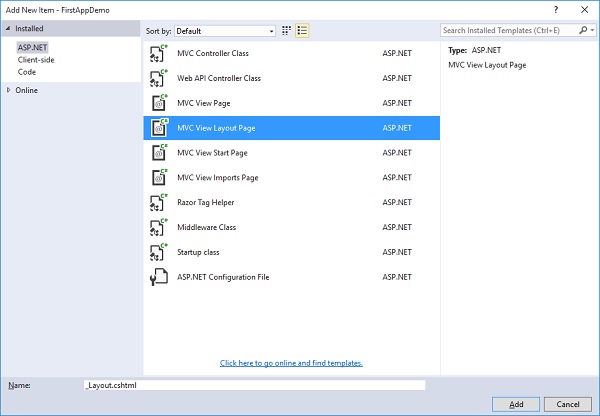
In the middle pane, select the MVC View Layout Page. The default name here is _Layout.cshtml. Choose the Layout view that you want to use at runtime depending on the user. Now, click on the Add button. This is what you will get by default for your new Layout view.
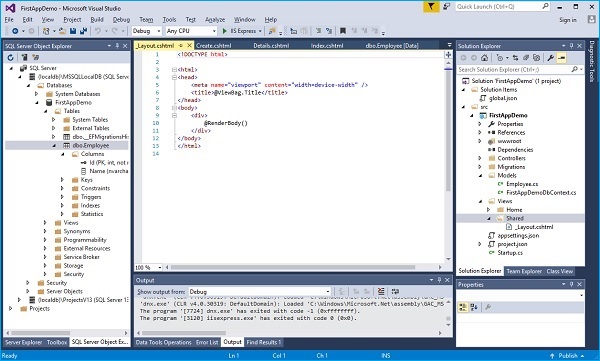
We want the Layout view to be responsible for managing the head and the body. Now, as this view is in a Razor view we can use the C# expressions. We can still add literal text. We now have a div that displays DateTime.Now. Let us now just add Year.
<!DOCTYPE html>
<html>

   <head>
      <meta name = "viewport" content = "width = device-width" />
      <title>@ViewBag.Title</title>
   </head>

   <body>
      <div>
        @DateTime.Now
      </div>

      <div>
        @RenderBody()
      </div>

   </body>
</html>
In the above code, you will see expressions like RenderBody and ViewBag.Title. When an MVC controller action renders the Index view, and with it there is a layout page involved; then the Index view and the HTML it produces will be placed in the Index view.
This is where the method call to RenderBody exists. We can expect all of the content views throughout our application to appear inside the div where RenderBody is called.
The other expression inside this file is the ViewBag.Title. ViewBag is a data structure that can be added to any property and any data that you want to into the ViewBag. We can add a ViewBag.Title, ViewBag.CurrentDate or any properties that we want on the ViewBag.
Let us now go to the index.cshtml file.
@model FirstAppDemo.Controllers.HomePageViewModel
<html xmlns = "https://www.w3.org/1999/xhtml">

   <head>
      <title>Home</title>
   </head>

   <body>
      <h1>Welcome!</h1>

      <table>
         @foreach (var employee in Model.Employees) {
            <tr>
               <td>
                  @Html.ActionLink(employee.Id.ToString(), "Details", new
                     { id = employee.Id })
               </td>
               <td>@employee.Name</td>
            </tr>
         }
      </table>

   </body>
</html>
Remove the markup that we no longer need inside the Index view. So, we can remove things like the HTML tag and the head tag. We also don't need the opening body element or the closing tags as shown in the following program.
@model FirstAppDemo.Controllers.HomePageViewModel
@{
   ViewBag.Title = "Home";
   Layout = "~/Views/Shared/_Layout.cshtml";
}
<h1>Welcome!</h1>
<table>
   @foreach (var employee in Model.Employees) {
      <tr>
         <td>
            @Html.ActionLink(employee.Id.ToString(), "Details", new { id = employee.Id })
         </td>
         <td>@employee.Name</td>
      </tr>
   }
</table>
We still need to do two things −
First, we need to tell the MVC framework that we want to use the Layout view from this view.
Second, we need to set the appropriate title by adding some information into the ViewBag as shown in the above code.
Let us save all the files and run the application. Once you run the application, you will see the following home page.


