Ionic - Cards
Since mobile devices have smaller screen size, cards are one of the best elements for displaying information that will feel user friendly. In the previous chapter, we have discussed how to inset lists. Cards are very similar to inset lists, but they offer some additional shadowing that can influence the performance for larger lists.
Adding Cards
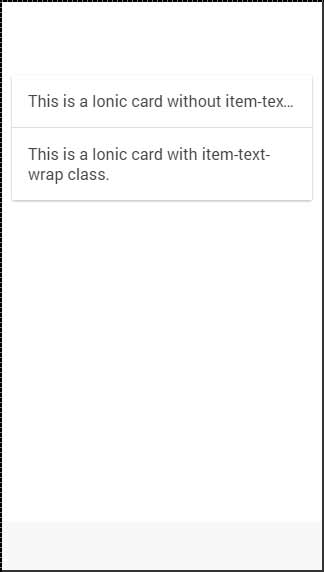
A default card can be created by adding a card class to your element. Cards are usually formed as lists with the item class. One of the most useful class is the item-text-wrap. This will help when you have too much text, so you want to wrap it inside your card. The first card in the following example does not have the item-text-wrap class assigned, but the second one is using it.
<div class = "card">
   <div class = "item">
      This is a Ionic card without item-text-wrap class.
   </div>

   <div class = "item item-text-wrap">
      This is a Ionic card with item-text-wrap class.
   </div>
</div>
The above code will produce the following screen −
Card Header and Footer
In the previous chapter, we have already discussed how to use the item-divider class for grouping lists. This class can be very useful when working with cards to create card headers. The same class can be used for footers as shown in the following code −
<div class = "card list">
   <div class = "item item-divider">
      Card header
   </div>

   <div class = "item item-text-wrap">
      Card text...
   </div>

   <div class = "item item-divider">
      Card Footer
   </div>
</div>
The above code will produce the following screen −

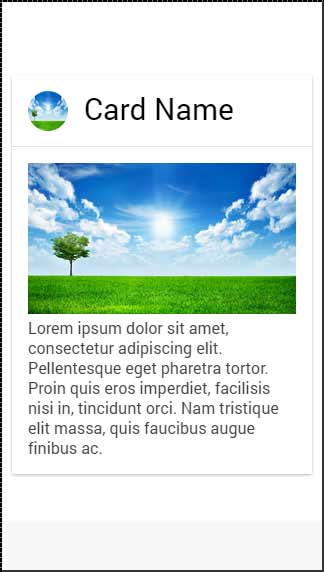
Complete Card
You can add any element on top of your card. In following example, we will show you how to use the full-image class together with the item-body to get a good-looking windowed image inside your card.
<div class = "card">
   <div class = "item item-avatar">
      <img src = "my-image.png">
      <h2>Card Name</h2>
   </div>

   <div class = "item item-body">
      <img class = "full-image" src = "my-image.png">
      Lorem ipsum dolor sit amet, consectetur adipiscing elit. Pellentesque eget
      pharetra tortor. Proin quis eros imperdiet, facilisis nisi in, tincidunt orci.
      Nam tristique elit massa, quis faucibus augue finibus ac.
   </div>
</div>
The above code will produce the following screen −