
Ionic - Javascript Navigation
Navigation is one of the core components of every app. Ionic is using the AngularJS UI Router for handling the navigation.
Using Navigation
Navigation can be configured in the app.js file. If you are using one of the Ionic templates, you will notice the $stateProvider service injected into the app config. The simplest way of creating states for the app is showed in the following example.
The $stateProvider service will scan the URL, find the corresponding state and load the file, which we defined in app.config.
app.js Code
.config(function($stateProvider) {
   $stateProvider
   .state('index', { url: '/', templateUrl: 'templates/home.html'})
   .state('state1', {url: '/state1', templateUrl: 'templates/state1.html'})
   .state('state2', {url: '/state2', templateUrl: 'templates/state2.html',});
});
The state will be loaded into the ion-nav-view element, which can be placed in the index.html body.
index.html Code
<ion-nav-view></ion-nav-view>
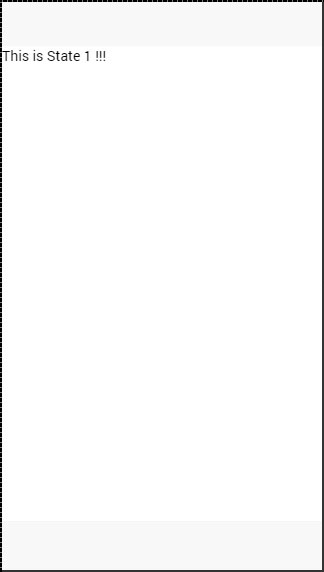
When we created states in the above-mentioned example, we were using the templateUrl, so when the state is loaded, it will search for matching the template file. Now, we will open the templates folder and create a new file state1.html, which will be loaded when the app URL is changed to /state1.
state1.html Code
<ion-view>
<ion-content>
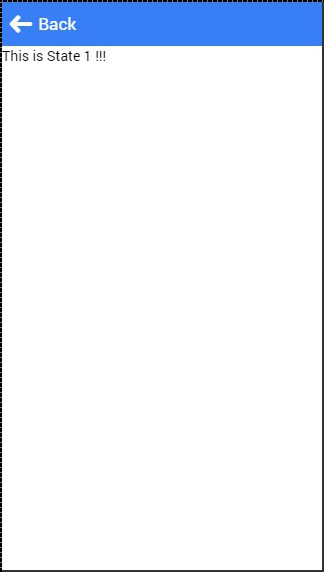
This is State 1 !!!
</ion-content>
</ion-view>
Creating Navigation Menu
You can add a navigation bar to your app in the index.html body by adding the “ion-nav-bar” element. Inside the navigation bar, we will add the ion-nav-back-button with an icon. This will be used for returning to the previous state. The button will appear automatically when the state is changed. We will assign the goBack() function, which will use the $ionicHistory service for handling this functionality. Therefore, when the user leaves the home state and goes to state1, the back button will appear which can be taped, if the user wants to return to the home state.
index.html Code
<ion-nav-bar class = "bar-positive">
   <ion-nav-back-button class = "button-clear" ng-click = "goBack()">
      <i class = "icon ion-arrow-left-c"></i> Back
   </ion-nav-back-button>
</ion-nav-bar>
Controller Code
.MyCtrl($scope, $ionicHistory) {
   $scope.goBack = function() {
      $ionicHistory.goBack();
   };
}
Adding Navigation Elements
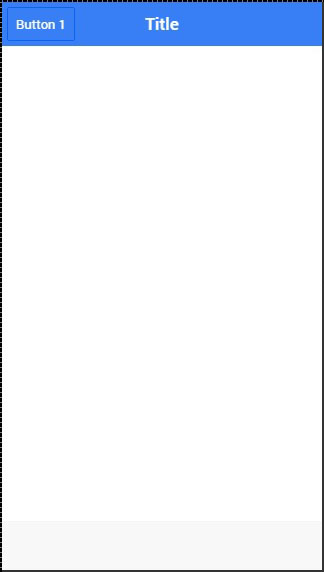
Buttons can be added to the navigation bar using the ion-nav-buttons. This element should be placed inside the ion-nav-bar or the ion-view. We can assign the side attribute with four option values. The primary and secondary values will place buttons according to the platform that is used. Sometimes you want the buttons on one side no matter if it is IOS or Android. If that is the case, you can use the left or the right attributes instead.
We can also add the ion-nav-title to the navigation bar. All the code will be placed in the index.html body, so it can be used everywhere.
<ion-nav-bar class = "bar-positive">
   <ion-nav-title>
      Title
   </ion-nav-title>

   <ion-nav-buttons side = "primary">
      <button class = "button">
         Button 1
      </button>
   </ion-nav-buttons>
</ion-nav-bar>
It will produce the following screen −
Other Navigation Attributes
The following table shows a few other functionalities, which can be used with Ionic navigation.
Navigation Attributes
| Attribute | Options | Detail |
|---|---|---|
| nav-transition | none, iOS, Android | Used to set animation that should be applied when transition occurs. |
| nav-direction | forward, back, enter, exit, swap | Used to set the direction of the animation when transition occurs. |
| hardwareBackButtonClose | Boolean | It will enable closing the modal when hardware back button is clicked. Default value is true. |
Caching
Ionic has the ability for caching up to ten views to improve performance. It also offers a way to handle caching manually. Since only backward views are cached and the forward ones are loading each time the users visit them, we can easily set to cache forward views by using following the code.
$ionicCinfigProvider.views.forwardCache(true);
We can also set how many states should be cached. If we want three views to be cached, we can use the following code.
$ionicConfigProvider.views.maxCache(3);
Caching can be disabled inside $stateProvider or by setting attribute to ion-view. Both examples are below.
$stateProvider.state('state1', {
   cache: false,
   url : '/state1',
   templateUrl: 'templates/state1.html'
})

<ion-view cache-view = "false"></ion-view>
Controlling the Navigation Bar
We can control the behavior of the navigation bar by using the $ionicNavBarDelegate service. This service needs to be injected to our controller.
HTML Code
<ion-nav-bar>
   <button ng-click = "setNavTitle('title')">
      Set title to banana!
   </button>
</ion-nav-bar>
Controller Code
$scope.setNavTitle = function(title) {
   $ionicNavBarDelegate.title(title);
}
The $ionicNavBarDelegate service has other useful methods. Some of these methods are listed in the following table.
Methods for $ionicNavBarDelegate
| Method | Parameter | Type | Detail |
|---|---|---|---|
| align(parameter) | center, left, right | string | Used to align the title. |
| showBackButton(parameter) | show | Boolean | Used to show or hide the back button. |
| title(parameter) | title | string | Used to show the new title. |
Tracking History
You can track the history of the previous, current and the forward views by using the $ionicHistory service. The following table shows all the methods of this service.
Methods for $ionicHistory
| Method | Parameter | Type | Detail |
|---|---|---|---|
| viewHistory | / | object | Returns the app view history data. |
| currentView() | / | object | Returns the current view. |
| title(parameter) | title | string | Returns the ID of the view which is parent of the current view. |
| currentTitle(parameter) | val | string | Returns the title of the current view. It can be updated by setting new val value. |
| backView() | / | string | Returns the last back view. |
| backTitle() | / | string | Returns the title of last back view. |
| forwardView() | / | object | Returns the last forward view. |
| currentStateName() | / | string | Returns the current state name. |
| goBack() | backCount | number | Used to set how many views to go back. Number should be negative. If it is positive or zero it will have no effect. |
| clearHistory() | / | / | Used to clear entire view history. |
| clearCache() | / | promise | Used to clear all cached views. |
| nextViewOptions() | / | object | Sets the options of the next view. You can look the following example for more info. |
The nextViewOptions() method has the following three options available.
disableAnimate is used for disabling animation of the next view change.
disableBack will set the back view to null.
historyRoot will set the next view as the root view.
$ionicHistory.nextViewOptions({
   disableAnimate: true,
   disableBack: true
});


