Splunk - Data Ingestion
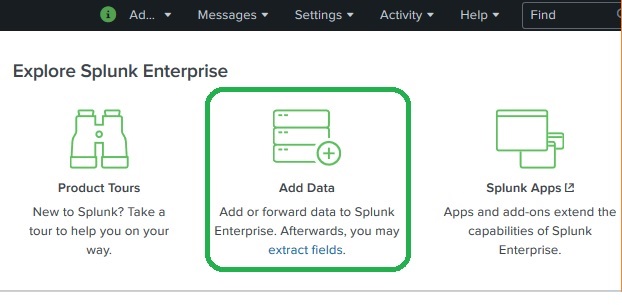
Data ingestion in Splunk happens through the Add Data feature which is part of the search & reporting app. After logging in, the Splunk interface home screen shows the Add Data icon as shown below. On clicking this button, we are presented with the screen to select the source and format of the data we plan to push to Splunk for analysis.
Gathering The Data
We can get the data for analysis by going to the download link . Save this file and unzip it in your local drive. On opening the folder, you can find following three files which have different formats. They are the log data generated by some web apps. We will use data from both these sets for understanding the working of various features of Splunk.
Uploading data
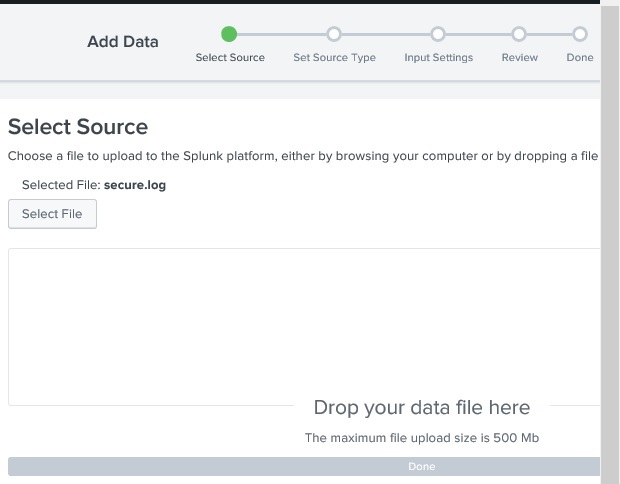
Next, we choose the file secure.log from the folder mailsv which we have kept in our local system as mentioned in the previous paragraph. After selecting the file, we move to next step using the green coloured next button in the top right corner.
Selecting Source Type
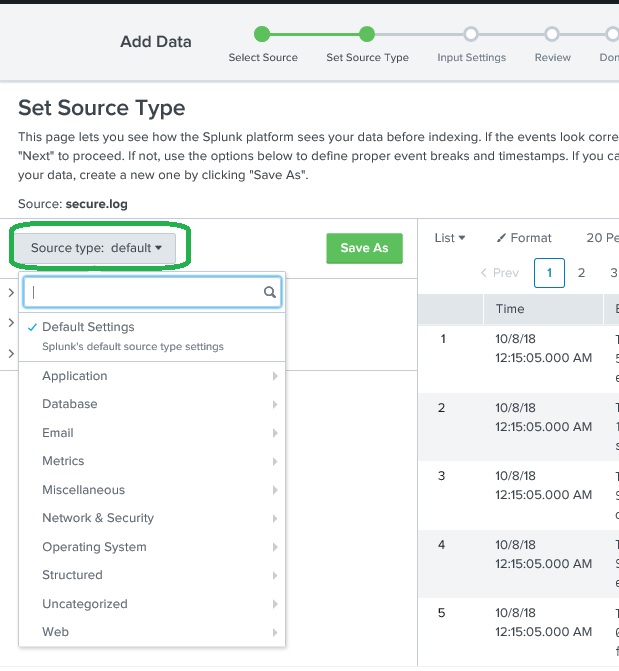
Splunk has in-built feature to detect the type of the data being ingested and it also gives the user an option to choose a different data type than the chosen by Splunk. On clicking the source type drop down we can see all the various data types that Splunk can ingest and enable for searching. In the current example we choose the default source type.
Input Settings
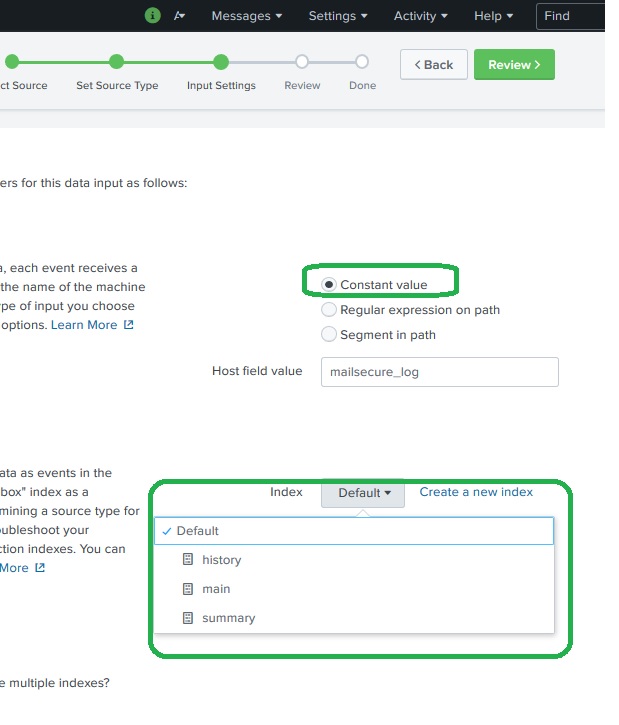
In this step of data ingestion, we configure the host name from which the data is being ingested. Following are the options to choose from, for the host name.
Constant value – It is the complete host name where the source data resides.
regex on path - When you want to extract the host name with a regular expression. Then enter the regex for the host you want to extract in the Regular expression field.
segment in path - When you want to extract the host name from a segment in your data source's path. Then enter the segment number in the Segment number field. For example, if the path to the source is /var/log/
and you want the third segment (the host server name) to be the host value, enter "3".
Next, we choose the index type to be created on the input data, for searching. We choose the default index strategy. The summary index only creates summary of the data through aggregation and creates index on it while the history index is for storing the search history.
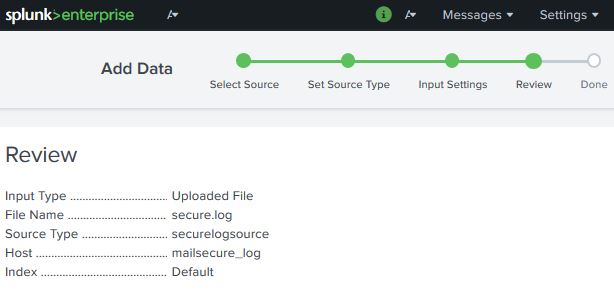
Review Settings
After pressing the next button we see a summary of the settings we have chosen. We review it and choose Next to finish the uploading of data.
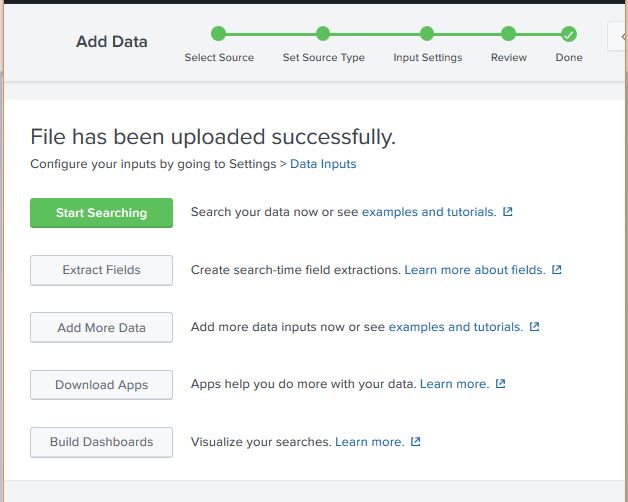
On finishing the load, the below screen appears which shows the successful data ingestion and further possible actions we can take on the data.